This is the full developer documentation for RedwoodSDK # What is RedwoodSDK? > From concept to cloud RedwoodSDK is a React framework for Cloudflare. It starts as a Vite plugin that enables server-side rendering, React Server Components, server functions, streaming responses, and real-time capabilities. Its standards-based router—with support for middleware and interrupters—gives you fine-grained control over every request and response. Local development mirrors production with Miniflare, which emulates the Cloudflare runtime. You get access to Durable Objects, D1 (database), R2 (blob storage), Queues, and more—right inside of the box. No installation required. Quick start Create a new project by running the following command, replacing my-project-name with your project name ```bash npx create-rwsdk my-project-name ``` Then [“start developing”](/getting-started/quick-start#start-developing) ## RedwoodSDK is not a framework, it’s a “framework” [Section titled “RedwoodSDK is not a framework, it’s a “framework””](#redwoodsdk-is-not-a-framework-its-a-framework) RedwoodSDK is not your typical JavaScript framework. We initially resisted calling it a framework. Instead, we described it as a toolkit, or more precisely, an SDK, because we believed most of the heavy lifting should come from the browser and the network, not a JavaScript runtime pretending to be the platform. RedwoodSDK embraces web-native primitives, minimizes abstraction, and gives you full control over the code you write. It is idiomatic to JavaScript and aligned with the platform. Over time, we adopted the term “framework” for clarity and discoverability. But at its core, RedwoodSDK remains a lightweight, composable set of tools that stays out of your way. ## Design Principles [Section titled “Design Principles”](#design-principles) ### 1. Zero Magic [Section titled “1. Zero Magic”](#1-zero-magic) RedwoodSDK avoids all hidden behavior: * No code generation * No transpilation side effects * No special treatment of file names or exports * Only explicit import and export statements * Everything respects JavaScript’s core contracts If the runtime relies on convention instead of clarity, it breaks the language contract. With RedwoodSDK, what you write is what runs. ### 2. Composability Over Configuration [Section titled “2. Composability Over Configuration”](#2-composability-over-configuration) RedwoodSDK gives you primitives, not policy: * Build from functions, modules, and types * No opinionated wrappers or rigid folder structures * Prioritizes developer intent and application code * Encourages co-location of logic, UI, and infrastructure You are in control. RedwoodSDK helps you build the software you want without getting in your way. ### 3. Web-First Architecture [Section titled “3. Web-First Architecture”](#3-web-first-architecture) RedwoodSDK is built for the web as it exists today: * Uses native Web APIs * No abstraction over fetch, Request, Response, or URL * Avoids rebuilding primitives the browser already provides If the platform already gives you a tool, we do not wrap it. We help you use it directly and idiomatically. ## Why This Matters [Section titled “Why This Matters”](#why-this-matters) RedwoodSDK is built around a simple idea: stay close to the platform. By minimizing abstraction, it reduces complexity, removes hidden behavior, and makes code easier to understand and maintain. This philosophy drives every architectural decision in RedwoodSDK. It is not just about writing software. It is about understanding the software you are writing. # Authentication > Secure your application with sessions and passwordless login. RedwoodSDK provides two paths for handling user authentication and sessions. For developers looking for a quick, standards-based solution, we provide a high-level **Passkey Addon** (see [Experimental Authentication](/experimental/authentication)). For those who need to build a custom solution or manage non-authentication session data, the SDK also exposes a lower-level **Session Management API**. This guide covers the **Session Management API**. ## Request/Response Foundations [Section titled “Request/Response Foundations”](#requestresponse-foundations) RedwoodSDK keeps the standard HTTP flow. Middleware and routes receive the platform `Request`, and they return `Response` instances. Headers and cookies are read directly from `request.headers` and set with `requestInfo.response.headers`. Persistent data and cross-cutting metadata live on `ctx`, which you populate in middleware. Arrays passed to `route()` act as interruptors: route-scoped middleware that runs after the global middleware pipeline, mutates `ctx`, and may short-circuit when needed. The rest of this guide builds on these primitives to show how authentication and session data move through the app. ## Session Management [Section titled “Session Management”](#session-management) The SDK includes an API for managing session data, which the Passkey Addon is built upon. This system uses Cloudflare Durable Objects for session data persistence. It can be used directly to manage any kind of session state, such as shopping carts, user preferences, or anonymous analytics. The main entry point is the `defineDurableSession` function, which creates a `sessionStore` object tied to a specific Durable Object. This store handles the creation of secure, signed session cookies and provides methods for interacting with the session data. ### Example: A Simple User Session [Section titled “Example: A Simple User Session”](#example-a-simple-user-session) Here is how you could build a basic user session store using the Session Management API. **1. Define the Session Durable Object** First, create a Durable Object that will store and manage the session data. This object must implement the `getSession`, `saveSession`, and `revokeSession` methods. src/sessions/UserSession.ts ```typescript interface SessionData { userId: string | null; } export class UserSession implements DurableObject { private storage: DurableObjectStorage; private session: SessionData | undefined = undefined; constructor(state: DurableObjectState) { this.storage = state.storage; } async getSession() { if (!this.session) { this.session = (await this.storage.get("session")) ?? { userId: null, }; } return { value: this.session }; } async saveSession(data: Partial) { // In a real app, you would likely merge the new data with existing session data this.session = { userId: data.userId ?? null }; await this.storage.put("session", this.session); return this.session; } async revokeSession() { await this.storage.delete("session"); this.session = undefined; } } ``` **2. Configure `wrangler.jsonc`** Add the Durable Object binding to your `wrangler.jsonc`. wrangler.jsonc ```jsonc { // ... "durable_objects": { "bindings": [ // ... other bindings { "name": "USER_SESSION_DO", "class_name": "UserSession" }, ], }, } ``` After updating `wrangler.jsonc`, run `pnpm generate` to update the generated type definitions. **3. Set up the Session Store in the Worker** In your `src/worker.tsx`, use `defineDurableSession` to create a `sessionStore`, then export the Durable Object class. src/worker.tsx ```typescript import { defineDurableSession } from "rwsdk/auth"; import { UserSession } from "./sessions/UserSession.js"; // ... other imports export const sessionStore = defineDurableSession({ sessionDurableObject: env.USER_SESSION_DO, }); export { UserSession }; // ... rest of your worker setup ``` **4. Use the Session in an RSC Action** Now you can use the `sessionStore` in your application. The recommended pattern is to create a “Server Action” module that contains all the logic for interacting with the session, and a separate “Client Component” for the UI. The `sessionStore` has three primary methods: * `load(request)`: Loads the session data based on the incoming request’s cookie. * `save(responseHeaders, data)`: Saves new session data and sets the session cookie on the outgoing response. * `remove(request, responseHeaders)`: Destroys the session data and removes the cookie. **a. Create Server Actions** Create a file with a `"use server"` directive at the top. This file will export functions that can be called from client components. src/app/actions/auth.ts ```typescript "use server"; import { sessionStore } from "../../worker.js"; import { requestInfo } from "rwsdk/worker"; export async function getCurrentUser() { const session = await sessionStore.load(requestInfo.request); return session?.userId ?? null; } export async function loginAction(userId: string) { // In a real app, you would have already verified the user's credentials await sessionStore.save(requestInfo.response.headers, { userId }); } export async function logoutAction() { await sessionStore.remove(requestInfo.request, requestInfo.response.headers); } ``` **b. Create a Client Component** Create a client component with a `"use client"` directive. This component can then import and call the server actions. src/app/components/AuthComponent.tsx ```tsx 1 "use client"; 2 3 import { useState, useEffect, useTransition } from "react"; 4 import { loginAction, logoutAction, getCurrentUser } from "../actions/auth.js"; 5 6 export function AuthComponent() { 7 const [userId, setUserId] = useState(null); 8 const [isPending, startTransition] = useTransition(); 9 10 // Fetch the initial user state when the component mounts 11 useEffect(() => { 12 getCurrentUser().then(setUserId); 13 }, []); 14 15 const handleLogin = () => { 16 startTransition(async () => { 17 const mockUserId = "user-123"; 18 await loginAction(mockUserId); 19 setUserId(mockUserId); 20 }); 21 }; 22 23 const handleLogout = () => { 24 startTransition(async () => { 25 await logoutAction(); 26 setUserId(null); 27 }); 28 }; 29 30 return ( 31
32 {userId ?

Logged in as: {userId}

:

Not logged in

} 33 36 39
40 ); 41 } ``` ### Populate `ctx` with middleware [Section titled “Populate ctx with middleware”](#populate-ctx-with-middleware) RedwoodSDK keeps the familiar request/response contract. Middleware receives the same `Request` object the platform provides, so you can read headers (`request.headers.get("cookie")`) or parse cookies exactly as you would in any web app. The `response.headers` object on `requestInfo` is mutable, which lets middleware append headers or set cookies that the final response will include. `ctx` is the request-scoped object that RedwoodSDK passes to middleware, routes, React Server Components, and Server Actions. Populate it inside middleware so every downstream handler sees the same session data. Place middleware near the top of `defineApp` so it runs before any route handlers. The snippet below uses the `sessionStore` defined earlier in this guide. Per-route interruptors work the same way. When you pass an array to `route()`, every function before the final handler is treated as a route-scoped middleware. These interruptors run after the global middleware, can mutate `ctx`, can read or write headers, and can short-circuit a request by returning or throwing a `Response`. src/worker.tsx ```tsx 1 import { defineApp, ErrorResponse } from "rwsdk/worker"; 2 import { route } from "rwsdk/router"; 3 4 export default defineApp([ 5 async function sessionMiddleware({ request, ctx }) { 6 const session = await sessionStore.load(request); 7 ctx.session = session ?? { userId: null }; 8 }, 9 async function requireUser({ ctx }) { 10 if (!ctx.session?.userId) { 11 throw new ErrorResponse(401, "Unauthorized"); 12 } 13 }, 14 route("/dashboard", ({ ctx }) => { 15 return new Response(`User: ${ctx.session.userId}`); 16 }), 17 ]); ``` When a middleware throws an `ErrorResponse`, RedwoodSDK stops the pipeline and returns the contained status code and message. Throwing a `Response` has the same effect. Throwing any other error causes the worker to log the error and rethrow, which surfaces as an unhandled exception. # Cron Triggers > Schedule background tasks If you want to schedule a background task, Cloudflare supports [Cron Triggers](https://developers.cloudflare.com/workers/configuration/cron-triggers/). ℹ️ **Important:** Cron triggers only fire automatically after you deploy to Cloudflare. The local dev server does not schedule jobs for you, but you can still trigger the scheduled cron handler manually (see [Testing locally](#testing-locally) below). ## Setup [Section titled “Setup”](#setup) Within your `wrangler.jsonc` file, add a new section called `triggers`: wrangler.jsonc ```jsonc "triggers": { "crons": ["* * * * *"] } ``` Where `crons` includes an array of cron schedules. After updating `wrangler.jsonc`, run `pnpm generate` to update the generated type definitions. Within your `worker.tsx` file, adjust your `defineApp` function: ```tsx 1 const app = defineApp([ 2 ... 3 ]); 4 5 export default { 6 fetch: app.fetch, 7 async scheduled(controller: ScheduledController) { 8 switch (controller.cron) { 9 case "* * * * *": { 10 console.log("🧹 Run minute-by-minute cleanups"); 11 break; 12 } 13 case "0 * * * *": { 14 console.log("📈 Aggregate hourly metrics"); 15 break; 16 } 17 case "0 21 * * *": { 18 console.log("🌙 Kick off nightly billing at 9 PM UTC"); 19 break; 20 } 21 default: { 22 console.warn(`Unhandled cron: ${controller.cron}`); 23 } 24 } 25 console.log("⏰ cron processed"); 26 }, 27 } satisfies ExportedHandler; ``` Notice each `case` matches a cron schedule that must exist in your `wrangler.jsonc` file: wrangler.jsonc ```jsonc "crons": ["* * * * *", "0 * * * *", "0 21 * * *"] ``` ## Testing locally [Section titled “Testing locally”](#testing-locally) To simulate a scheduled run in development, hit the dev server’s scheduler endpoint and pass the cron expression you want to test: ```bash curl "http://localhost:5173/cdn-cgi/handler/scheduled?cron=*+*+*+*+*" ``` For example, run the following commands to see the above cron handlers in action: * Every minute: ```bash curl "http://localhost:5173/cdn-cgi/handler/scheduled?cron=*+*+*+*+*" ⏰ cron processed ``` * Every hour on the zero minute: ```bash curl "http://localhost:5173/cdn-cgi/handler/scheduled?cron=0+*+*+*+*" 📈 Aggregate hourly metrics ⏰ cron processed ``` * Every day at 9 PM UTC: ```bash curl "http://localhost:5173/cdn-cgi/handler/scheduled?cron=0+21+*+*+*" 🌙 Kick off nightly billing at 9 PM UTC ⏰ cron processed ``` ## Cloudflare Cron Triggers [Section titled “Cloudflare Cron Triggers”](#cloudflare-cron-triggers) Within the Cloudflare Dashboard UI, you can view all the cron triggers for your worker. Click on the **Settings** tab, and then click on the **Cron Triggers** section. ![](/_astro/trigger-events.QByUXfqa_17ggTB.webp) To view more details about the events, click on the **View Events** link. ![](/_astro/trigger-events-view-events.CybvYGUZ_97oHP.webp) You can see a list of all the events that have been triggered for your worker. ![](/_astro/cloudflare-cron-events.Bu3jq6Tj_Z2j9UDP.webp) ## Further Reading [Section titled “Further Reading”](#further-reading) * [Cloudflare Cron Triggers](https://developers.cloudflare.com/workers/configuration/cron-triggers/) # Email > Send and receive emails with Cloudflare Email RedwoodSDK integrates with [Cloudflare Email Workers](https://developers.cloudflare.com/email-routing/email-workers/) so your application can send transactional messages, receive inbound mail, and reply in the same Worker runtime. Production deliveries currently require recipients to be verified through Cloudflare Email Routing, but Cloudflare’s forthcoming [Email Service beta](https://blog.cloudflare.com/email-service/) expands reach to general addresses. This guide walks through the configuration steps, highlights important sending considerations, and demonstrates common patterns for end-to-end email workflows. ## Implementing Email Handling [Section titled “Implementing Email Handling”](#implementing-email-handling) Update your `wrangler.jsonc` to include the `EMAIL` binding: wrangler.jsonc ```jsonc { "send_email": [ { "name": "EMAIL", }, ], } ``` Next, run `pnpm generate` to update the generated type definitions. Once you have a zone with Email Routing enabled, follow the [Enable Email Workers](https://developers.cloudflare.com/email-routing/email-workers/enable-email-workers/) documentation to deploy your Worker in production. Outbound email **must target a destination address that you have verified** in [Email Routing](https://developers.cloudflare.com/email-routing/email-workers/enable-email-workers/). When calling `env.EMAIL.send()`, pass either a verified address or leave the recipient undefined when you use a binding that specifies `destination_address` or `allowed_destination_addresses`. > ℹ️ For broader transactional delivery to arbitrary recipients, see [Cloudflare’s Email Service beta](https://blog.cloudflare.com/email-service/) or an external provider such as [Resend](/guides/email/sending-email). ### Example Worker with Email Handling [Section titled “Example Worker with Email Handling”](#example-worker-with-email-handling) The example below demonstrates how to integrate the worker with email sending and receiving. To send and email, you can simply call the `env.EMAIL.send()` method with the email message as shown in the example below `route("/email", async () => { ... })`. > ℹ️ Note: In production, this must be a verified address in [Email Routing](https://developers.cloudflare.com/email-routing/email-workers/enable-email-workers/). However, to receive an email, you need to implement the `email` handler and export it in the default export of the worker. This is a change to how `defineApp` is often used in the worker. The default export of the worker is the `DefaultWorker` class that extends the `WorkerEntrypoint` class. This tells Cloudflare that the worker is also email worker and can be selected to route inbound emails to. > Note: If you are just sending emails, you can still use `defineApp` as usual and just call `env.EMAIL.send()` in the route handler or in a server function. worker.ts ```file import * as PostalMime from "postal-mime"; import { EmailMessage } from "cloudflare:email"; import { createMimeMessage } from "mimetext"; import { render, route } from "rwsdk/router"; import { defineApp } from "rwsdk/worker"; import { Document } from "@/app/Document"; import { setCommonHeaders } from "@/app/headers"; import { env, WorkerEntrypoint } from "cloudflare:workers"; const app = defineApp([ setCommonHeaders(), /** * This route is used to send an email from the worker * First, we create a MIME message with the sender, recipient, * and the content of the email. * Then, we create a new EmailMessage object with the * sender, recipient, and the raw content of the email. * Finally, we send the email using the `env.EMAIL.send()` method. * Ensure the `recipient@example.com` address is verified in Cloudflare Email Routing, or adjust the binding configuration accordingly. */ route("/email", async () => { const msg = createMimeMessage(); msg.setSender({ name: "Sending email test", addr: "sender@example.com" }); msg.setRecipient("recipient@example.com"); msg.setSubject("An email generated in a worker"); msg.addMessage({ contentType: "text/plain", data: `Congratulations, you just sent an email from a worker.`, }); const message = new EmailMessage( "sender@example.com", "recipient@example.com", msg.asRaw() ); await env.EMAIL.send(message); return Response.json({ ok: true }); }), ]); /** * This is the default worker entrypoint for the Worker. * It extends the WorkerEntrypoint class and implements the email and fetch handlers. */ // It extends the WorkerEntrypoint class and implements the email and fetch handlers. export default class DefaultWorker extends WorkerEntrypoint { /** * Email handler for the Worker. * The `message` parameter is an ForwardableEmailMessage object * * You can call `message.reply()` to respond directly to the * inbound sender without additional verification steps. */ async email(message: ForwardableEmailMessage) { const parser = new PostalMime.default(); const rawEmail = new Response((message as any).raw); const email = await parser.parse(await rawEmail.arrayBuffer()); console.log(email); } /** * Fetch handler for the Worker. * Needed so that the worker can handle the request and pass it to the app. */ override async fetch(request: Request) { return await app.fetch(request, this.env, this.ctx); } } ``` ### Replying to inbound email [Section titled “Replying to inbound email”](#replying-to-inbound-email) You can reply directly to an inbound message without pre-verifying the recipient. The Worker runtime preserves threading headers and delivers the response through the original route. Construct your response with `mimetext` and pass the raw payload to `message.reply()`, as shown in the [Reply from Workers guide](https://developers.cloudflare.com/email-routing/email-workers/reply-email-workers/). It is important to note that the `In-Reply-To` header is required to reply to the inbound email. Replying inside the email handler ```ts 1 async email(message: ForwardableEmailMessage) { 2 console.log("📧 Email received"); 3 4 // Parse the inbound email 5 const parser = new PostalMime.default(); 6 const rawEmail = new Response((message as any).raw); 7 8 const receivedEmail = await parser.parse(await rawEmail.arrayBuffer()); 9 console.log("📧 Email received and parsed", receivedEmail); 10 11 // Create a new message to reply to the inbound email 12 const replyToMessage = createMimeMessage(); 13 14 // ❗️ Important:This In-Reply-To header is required to reply to the inbound email 15 replyToMessage.setHeader( 16 "In-Reply-To", 17 message.headers.get("Message-ID") ?? "" 18 ); 19 20 replyToMessage.setSender({ name: "Contact Person", addr: "@example.com" }); 21 replyToMessage.setRecipient(receivedEmail.from); 22 replyToMessage.setSubject(`Re: ${receivedEmail.subject}`); 23 replyToMessage.addMessage({ 24 contentType: "text/plain", 25 data: "Thanks for contacting us. We'll get back to you shortly.", 26 }); 27 28 console.log("📧 New message created", replyToMessage.asRaw()); 29 30 const replyMessage = new EmailMessage( 31 "@example.com", 32 message.from, 33 replyToMessage.asRaw() 34 ); 35 36 console.log("📧 Sending reply email"); 37 38 await message.reply(replyMessage); 39 40 console.log("📧 Reply email sent"); 41 } ``` ### Key points [Section titled “Key points”](#key-points) * By default, the worker is not an email worker. You need to extend the `WorkerEntrypoint` class and implement the `email` handler to make it an email worker. * By extending the `WorkerEntrypoint` class, you are telling Cloudflare that the worker is also email worker and can be selected to route inbound emails to. * The `message` parameter is an `ForwardableEmailMessage` object that contains the inbound email message. * The `In-Reply-To` header is required to reply to the inbound email. * Use `PostalMime` to parse inbound messages for headers, text, HTML, and attachments. * Construct outbound MIME content with `mimetext` to control subject, sender, and body. * Call `env.EMAIL.send()` to deliver new messages, or `message.reply()` / `message.forward()` inside the email handler. * A fetch handler is needed so that the worker can handle all requests and pass it to the app. ## Testing Locally [Section titled “Testing Locally”](#testing-locally) RedwoodSDK can [emulate](https://developers.cloudflare.com/email-routing/email-workers/local-development/) both inbound and outbound email interactions locally. ### Sending Email Locally [Section titled “Sending Email Locally”](#sending-email-locally) To test the sending of an email by the email handler locally, you can use the following command: ```bash pnpm dev ``` This will start the local development server and you can send emails to the `recipient@example.com` address. Now, visit `http://localhost:5173/email` to see the email in the console output of the local development server. For this example, you’ll see the following response: Response ```json { "ok": true } ``` and in the console output, you’ll see something like the following log: ```bash send_email binding called with the following message: /var/folders/ft/8320mthj6gbdd2pmc42x13480000gn/T/miniflare-288e7109e15f898bd9877d7857386f8b/files/email/2dad29db-0a7d-498d-89ab-e961746835c4.eml ``` You can also see the email in the `.eml` file in the temporary directory. ```bash cat /var/folders/ft/8320mthj6gbdd2pmc42x13480000gn/T/miniflare-288e7109e15f898bd9877d7857386f8b/files/email/2dad29db-0a7d-498d-89ab-e961746835c4.eml 288e7109e15f898bd9877d7857386f8b/files/email/2dad29db-0a7d-498d-89ab-e961746835c4.eml Date: Sun, 09 Nov 2025 01:54:06 +0000 From: =?utf-8?B?U2VuZGluZyBlbWFpbCB0ZXN0?= To: Message-ID: Subject: =?utf-8?B?QW4gZW1haWwgZ2VuZXJhdGVkIGluIGEgd29ya2Vy?= MIME-Version: 1.0 Content-Type: text/plain; charset=UTF-8 Content-Transfer-Encoding: 7bit Congratulations, you just sent an email from a worker.% ``` > Note: The path to the `.eml` file is different for each operating system. ### Receiving Email Locally [Section titled “Receiving Email Locally”](#receiving-email-locally) To test the receiving of an email by the email handler locally, you can use the following command: ```bash pnpm dev ``` This will start the local development server and you can send emails to the `recipient@example.com` address. Then, you can send an email to the `recipient@example.com` address using the following command: ```bash curl --request POST 'http://localhost:5173/cdn-cgi/handler/email' \ --url-query 'from=sender@example.com' \ --url-query 'to=recipient@example.com' \ --header 'Content-Type: application/json' \ --data-raw 'Received: from smtp.example.com (127.0.0.1) by cloudflare-email.com (unknown) id 4fwwffRXOpyR for ; Tue, 27 Aug 2024 15:50:20 +0000 From: "John" Reply-To: sender@example.com To: recipient@example.com Subject: Testing Email Workers Local Dev Content-Type: text/html; charset="windows-1252" X-Mailer: Curl Date: Tue, 27 Aug 2024 08:49:44 -0700 Message-ID: <6114391943504294873000@ZSH-GHOSTTY> Hi there' ``` You should see the content of the simulated email in the console output of the local development server. ```bash { headers: [ { key: 'received', value: 'from smtp.example.com (127.0.0.1) by cloudflare-email.com (unknown) id 4fwwffRXOpyR for ; Tue, 27 Aug 2024 15:50:20 +0000' }, { key: 'from', value: '"John" ' }, { key: 'reply-to', value: 'sender@example.com' }, { key: 'to', value: 'recipient@example.com' }, { key: 'subject', value: 'Testing Email Workers Local Dev' }, { key: 'content-type', value: 'text/html; charset="windows-1252"' }, { key: 'x-mailer', value: 'Curl' }, { key: 'date', value: 'Tue, 27 Aug 2024 08:49:44 -0700' }, { key: 'message-id', value: '<6114391943504294873000@ZSH-GHOSTTY>' } ], from: { address: 'sender@example.com', name: 'John' }, to: [ { address: 'recipient@example.com', name: '' } ], replyTo: [ { address: 'sender@example.com', name: '' } ], subject: 'Testing Email Workers Local Dev', messageId: '<6114391943504294873000@ZSH-GHOSTTY>', date: '2024-08-27T15:49:44.000Z', html: 'Hi there\n', attachments: [] } ``` ## Production Deployment [Section titled “Production Deployment”](#production-deployment) To enable email handling in production, you need to have a Cloudflare zone with Email Routing enabled and at least one verified destination address. You can refer to the following documentation: * [Configure Email Routing Rules and Addresses](https://developers.cloudflare.com/email-routing/setup/email-routing-addresses/) * [Enable Email Workers](https://developers.cloudflare.com/email-routing/email-workers/enable-email-workers/) * [Send Email from Workers](https://developers.cloudflare.com/email-routing/email-workers/send-email-workers/) * [Reply to Email from Workers](https://developers.cloudflare.com/email-routing/email-workers/reply-email-workers/) * [Cloudflare Email Service Beta](https://blog.cloudflare.com/email-service/) * [Sending email with Resend](/guides/email/sending-email) ## Further Reading [Section titled “Further Reading”](#further-reading) * [Cloudflare Email Routing Documentation](https://developers.cloudflare.com/email-routing/email-workers/) * [Local Development for Email Workers](https://developers.cloudflare.com/email-routing/email-workers/local-development/) ## Future Improvements [Section titled “Future Improvements”](#future-improvements) * Demonstrate how to compose emails with [React Email](https://react.email). # Environment Variables & Secrets > RedwoodSDK Environment Variables When integrating with external services you typically store your credentials in environment variables. This is done to avoid hardcoding secrets into your codebase. There are several environments that require different credentials, for example: * On your local machine: Development * Secrets on deployed Workers: Staging & Production ## Development [Section titled “Development”](#development) Create a `.env` file in the root of your project. .env ```ts 1 SECRET_KEY = "value"; 2 API_TOKEN = "ABCDEFGHIJKLMNOPQRSTUVWXYZ"; ``` Cloudflare uses `.dev.vars`, however, `.env` is the typical approach. Therefore, when you run `pnpm dev`, RedwoodSDK will automatically create a symlink from `.env` to `.dev.vars`. ![](/_astro/env-in-cursor-sidebar.BTW0mS5L_Z1iMpk4.webp) ### Updating Types [Section titled “Updating Types”](#updating-types) After adding any environment variables, run: ```bash npx wrangler types ``` This adds the environment variable and associated type to `worker-configuration.d.ts` and avoids unknown types when accessing `env`. worker-configuration.d.ts ```ts 1 // Generated by Wrangler by running `wrangler types` 2 // Runtime types generated with .... 3 declare namespace Cloudflare { 4 interface Env { 5 SECRET_KEY: string; 6 API_TOKEN: string; 7 } 8 } ``` Danger Simply running `pnpm dev` will not generate these runtime types. ## Production / Secrets on deployed Workers [Section titled “Production / Secrets on deployed Workers”](#production--secrets-on-deployed-workers) To add a secret to a deployed worker, run: ```bash npx wrangler secret put ``` Then, the CLI will prompt you to enter the secret value. These can also be added and managed via the Cloudflare dashboard. ![](/_astro/cloudflare-ui-for-env.b1y6mhBc_Z1Jiii3.webp) 1. Expand the Computer (Workers) tab 2. Click on Workers and Pages 3. Click on the name of the worker 4. Click on the “Settings” tab 5. Click on the “Variables and Secrets” section ## Using an Environment Variable [Section titled “Using an Environment Variable”](#using-an-environment-variable) At the top of your file, import `env`: ```tsx 1 import { env } from "cloudflare:workers"; ``` Then, you can access the environment variables through the `env` object. ```ts 1 const rpID = env.WEBAUTHN_RP_ID ?? new URL(request.url).hostname; ``` ## Managing staging and production configurations [Section titled “Managing staging and production configurations”](#managing-staging-and-production-configurations) Define each Cloudflare environment in `wrangler.jsonc`. Wrangler reads the `env` block to decide which variables, routes, and bindings to apply when you deploy with `CLOUDFLARE_ENV`. wrangler.jsonc ```jsonc { "name": "redwood-example", "main": "./dist/worker.mjs", "compatibility_date": "2024-10-21", "env": { "staging": { "vars": { "APP_BASE_URL": "https://staging.example.com" }, "routes": [ { "pattern": "staging.example.com/*", "custom_domain": true } ] } } } ``` After updating `wrangler.jsonc`, run `pnpm generate` to update the generated type definitions. Create environment-scoped secrets with the `--env` flag: ```bash npx wrangler secret put DATABASE_URL --env staging ``` Deploy with `CLOUDFLARE_ENV=staging` to load the staging configuration, or omit it to deploy the default production configuration. ## Further Reading [Section titled “Further Reading”](#further-reading) * [Cloudflare Environment Variables](https://developers.cloudflare.com/workers/configuration/secrets/) # Hosting > Cloudflare's Developer Platform provides out-of-the-box access to essential services Cloudflare’s Developer Platform provides out-of-the-box access to essential services: * [Compute](https://developers.cloudflare.com/workers/) (Workers) for serverless functions * [Database](https://developers.cloudflare.com/d1/) (D1) for data storage * [Storage](https://developers.cloudflare.com/r2/) (R2) for files and assets * [Queues](https://developers.cloudflare.com/queues/) for background job processing * & [so much more!](https://developers.cloudflare.com/) Pick your poison You do not need to use Cloudflare’s Developer Platform, you can use any bare-metal hosting provider you want, but we recommend using Cloudflare’s Developer Platform! Not only does Cloudflare have the world’s best network, but they also have the best developer experience. When you code locally you’re coding against a real environment that is the same as the production environment. This has huge implications for your workflow and productivity, because often “it just works!” ## Deploy to production [Section titled “Deploy to production”](#deploy-to-production) Ship your webapp to Cloudflare with the following command: * npm ```sh npm run release ``` * pnpm ```sh pnpm run release ``` * yarn ```sh yarn run release ``` Within the Terminal, it will ask you: **Do you want to proceed with deployment? (y/N):** Type `y` and press Enter. Go to your dashboard in Cloudflare, on the left side navigation click on **Workers & Pages**. You should see your application in the list. Then, you can click on the **Visit** link to see your application online. ![](/_astro/cloudflare-visit-website.byYGJfXn_Z2ua55F.webp) ## Deploy to staging [Section titled “Deploy to staging”](#deploy-to-staging) Staging deployments reuse the same release process but load configuration from the matching entry under `env` in `wrangler.jsonc`. Set the `CLOUDFLARE_ENV` variable before running the release command: ```bash CLOUDFLARE_ENV=staging pnpm release ``` Wrangler applies the `env.staging` routes, bindings, and variables defined in your configuration file. The terminal output includes the staging Worker URL. Cloudflare also lists the latest staging deployment under Workers & Pages so you can confirm the release completed. ## Using a Custom Domain Name [Section titled “Using a Custom Domain Name”](#using-a-custom-domain-name) You can use a custom domain name with your application. You can purchase a domain name through Cloudflare, or you can use an existing domain name you already own. **If you already have a domain name that’s active on your Cloudflare account, you can skip right to [Hooking Up your Domain Name to your Project](#hooking-up-your-domain-name-to-your-project). Otherwise, read on!** ### Adding a Domain Name to Cloudflare [Section titled “Adding a Domain Name to Cloudflare”](#adding-a-domain-name-to-cloudflare) To add a domain name to Cloudflare, you have two options: 1. **Purchase a new domain name** through Cloudflare. 2. **Add an existing domain name** to Cloudflare. #### Purchase a new domain name [Section titled “Purchase a new domain name”](#purchase-a-new-domain-name) If you don’t already have a domain name, it’s super easy to just buy one through Cloudflare. This is the easiest option, and will let you host your site on your new domain name right away. To buy a domain name through Cloudflare, go to [Cloudflare’s Domain Registrar](https://domains.cloudflare.com/) and search for the domain name you want to buy. If it’s available, you can purchase it right here, and it will be automatically added to your Cloudflare account. ![](/_astro/search-for-domain-cloudflare.dQ3pPsmY_Z2aJ4Mm.webp) #### Add an existing domain name [Section titled “Add an existing domain name”](#add-an-existing-domain-name) Worried you'll break something? Have a domain name you want to use, but already using it for, say, your email address? Don’t worry! When you add your domain name to Cloudflare, they’ll automatically bring in all your existing DNS records, so your email and other services will continue to work as expected. If you already have a domain name, or simply prefer to use a different registrar, you can add your domain to Cloudflare as follows: Head to your Cloudflare dashboard, and click on the **+ Add a domain** button: ![](/_astro/add-a-domain.CkUPJSVx_g20oD.webp) Next, search for the domain name you want to add. You can keep the “Quick scan for DNS records” option checked. Click **Continue**. ![](/_astro/enter-existing-domain.BVZwkkuI_1wC0YI.webp) Cloudflare will ask you to select a plan for this domain. You can select the **Free** plan, which is perfect for most use cases (and you can always upgrade later, if you need). Click **Select plan**. ![](/_astro/select-plan.DswZW5zL_Zga5go.webp) Next, you’ll be asked to review the DNS records that Cloudflare found for your domain. If you have any existing DNS records, they will be automatically imported here. You can add or remove any records as needed, and you can always come back to this later. Click **Continue to activation**. ![](/_astro/review-dns.yAyW9Wcn_2vsD9J.webp) Now’s the part where you tell your domain registar to use Cloudflare’s nameservers. This is how Cloudflare will be able to manage your domain name. To do this, you’ll need to know how to change your nameservers — every registrary is different, so you’ll need to look up the instructions for your specific registrar. Here are some common registrars and their instructions: * [Porkbun](https://kb.porkbun.com/article/22-how-to-change-your-nameservers) * [Namecheap](https://www.namecheap.com/support/knowledgebase/article.aspx/767/10/how-to-change-dns-for-a-domain/) * [GoDaddy](https://www.godaddy.com/help/edit-my-domain-nameservers-664) Cloudflare also has a long list of links to instructions for many registrars [here](https://developers.cloudflare.com/dns/nameservers/update-nameservers/#your-domain-uses-a-different-registrar). Once you’ve updated your nameservers, go back to Cloudflare and click **Continue**. ![](/_astro/last-step-update-ns.CTXLmEW4_1MXIdJ.webp) It’ll now present you with a note that it can take some time to process nameserver changes. From here, you can just wait until Cloudflare emails you, but for the impatiant amongst us, Cloudflare offers a **Check nameservers now** button. ![](/_astro/check-nameservers.BEFc2fZL_2gF2pD.webp) Clicking this will trigger a check to see if your nameservers have been updated. ![](/_astro/checking-nameservers.hfT5zBaH_2nPGvM.webp) Once Cloudflare has confirmed that your nameservers have been updated, you’ll get an email, and your domain will be added to your Cloudflare account. ![](/_astro/active-domain-email-confirmation.Ceo3E0s7_Z1PjONK.webp) ### Hooking Up your Domain Name to your Project [Section titled “Hooking Up your Domain Name to your Project”](#hooking-up-your-domain-name-to-your-project) To use a domain name that’s registered to your Cloudflare account, go to **Workers & Pages** in the left side navigation. Then, click on the name of your project. Click on the **Settings** tab. At the top, you’ll see the domains associated with your project. ![](/_astro/connecting-to-custom-domain.D-ahOybJ_Z1GGUEB.webp) Click on the **+ Add** button at the top of the **Domains & Routes** table. A side panel will appear: ![](/_astro/side-panel-custom-domain.CiT6HHWu_1RtIN0.webp) Click on the **Custom Domain** option. Then, it will ask you enter the domain name you want to use. ![](/_astro/existing-domain-name-in-cloudflare.DZA_Ivwm_1hcpnG.webp) And that’s it! Your domain name is now connected to your project. You can now visit your project at your custom domain name. ![](/_astro/project-live-custom-domain.tI8QXUN5_Ze1jsQ.webp) ## Deleting Your Project [Section titled “Deleting Your Project”](#deleting-your-project) If for whatever reason, you need to delete your project through Cloudflare, go to **Workers & Pages** in the left side navigation. Then, click on the name of your project. Click on the **Settings** tab, then scroll to the bottom of the page. Click on the **Delete** button. ![](/_astro/cloudflare-delete-project.CaiHvs5W_3GyXq.webp) A confirmation modal will appear, asking you to type the name of your project, then click on the **Delete** button. ![](/_astro/cloudflare-confirm-project-delete.wMdg8mZM_Z1KQUFQ.webp) # Overview > Things you need to know about RedwoodSDK Below are the things you need to know in order to be effective with RedwoodSDK. [Play](https://youtube.com/watch?v=omKvO9KoPLs) *Peter Pistorius gives a 5 minute tour of RedwoodSDK.* *** 1. [Request Handling, Routing & Responses](/core/routing) 2. [React Server Components](/core/react-server-components) 3. [Database](/experimental/database) 4. [Storage](/core/storage) 5. [Realtime](/experimental/realtime) 6. [Queues & Background Jobs](/core/queues) 7. [Email](/core/email) 8. [Authentication & Session Management](/core/authentication) 9. [Security](/core/security) 10. [Hosting (Cloudflare)](/core/hosting) # Queues > Messages, queues, and background tasks Whilst building a webapp you want to be able to respond as quickly as possible to user interactions, but sometimes you need to do things that take a long time! For example, you might need to send an email when a user submits a form, or you need to process a payment, or do something magic with AI - and you don’t want the user to wait for these things to complete. To handle these you’ll use **background tasks**. Background tasks are managed by the [Cloudflare queue system](https://developers.cloudflare.com/queues/). You send a message to a queue, where a worker will process the message, but on a different worker - so it doesn’t block the main one. Pick your poison You do not need to use Cloudflare’s queue system, you can use any background task system you want, but we recommend using queues! ### Setup [Section titled “Setup”](#setup) First thing you’ve got to do is create a queue and bind the queue producers and consumers to your worker. ```bash npx wrangler queues create my-queue-name ``` Replace `my-queue-name` with the name of your queue, and place the following in your `wrangler.jsonc` file: wrangler.jsonc ```jsonc { "queues": { "producers": [ { "binding": "QUEUE", "queue": "my-queue-name", } ], "consumers": [ { "queue": "my-queue-name", "max_batch_size": 10, "max_batch_timeout": 5 } ] } } ``` After updating `wrangler.jsonc`, run `pnpm generate` to update the generated type definitions. This will bind the queue to the `env.QUEUE` object in the worker. So you’ll be able to send messages. #### Naming Queues [Section titled “Naming Queues”](#naming-queues) Queue names must match the following RegEx pattern: `^[a-z0-9]([a-z0-9-]{0,61}[a-z0-9])?$` ##### Valid queue names [Section titled “Valid queue names”](#valid-queue-names) * `my-queue` * `my-awesome-queue-123` * `queue1` * `1queue` * `my-queue-v2` ##### Invalid queue names [Section titled “Invalid queue names”](#invalid-queue-names) * `My_Queue` (uppercase letters not allowed) * `MY_QUENE_NAME` (uppercase letters and underscores not allowed)) * `-queue-` (cannot start or end with hyphen) * `really-really-really-really-really-really-really-long-queue-name` (max 63 chars) * `queue_name` (underscores not allowed) ### Sending messages [Section titled “Sending messages”](#sending-messages) src/worker.tsx ```tsx 1 import { env } from "cloudflare:workers"; 2 3 export default defineApp([ 4 route('/pay-with-ai', () => { 5 // Post a message to the queue 6 env.QUEUE.send({ 7 userId: 1, 8 amount: 100, 9 currency: 'USD', 10 }) 11 12 return new Response('Done!') 13 }) 14 ]) ``` ### Receiving messages [Section titled “Receiving messages”](#receiving-messages) In order to “consume messages” from the queue you need to change the shape of the `default` export of your worker. You’ll add another function called `queue` that will receive a batch of messages. src/worker.tsx ```tsx 1 const app = defineApp([ /* routes... */]) 2 3 export default { 4 fetch: app.fetch, 5 async queue(batch) { 6 for (const message of batch.messages) { 7 console.log('handling message' + JSON.stringify(message)) 8 } 9 } 10 } satisfies ExportedHandler; ``` This will receive a batch of messages, and process them one by one. ## Ways to Send Messages [Section titled “Ways to Send Messages”](#ways-to-send-messages) Cloudflare Queues allow Workers to send and process asynchronous messages reliably. There are three common approaches to send data: ### Send Message Body Directly (up to 128KB) [Section titled “Send Message Body Directly (up to 128KB)”](#send-message-body-directly-up-to-128kb) Best for: Small payloads that fit within the 128KB limit. ```ts 1 await queue.send({ 2 body: JSON.stringify({ email: "user@example.com", subject: "Welcome!" }), 3 }); ``` ✅ Simple and fast ❌ Hard limit of 128KB per message ### Store in R2 and Send Object Key [Section titled “Store in R2 and Send Object Key”](#store-in-r2-and-send-object-key) Best for: Large payloads (e.g., files, JSON blobs, videos). ```ts 1 // Upload to R2 first 2 await r2.put("msg/123.json", JSON.stringify(largeData)); 3 4 // Then send only the key to the queue 5 await queue.send({ 6 body: JSON.stringify({ r2Key: "msg/123.json" }), 7 }); ``` ✅ Great for large data ✅ Persistent and versioned if needed ❌ Slightly more complex (requires R2 integration) ### Store in KV and Send KV Key [Section titled “Store in KV and Send KV Key”](#store-in-kv-and-send-kv-key) Best for: Short-lived messages or small-to-medium payloads. ```plaintext // Save to KV await kv.put("queue:msg:123", JSON.stringify(data), { expirationTtl: 600 }); // Send reference key await queue.send({ body: JSON.stringify({ kvKey: "queue:msg:123" }), }); ``` ✅ Fast access ✅ Automatic expiration possible ❌ Not ideal for large data ❌ KV has eventual consistency (meaning that when you write data to Cloudflare KV (via kv.put), it might not be immediately visible to all readers — especially in different Cloudflare data centers.) ### Tips [Section titled “Tips”](#tips) #### Handling Different Queues [Section titled “Handling Different Queues”](#handling-different-queues) By sending a message on a queue src/worker.tsx ```tsx 1 import { env } from "cloudflare:workers"; 2 3 export default defineApp([ 4 route('/pay-with-ai', () => { 5 // Post a message to the queue 6 env.QUEUE.send({ 7 userId: 1, 8 amount: 100, 9 currency: 'USD', 10 }) 11 12 return new Response('Done!') 13 }) 14 ]) ``` when handling queues and receivng a `MessageBatch`, the `batch` contains a collection of `messages` and the name of the `queue` which you can use to handle src/worker.tsx ```tsx 1 const app = defineApp([ /* routes... */]) 2 3 export default { 4 fetch: app.fetch, 5 async queue(batch) { 6 if (batch.queue === 'my-queue-name') { 7 for (const message of batch.messages) { 8 console.log('handling my-queue-name message' + JSON.stringify(message)) 9 } 10 } 11 } 12 } satisfies ExportedHandler; ``` > ℹ️ Note: Having a dedicated Queue for a specific message is a best practice #### Handling Different Messages on the Same Queue [Section titled “Handling Different Messages on the Same Queue”](#handling-different-messages-on-the-same-queue) Use metadata (e.g. type, source, key) in your message body to help the consumer Worker determine where and how to retrieve the full data. If for some reason, you decide to share a queue for different types of messages, one pattern is to set a `type` (or other attribute) in the message body to specify its purpose and how to handle its contents. For example, when sending this payment message: src/worker.tsx ```tsx 1 import { env } from "cloudflare:workers"; 2 3 export default defineApp([ 4 route('/pay-with-ai', () => { 5 // Post a message to the queue 6 env.QUEUE.send({ 7 type: 'PAYMENT', 8 userId: 1, 9 amount: 100, 10 currency: 'USD', 11 }) 12 13 return new Response('Done!') 14 }) 15 ]) ``` One can then determine the message type and handle accordingly: src/worker.tsx ```tsx 1 const app = defineApp([ /* routes... */]) 2 3 export default { 4 fetch: app.fetch, 5 async queue(batch) { 6 for (const message of batch.messages) { 7 const { type, userId, amount, currenct } = message.body as { type: string, userId: number, amount: number, currency: string }; 8 if (type === 'PAYMENT') { 9 console.log('handling payment message' + JSON.stringify(message)) 10 } 11 } 12 } 13 } satisfies ExportedHandler; ``` # React Server Components > React, Server Components, Server Actions, and Suspense React is used to build your user interface. By default, all components are server components. That means that the component is rendered on the server as HTML and then streamed to the client. These do not include any client-side interactivity. ```tsx 1 export default function MyServerComponent() { 2 return
Hello, from the server!
; 3 } ``` When a user needs to interact with your component: clicking a button, setting state, etc, then you must use a client component. Mark the client component with the `"use client"` directive. This will be hydrated by React in the browser. ```tsx 1 "use client"; 2 3 export default function MyClientComponent() { 4 return ; 5 } ``` ## Fetching and displaying data [Section titled “Fetching and displaying data”](#fetching-and-displaying-data) React Server Components run on the server, they can easily fetch data and make it part of the payload that’s sent to the client. src/app/pages/todos/TodoPage.tsx ```tsx 1 export async function Todos({ ctx }) { 2 const todos = await db.todo.findMany({ where: { userId: ctx.user.id } }); 3 return ( 4
    5 {todos.map((todo) => ( 6
  1. {todo.title}
  2. 7 ))} 8
9 ); 10 } 11 12 export async function TodoPage({ ctx }) { 13 return ( 14
15

Todos

16 Loading...
}> 17 18 19 20 ); 21 } ``` The `TodoPage` component is a server component. It is rendered by a route, so it receives the `ctx` object. We pass this to the `Todos` component, which is also a server component, and renders the todos. Suspense When a server component is async, you’ll be able to wrap it in a `Suspense` boundary. This will allow you to show a loading state while the data is being fetched. ## Server Functions [Section titled “Server Functions”](#server-functions) Allow you to execute code on the server from a client component. @/pages/todos/functions.tsx ```tsx 1 "use server"; 2 3 import { requestInfo } from "rwsdk/worker"; 4 5 export async function addTodo(formData: FormData) { 6 const { ctx } = requestInfo; 7 const title = formData.get("title"); 8 await db.todo.create({ data: { title, userId: ctx.user.id } }); 9 } ``` The `addTodo` function is a server function. It is executed on the server when the form is submitted from a client side component. The form data is sent to the server and the function is executed. The result is **streamed** back to the client, parsed by React, and the view is updated with the new todo. @/pages/todos/AddTodo.tsx ```tsx 1 "use client"; 2 3 import { addTodo } from "./functions"; 4 5 export default function AddTodo() { 6 return ( 7
8 9 10
11 ); 12 } ``` ### `serverQuery` and `serverAction` [Section titled “serverQuery and serverAction”](#serverquery-and-serveraction) Standard React Server Action calls typically expect the server to return the entire updated UI tree so the client can rehydrate the page. For many interactions—especially queries where you only need the returned data—this is unnecessary overhead. To give you more control over this behavior, RedwoodSDK provides `serverQuery` and `serverAction` wrappers. #### `serverQuery` [Section titled “serverQuery”](#serverquery) Use `serverQuery` for fetching data. * **Method**: GET (default). * **Behavior**: Returns data only. Does **not** rehydrate or re-render the page. * **Location**: Must be in a `"use server"` file. We recommend `queries.ts`. queries.ts ```tsx 1 "use server"; 2 3 import { serverQuery } from "rwsdk/worker"; 4 import { isAuthenticated } from "@/lib/auth"; // Hypothetical auth utility 5 6 // Simple query 7 export const getTodos = serverQuery(async (userId: string) => { 8 return db.todo.findMany({ where: { userId } }); 9 }); 10 11 // Query with middleware (e.g. auth check) 12 export const getSecretData = serverQuery([ 13 async () => { 14 // Check auth 15 if (!isAuthenticated()) { 16 throw new Response("Unauthorized", { status: 401 }); 17 } 18 }, 19 async () => { 20 return "Secret Data"; 21 } 22 ]); ``` #### `serverAction` [Section titled “serverAction”](#serveraction) Use `serverAction` for mutations. * **Method**: POST (default). * **Behavior**: Rehydrates and re-renders the page with the updated server state. * **Location**: Must be in a `"use server"` file. We recommend `actions.ts`. actions.ts ```tsx 1 "use server"; 2 3 import { serverAction } from "rwsdk/worker"; 4 import { isAuthenticated } from "@/lib/auth"; // Hypothetical auth utility 5 6 export const createTodo = serverAction(async (title: string) => { 7 await db.todo.create({ data: { title } }); 8 }); 9 10 // Action with middleware 11 const requireAuth = async () => { 12 // Auth check 13 if (!isAuthenticated()) { 14 throw new Response("Unauthorized", { status: 401 }); 15 } 16 } 17 18 export const deleteTodo = serverAction([ 19 requireAuth, 20 async (id: string) => { 21 await db.todo.delete({ where: { id } }); 22 } 23 ]); 24 25 // You can also customize the HTTP method 26 export const searchTodos = serverAction( 27 async (query: string) => { 28 // ... 29 }, 30 { method: "GET" } 31 ); ``` ### How it works [Section titled “How it works”](#how-it-works) Behind the scenes, `serverQuery` uses a specialized optimization of the RSC protocol to enable fast, data-only fetches without the overhead of a full page re-render. #### The `x-rsc-data-only` Header [Section titled “The x-rsc-data-only Header”](#the-x-rsc-data-only-header) Standard React Server Action calls typically expect the server to return the entire updated UI tree so the client can rehydrate the page. For queries where you only need the returned data, this is unnecessary overhead. When you call a function wrapped in `serverQuery`, the client sends a special `x-rsc-data-only: true` header. #### Server-Side Optimization [Section titled “Server-Side Optimization”](#server-side-optimization) The RedwoodSDK server recognizes this header and skips the expensive process of rendering your Page components. Instead, it returns a minimal RSC payload: 1. **`node: null`**: Tells React there is no UI change required. 2. **`actionResult`**: Contains the actual data returned by your function. This allows RedwoodSDK to resolve the function call result directly in your client component while keeping the current UI state perfectly intact, avoiding any flickering or unnecessary hydration cycles. ### Context [Section titled “Context”](#context) Context is a way to share data globally between server components on a per-request basis. The context is populated by middleware, and is available to all React Server Components Pages and Server Functions via the `ctx` prop or `requestInfo.ctx`. ### Returning Responses [Section titled “Returning Responses”](#returning-responses) Server Functions can return standard `Response` objects, which is particularly useful for performing redirects or setting custom headers after an action completes. When a `Response` is returned, RedwoodSDK automatically handles it: * **Redirects:** If the response has a 3xx status code and a `Location` header, the client will automatically redirect. * **Custom Responses:** Other response types are also supported, and their metadata (status, headers) is made available on the client. src/pages/todos/functions.tsx ```tsx 1 "use server"; 2 3 export async function addTodo(formData: FormData) { 4 // ... logic to add todo ... 5 6 // Redirect to the todos list page after success 7 return Response.redirect("/todos", 303); 8 } ``` #### Intercepting Action Responses [Section titled “Intercepting Action Responses”](#intercepting-action-responses) You can intercept action responses on the client by providing an `onActionResponse` callback to `initClient`. This is useful if you want to handle redirects manually or perform side effects based on the response. src/entry.client.tsx ```tsx 1 import { initClient } from "rwsdk/client"; 2 3 initClient({ 4 onActionResponse: (response) => { 5 console.log("Action returned status:", response.status); 6 // Return true to prevent the default redirect behavior 7 // return true; 8 }, 9 }); ``` ## Advanced usage [Section titled “Advanced usage”](#advanced-usage) ### Manual rendering [Section titled “Manual rendering”](#manual-rendering) RedwoodSDK also provides a way to render your React Server Components imperatively with `renderToStream()` and `renderToString()`. To render your component tree to a [`ReadableStream`](https://developer.mozilla.org/en-US/docs/Web/API/ReadableStream) ### `renderToStream()` and `renderToString()` [Section titled “renderToStream() and renderToString()”](#rendertostream-and-rendertostring) #### `renderToStream(element[, options]): Promise` Experimental [Section titled “renderToStream(element\[, options\]): Promise\ ”](#rendertostreamelement-options-promisereadablestream) Takes in a React Server Component (can be a client component or server component), and returns a stream that decodes to html. Limitations `renderToStream` is designed for generating HTML streams. It does *not* automatically handle the negotiation required for React Server Components features like Server Actions or client-side transitions (which require a different response format). If you use `renderToStream` in a route handler, interactivity like form submissions may fail. For fully interactive routes, please use the standard `render()` function in `defineApp` which handles this negotiation automatically. ```tsx 1 const stream = await renderToStream(, { Document }) 2 3 const response = new Response(stream, { 4 status: 404, 5 }); ``` #### Options [Section titled “Options”](#options) * `Document`: The [document](/core/routing/#documents) component to wrap around the React Server Component `element`. If not given, will return the rendered React Server Component without any wrapping. * `injectRSCPayload = false`: Whether to inject the corresponding RSC payload for the React Server Component to use for client-side hydration * `onError`: A callback function called with the relevant error as the only paramter if any errors happen during rendering #### `renderToString(element[, options]): Promise` Experimental [Section titled “renderToString(element\[, options\]): Promise\ ”](#rendertostringelement-options-promisestring) Takes in a React Server Component (can be a client component or server component), and returns an html string. ```tsx 1 const html = await renderToString(, { Document }) 2 3 const response = new Response(html, { 4 status: 404, 5 }); ``` #### Options [Section titled “Options”](#options-1) * `Document`: The [document](/core/routing/#documents) component to wrap around the React Server Component `element`. If not given, will return the rendered React Server Component without any wrapping. * `injectRSCPayload = false`: Whether to inject the corresponding RSC payload for the React Server Component to use for client-side hydration # Request Handling & Routing > Like air traffic control, but for requests. The request/response paradigm is at the heart of web development - when a browser makes a request, your server needs to respond with content. RedwoodSDK makes this easy with the `defineApp` function, which lets you elegantly handle incoming requests and return the right responses. src/worker.tsx ```tsx 1 import { defineApp } from "rwsdk/worker"; 2 import { route } from "rwsdk/router"; 3 import { env } from "cloudflare:workers"; 4 5 export default defineApp([ 6 // Middleware 7 function middleware({ request, ctx }) { 8 /* Modify context */ 9 }, 10 function middleware({ request, ctx }) { 11 /* Modify context */ 12 }, 13 // Request Handlers 14 route("/", function handler({ request, ctx }) { 15 return new Response("Hello, world!"); 16 }), 17 route("/ping", function handler({ request, ctx }) { 18 return new Response("Pong!"); 19 }), 20 route("/api/users", { 21 get: () => new Response(JSON.stringify(users)), 22 post: () => new Response("Created", { status: 201 }), 23 }), 24 ]); ``` *** The `defineApp` function takes an array of middleware and route handlers that are executed in the order they are defined. In this example the request is passed through two middleware functions before being “matched” by the route handlers. *** ## Matching Patterns [Section titled “Matching Patterns”](#matching-patterns) Routes are matched in the order they are defined. You define routes using the `route` function. Trailing slashes are optional and normalized internally. src/worker.tsx ```tsx 1 import { route } from "rwsdk/router"; 2 3 defineApp([route("/match-this", () => new Response("Hello, world!"))]); ``` *** `route` parameters: 1. The matching pattern string 2. The request handler function *** There are three matching patterns: #### Static [Section titled “Static”](#static) Match exact pathnames. ```tsx 1 route("/", ...) 2 route("/about", ...) 3 route("/contact", ...) ``` #### Parameter [Section titled “Parameter”](#parameter) Match dynamic segments marked with a colon (`:`). The values are available in the route handler via `params` (`params.id` and `params.groupId`). ```tsx 1 route("/users/:id", ...) 2 route("/users/:id/edit", ...) 3 route("/users/:id/addToGroup/:groupId", ...) ``` #### Wildcard [Section titled “Wildcard”](#wildcard) Match all remaining segments after the prefix, the values are available in the route handler via `params.$0`, `params.$1`, etc. ```tsx 1 route("/files/*", ...) 2 route("/files/*/preview", ...) 3 route("/files/*/download/*", ...) ``` *** ## Query Parameters [Section titled “Query Parameters”](#query-parameters) RedwoodSDK uses the standard Web [Request](https://developer.mozilla.org/en-US/docs/Web/API/Request) object. To access query parameters, you can use the standard `URL` API: ```tsx 1 route("/search", ({ request }) => { 2 const url = new URL(request.url); 3 const name = url.searchParams.get("name"); 4 5 return
Hello, {name}!
; 6 }); ``` To get multiple values for a single key (e.g., `?tag=js&tag=react`): ```tsx 1 route("/posts", ({ request }) => { 2 const url = new URL(request.url); 3 const tags = url.searchParams.getAll("tag"); // ["js", "react"] 4 5 return
Filtering by tags: {tags.join(", ")}
; 6 }); ``` *** ## Request Handlers [Section titled “Request Handlers”](#request-handlers) The request handler is a function, or array of functions (See [Interrupters](#interrupters)), that are executed when a request is matched. src/worker.tsx ```tsx 1 import { route } from "rwsdk/router"; 2 3 defineApp([ 4 route("/a-standard-response", ({ request, params, ctx }) => { 5 return new Response("Hello, world!"); 6 }), 7 route("/a-jsx-response", () => { 8 return
Hello, JSX world!
; 9 }), 10 ]); ``` *** The request handler function takes a [RequestInfo](#request-info) object as its parameter. Return values: * `Response`: A standard response object. * `JSX`: A React component, which is rendered to HTML on the server and **streamed** to the client. This allows the browser to progressively render the page before it is hydrated on the client side. *** ## HTTP Method Routing [Section titled “HTTP Method Routing”](#http-method-routing) You can handle different HTTP methods (GET, POST, PUT, DELETE, etc.) on the same path by passing an object with method keys: ```tsx 1 route("/api/users", { 2 get: () => new Response(JSON.stringify(users)), 3 post: ({ request }) => new Response("User created", { status: 201 }), 4 delete: () => new Response("User deleted", { status: 204 }), 5 }); ``` Method handlers can also be arrays of functions, allowing you to use [interrupters](#interrupters) per method: ```tsx 1 route("/api/users", { 2 get: [isAuthenticated, () => new Response(JSON.stringify(users))], 3 post: [isAuthenticated, validateUser, createUserHandler], 4 }); ``` **Standard HTTP Methods**: `delete`, `get`, `head`, `patch`, `post`, `put` **Custom Methods**: Use the `custom` key for non-standard methods (case-insensitive): ```tsx 1 route("/api/search", { 2 custom: { 3 report: () => new Response("Report data"), 4 }, 5 }); ``` **Automatic OPTIONS & 405 Support**: By default, OPTIONS requests return `204 No Content` with an `Allow` header, and unsupported methods return `405 Method Not Allowed`. **Configuration**: Disable automatic behaviors: ```tsx 1 route("/api/users", { 2 get: () => new Response("OK"), 3 config: { 4 disableOptions: true, // OPTIONS returns 405 5 disable405: true, // Unsupported methods fall through to 404 6 }, 7 }); ``` HEAD Requests Unlike in Express.js, you must explicitly provide a HEAD handler. HEAD requests are not automatically mapped to GET handlers: ```tsx 1 route("/api/users", { 2 get: getHandler, 3 head: getHandler, // Explicitly reuse handler 4 }); ``` *** ### Interrupters [Section titled “Interrupters”](#interrupters) Interrupters are an array of functions that are executed in sequence for each matched request. They can be used to modify the request, context, or to short-circuit the response. A typical use-case is to check for authentication on a per-request basis, as an example you’re trying to ensure that a specific user can access a specific resource. src/worker.tsx ```tsx 2 collapsed lines 1 import { defineApp } from "rwsdk/worker"; 2 import { route } from "rwsdk/router"; 3 import { EditBlogPage } from "src/pages/blog/EditBlogPage"; 4 5 function isAuthenticated({ request, ctx }) { 6 // Ensure that this user is authenticated 7 if (!ctx.user) { 8 return new Response("Unauthorized", { status: 401 }); 9 } 10 } 11 12 defineApp([route("/blog/:slug/edit", [isAuthenticated, EditBlogPage])]); ``` *** For the `/blog/:slug/edit` route, the `isAuthenticated` function will be executed first, if the user is not authenticated, the response will be a 401 Unauthorized. If the user is authenticated, the `EditBlogPage` component will be rendered. Therefore the flow is interrupted. The `isAuthenticated` function can be shared across multiple routes. *** ## Middleware & Context [Section titled “Middleware & Context”](#middleware--context) The context object (`ctx`) is a mutable object that is passed to each request handler, interrupters, and React Server Functions. It’s used to share data between the different parts of your application. You populate the context on a per-request basis via Middleware. Middleware runs before the request is matched to a route. You can specify multiple middleware functions, they’ll be executed in the order they are defined. Server Actions Requests made by Server Actions also pass through the middleware pipeline. This means you can rely on middleware to populate context or perform checks for your actions, just as you would for page requests. src/worker.tsx ```tsx 1 import { defineApp } from "rwsdk/worker"; 2 import { route } from "rwsdk/router"; 3 import { env } from "cloudflare:workers"; 4 5 defineApp([ 6 sessionMiddleware, 7 async function getUserMiddleware({ request, ctx }) { 8 if (ctx.session.userId) { 9 ctx.user = await db.user.find({ where: { id: ctx.session.userId } }); 10 } 11 }, 12 route("/hello", [ 13 function ({ ctx }) { 14 if (!ctx.user) { 15 return new Response("Unauthorized", { status: 401 }); 16 } 17 }, 18 function ({ ctx }) { 19 return new Response(`Hello ${ctx.user.username}!`); 20 }, 21 ]), 22 ]); ``` *** The context object: 1. `sessionMiddleware` is a function that is used to populate the `ctx.session` object 2. `getUserMiddleware` is a middleware function that is used to populate the `ctx.user` object 3. `"/hello"` is a an array of route handlers that are executed when “/hello” is matched: * if the user is not authenticated the request will be interrupted and a 401 Unauthorized response will be returned * if the user is authenticated the request will be passed to the next request handler and `"Hello {ctx.user.username}!"` will be returned *** ### Extending App Context Types [Section titled “Extending App Context Types”](#extending-app-context-types) To get full type safety for your custom context data (like `ctx.user`), you can extend the `DefaultAppContext` interface in a `global.d.ts` file in your project’s root. global.d.ts ```typescript import { User } from "@db/index"; import { DefaultAppContext } from "rwsdk/worker"; interface AppContext { user?: User; session?: { userId: string | null }; } declare module "rwsdk/worker" { interface DefaultAppContext extends AppContext {} } ``` Now, whenever you access `ctx` in your handlers or via `getRequestInfo().ctx`, TypeScript will know about the `user` and `session` properties without needing manual casting. *** ## Documents [Section titled “Documents”](#documents) Documents are how you define the “shell” of your application’s html: the ``, ``, `` tags, scripts, stylesheets, ``, and where in the `` your actual page content is rendered. In RedwoodSDK, you tell it which document to use with the `render()` function in `defineApp`. In other words, you’re asking RedwoodSDK to “render” the document. src/worker.tsx ```tsx 1 import { defineApp } from "rwsdk/worker"; 2 import { route, render } from "rwsdk/router"; 3 4 import { Document } from "@/pages/document"; 5 import { HomePage } from "@/pages/home-page"; 6 7 export default defineApp([render(Document, [route("/", HomePage)])]); ``` *** The `render` function takes a React component and an array of route handlers. The document will be applied to all the routes that are passed to it. This component will be rendered on the server side when the page loads. When defining this component, you’d add: * Your application’s stylesheets and scripts *** src/pages/document.tsx ```tsx 1 export const Document = ({ children }) => ( 2 3 4 5 6 7 8 {children} 9 10 11 ); ``` Client Side Hydration You must include the client side hydration script in your document, otherwise the React components will not be hydrated. ## Request Info [Section titled “Request Info”](#request-info) The `requestInfo` object and `getRequestInfo()` function are available in server functions and provide access to the current request’s context. Import them from `rwsdk/worker`: ```tsx 1 import { requestInfo, getRequestInfo } from "rwsdk/worker"; 2 3 export async function myServerFunction() { 4 // Option 1: Using the requestInfo object 5 const { request, response, ctx } = requestInfo; 6 7 // Option 2: Using the getRequestInfo() function (recommended for actions) 8 const info = getRequestInfo(); 9 // info.request, info.response, info.ctx.user 10 } ``` Note `getRequestInfo()` will throw an error if called outside of a request lifecycle, whereas `requestInfo` will return `undefined` for its properties. *** The `requestInfo` object contains: * `request`: The incoming HTTP [Request](https://developer.mozilla.org/en-US/docs/Web/API/Request) object * `response`: A [ResponseInit](https://fetch.spec.whatwg.org/#responseinit) object used to configure the status and headers of the response * `ctx`: The app context (same as what’s passed to components) * `rw`: RedwoodSDK-specific context * `cf`: Cloudflare’s Execution Context API You can mutate the `response` object to configure the status and headers. For example: ```tsx 1 import { requestInfo } from "rwsdk/worker"; 2 import { route } from "rwsdk/router"; 3 4 const NotFound = () =>
Not Found
; 5 6 export default defineApp([ 7 route("/some-resource", async () => { 8 // some logic to determine if the resource is not found 9 10 response.status = 404; 11 response.headers.set("Cache-Control", "no-store"); 12 13 return ; 14 }), 15 ]); ``` *** ## Generating Links [Section titled “Generating Links”](#generating-links) Use `linkFor` to derive a strongly typed helper from your `defineApp` export. The helper works anywhere you can import types, including client code, because the call only depends on the app type. src/app/shared/links.ts ```ts 1 import { linkFor } from "rwsdk/router"; 2 3 // Recommended: type-only import to avoid bundling worker code 4 import type * as Worker from "../../worker"; 5 type App = typeof Worker.default; 6 7 export const link = linkFor(); ``` `linkFor` exposes the full set of routes discovered inside `defineApp`. TypeScript verifies that the path you pass exists and that you provide the required parameters. Using a type-only import ensures bundlers do not include the worker code in client bundles while preserving full types. Alternative import pattern If your tooling supports it, you can also use: ```ts 1 type App = typeof import("../../worker").default; ``` Some environments do not allow `import()` in types; in that case, prefer the type-only import shown above. ### When using Cron, Queues, etc. [Section titled “When using Cron, Queues, etc.”](#when-using-cron-queues-etc) When using `ExportedHandler` to support Cron, Queues, etc. you need to export the `app` object using the `defineApp` function. src/worker.tsx ```tsx 1 export const app = defineApp([ 2 // <-- Note: `export const app = ...`> 3 setCommonHeaders(), 4 ({ ctx }) => { 5 // setup ctx here 6 ctx; 7 }, 8 render(Document, [route("/", Home)]), 9 ]); 10 11 export default { 12 fetch: app.fetch, 13 } satisfies ExportedHandler; ``` Then you can use the `link` function to generate links to your routes, but instead of `default` you need to pass the exported `app` object. src/app/shared/links.ts ```tsx 1 import { linkFor } from "rwsdk/router"; 2 3 // Recommended: type-only import to avoid bundling worker code 4 import type * as Worker from "../../worker"; 5 type App = typeof Worker.app; // <-- Note: `.app`> 6 7 export const link = linkFor(); ``` ### Examples [Section titled “Examples”](#examples) Anywhere in your app (client or server) ```tsx 1 import { link } from "@/shared/links"; 2 3 // Static route 4 const accountsHref = link("/accounts"); 5 // View Accounts 6 7 // Dynamic route with params (fully typed) 8 const callDetailsHref = link("/calls/details/:id", { id: call.id }); 9 // View Call 10 11 // Building currentPath for list pages or search components 12 const currentPath = link("/settings/users"); ``` * Typing `link("` in your editor will autocomplete all valid route patterns from your app. * Passing a path that does not exist in your route tree, or omitting required params, produces a compile-time type error. ### Prefetching pages with `` [Section titled “Prefetching pages with \”](#prefetching-pages-with-link-relx-prefetch) When client-side navigation is enabled via `initClientNavigation`, you can hint future navigations using the browser’s [Cache API](https://developer.mozilla.org/en-US/docs/Web/API/Cache): In a route or layout component (React 19) ```tsx 1 import { link } from "@/shared/links"; 2 3 export function AboutPageLayout() { 4 const aboutHref = link("/about/"); 5 6 return ( 7 <> 8 {/* React 19 will hoist this into */} 9 10 {/* ...rest of your page... */} 11 12 ); 13 } ``` After each client navigation, RedwoodSDK scans `link[rel="x-prefetch"][href]` elements and issues background `GET` requests for those route-like URLs with the `__rsc` query parameter set and an `x-prefetch: true` header. Successful responses are stored in a generation-based `Cache` using `cache.put`, following the semantics described in the MDN Cache documentation. When navigating to a prefetched route, the cached response is used instead of making a network request, improving navigation performance. Cache entries are automatically evicted after each navigation to ensure fresh content, using a generation-based pattern that avoids races with in-flight prefetches and isolates cache entries per browser tab. ### Migration tips (from route constants) [Section titled “Migration tips (from route constants)”](#migration-tips-from-route-constants) If you previously used route constant helpers (e.g. `ROUTES` or `ADMIN_ROUTES`), you can migrate incrementally: ```ts 1 // Before 2 // ROUTES.CALLS.INDEX 3 // ROUTES.CALLS.DETAILS(id) 4 // ADMIN_ROUTES.COMPANIES.USERS(id) 5 6 // After 7 link("/calls"); 8 link("/calls/details/:id", { id }); 9 link("/admin/companies/:id/users", { id }); ``` Notes: * The accepted patterns are exactly those declared in your route tree in `@/worker`. * For routes with optional query strings, build them as needed: ```ts 1 const base = link("/admin/companies/calls/details/:id", { id: callId }); 2 const href = companyId ? `${base}?companyId=${companyId}` : base; ``` # Security > Learn about security headers and how to configure them for your app. ## 🔐 Security Headers [Section titled “🔐 Security Headers”](#-security-headers) Security headers are an important part of protecting your application from common attacks like cross-site scripting (XSS), clickjacking, and data injection. RedwoodSDK makes it easy to add these headers to your responses using middleware. Here is an example of a middleware that adds a set of common security headers: src/app/headers.ts ```typescript import type { RouteMiddleware } from "rwsdk/worker"; export const setCommonHeaders = (): RouteMiddleware => ({ response, rw: { nonce } }) => { const headers = response.headers; headers.set("X-Frame-Options", "DENY"); headers.set("X-Content-Type-Options", "nosniff"); headers.set("Referrer-Policy", "strict-origin-when-cross-origin"); headers.set( "Content-Security-Policy", `default-src 'self'; script-src 'self' 'nonce-${nonce}'; style-src 'self' 'unsafe-inline'; object-src 'none';` ); headers.set( "Permissions-Policy", "geolocation=(), microphone=(), camera=()" ); }; ``` You can then apply this middleware in your `src/worker.tsx`: src/worker.tsx ```typescript import { rwsdk } from "rwsdk/worker"; import { setCommonHeaders } from "./app/headers.js"; import { routes } from "./app/pages/routes.js"; export default { async fetch(request, env, ctx) { return rwsdk(request, env, ctx, { routes, middleware: [setCommonHeaders()], }); }, }; ``` ### Changing CSP (Content Security Policy) headers [Section titled “Changing CSP (Content Security Policy) headers”](#changing-csp-content-security-policy-headers) Sometimes you need to allow additional resources or modify the Content Security Policy (CSP) to accommodate third-party scripts, styles, or other assets. The CSP headers control what resources can be loaded and executed by your application. #### Adding trusted domains [Section titled “Adding trusted domains”](#adding-trusted-domains) Note Your CSP should reflect your application’s needs. Some apps require more permissive policies to function properly, while security-critical applications might need stricter controls. The key is understanding the tradeoffs and making informed decisions. For more information, see the [MDN Content Security Policy documentation](https://developer.mozilla.org/en-US/docs/Web/HTTP/CSP). ```diff // In app/headers.ts headers.set( "Content-Security-Policy", `default-src 'self'; script-src 'self' 'nonce-${nonce}'; style-src 'self' 'unsafe-inline'; object-src 'none';`, `default-src 'self'; script-src 'self' 'nonce-${nonce}' https://trusted-scripts.example.com; style-src 'self' 'unsafe-inline'; img-src 'self' https://images.example.com; object-src 'none';`, ); ``` #### Allowing images from multiple sources [Section titled “Allowing images from multiple sources”](#allowing-images-from-multiple-sources) When working with images in your RedwoodSDK application, you may need to load images from different sources such as remote URLs or data URIs. The default CSP configuration doesn’t include an `img-src` directive, which means images from external sources will be blocked. To allow images from remote URLs and data URIs, add the `img-src` directive to your CSP: ```diff // In app/headers.ts headers.set( "Content-Security-Policy", `default-src 'self'; script-src 'self' 'nonce-${nonce}'; style-src 'self' 'unsafe-inline'; object-src 'none';`, `default-src 'self'; script-src 'self' 'nonce-${nonce}'; style-src 'self' 'unsafe-inline'; img-src 'self' https://trusted-images.example.com data:; object-src 'none';`, ); ``` This configuration allows: * `'self'` - Images from your own domain * `https://trusted-images.example.com` - Images from specific trusted domains * `data:` - Data URIs (base64 encoded images) Caution Be cautious when using `data:` URIs as they can significantly increase the size of your HTML. Only allow specific remote domains that you trust, and consider using a more restrictive CSP in production environments. #### Using `nonce` for inline scripts [Section titled “Using nonce for inline scripts”](#using-nonce-for-inline-scripts) Sometimes you need to include inline scripts in your application, but Content Security Policy (CSP) blocks them by default for security reasons. RedwoodSDK automatically generates a fresh, cryptographically secure nonce value for each request You can access this nonce in document or page components rendered by the [router](./routing), using `rw.nonce`. Caution Only use the nonce attribute for trusted inline scripts that you have full control over. Adding nonces to third-party or user-generated scripts defeats the purpose of CSP protection and could expose your application to cross-site scripting (XSS) attacks. ```tsx 1 export const Document = ({ rw, children }) => ( 2 3 4 5 {children} 6 7 8 9 10 11 ); ``` ### Lifting device permission restrictions [Section titled “Lifting device permission restrictions”](#lifting-device-permission-restrictions) Sometimes you need to allow your web application to access device features like the camera, microphone, or geolocation. These permissions are controlled by the `Permissions-Policy` header. To enable device access, you’ll need to modify the `Permissions-Policy` header in your `app/headers.ts` file: ```diff // In app/headers.ts headers.set( "Permissions-Policy", "geolocation=(), microphone=(), camera=()", "geolocation=self, microphone=self, camera=self" ); ``` The `self` keyword allows the feature to be used only by your own domain. For a complete reference, see the [MDN Permissions Policy documentation](https://developer.mozilla.org/en-US/docs/Web/HTTP/Headers/Permissions-Policy). # Storage > Upload & download files to Cloudflare R2. [Cloudflare R2](https://developers.cloudflare.com/r2/) is an object storage solution that’s S3 compatible, global, scalable, and can be used to store files, images, videos, and more! It integrates natively with Cloudflare workers, and therefore, with Redwood. It is available locally during development, and is automatically configured when you deploy to Cloudflare. Pick your poison You do not need to use R2, you can use any storage solution you want, but we recommend R2! ## Setup [Section titled “Setup”](#setup) To use R2 in your project, you need to create a R2 bucket, and bind it to your worker. ```bash npx wrangler r2 bucket create my-bucket ``` ``` Creating bucket 'my-bucket'... ✅ Created bucket 'my-bucket' with default storage class of Standard. Configure your Worker to write objects to this bucket: { "r2_buckets": [ { "bucket_name": "my-bucket", "binding": "R2", }, ], } ``` This will create a bucket called `my-bucket`, which you’ll have to bind to your worker, which you do by pasting the above into your `wrangler.jsonc` file. wrangler.jsonc ```jsonc { "r2_buckets": [ { "bucket_name": "my-bucket", "binding": "R2", }, ], } ``` After updating `wrangler.jsonc`, run `pnpm generate` to update the generated type definitions. This will make the `my-bucket` bucket available via the `env.R2` binding in your worker. You can then use this binding to upload, download, and manage files stored in R2 using the standard R2 API. ### Naming [Section titled “Naming”](#naming) Bucket names must begin and end with an alphanumeric and can only contain letters (a-z), numbers (0-9), and hyphens (-). ## Usage [Section titled “Usage”](#usage) RedwoodSDK uses the standard Request/Response objects. When uploading files, the data is streamed directly from the client to R2 storage. Similarly, when downloading files, they are streamed directly from R2 to the client. This streaming approach means files are processed in small chunks rather than loading the entire file into memory, making it memory-efficient and suitable for handling large files. ### Uploading Files [Section titled “Uploading Files”](#uploading-files) src/worker.tsx ```tsx 1 import { defineApp } from "rwsdk/worker"; 2 import { route } from "rwsdk/router"; 3 import { env } from "cloudflare:workers"; 4 5 defineApp([ 6 route("/upload/", async ({ request }) => { 7 const formData = await request.formData(); 8 const file = formData.get("file") as File; 9 10 // Stream the file directly to R2 11 const r2ObjectKey = `/storage/${file.name}`; 12 await env.R2.put(r2ObjectKey, file.stream(), { 13 httpMetadata: { 14 contentType: file.type, 15 }, 16 }); 17 18 return new Response(JSON.stringify({ key: r2ObjectKey }), { 19 status: 200, 20 headers: { 21 "Content-Type": "application/json", 22 }, 23 }); 24 }), 25 ]); ``` ### Downloading Files [Section titled “Downloading Files”](#downloading-files) src/worker.tsx ```tsx 1 import { defineApp } from "rwsdk/worker"; 2 import { route } from "rwsdk/router"; 3 import { env } from "cloudflare:workers"; 4 5 defineApp([ 6 route("/download/*", async ({ request, params }) => { 7 const object = await env.R2.get("/storage/" + params.$0); 8 if (object === null) { 9 return new Response("Object Not Found", { status: 404 }); 10 } 11 return new Response(object.body, { 12 headers: { 13 "Content-Type": object.httpMetadata?.contentType as string, 14 }, 15 }); 16 }), 17 ]); ``` # Authentication > Secure your application with passwordless login. ## Passkey Authentication (WebAuthn) [Section titled “Passkey Authentication (WebAuthn)”](#passkey-authentication-webauthn) Passkeys are a passwordless authentication method that allows users to sign in to websites and applications using the same biometric data (like a fingerprint or face scan) or PIN they use to unlock their devices. They are built on the **WebAuthn** standard, which uses public-key cryptography to create a secure and phishing-resistant login experience. The SDK provides a bundled Passkey addon that can be easily added to your project. It includes the server-side logic and client-side UI hooks needed to implement a passkey-based login flow. ### Adding the Passkey Addon [Section titled “Adding the Passkey Addon”](#adding-the-passkey-addon) To add passkey authentication to your project, you can either run the following command from your project’s root directory yourself, or you can ask your AI-powered editor (like Cursor) to run it for you: ```bash # AI: Run this command, then open the INSTRUCTIONS.md file it points to and follow the steps. npx rwsdk addon passkey ``` This command will download the addon’s files into a temporary directory. It will then provide you with a command to open a local `INSTRUCTIONS.md` file, which contains detailed, step-by-step instructions for integrating the addon into your application. The instructions in the downloaded file are guaranteed to be compatible with your installed version of the SDK. # Database > Build isolated, zero-setup databases using SQLite Durable Objects and SQL-based queries with full TypeScript support. The SDK includes a built-in database solution using **SQLite Durable Objects** and **Kysely** for SQL queries. Create isolated databases at runtime with minimal setup. *** ## Motivation [Section titled “Motivation”](#motivation) We believe a lightweight, SQL-based query builder is the best fit as the out of the box solution. With just SQL, **you either already know it** (so you can be immediately productive) **or learning it is transferrable knowledge**. This doesn’t replace your existing ORMs - you’re always free to use your preferred database solution where it makes sense. For applications with modular components or add-ons, there’s an additional benefit: natural isolation. Each database instance is completely separate, giving you explicit control over how components communicate with each other’s data. `rwsdk/db` delivers both simplicity and isolation in one package: Write your migrations, call `createDb()`, and start querying with full type safety. Types are inferred directly from your migrations. *** ## How It Works [Section titled “How It Works”](#how-it-works) Under the hood, `rwsdk/db` combines: 1. **SQLite Durable Objects** - Each database instance runs in its own isolated Durable Object 2. **Kysely** - A lightweight, type-safe SQL query builder with the same API naming and semantics as SQL ### Type Inference [Section titled “Type Inference”](#type-inference) Instead of code generation or handwritten types, we infer your database schema directly from your migrations: ```ts 1 import { type Migrations } from "rwsdk/db"; 2 3 export const migrations = { 4 "001_initial_schema": { 5 async up(db) { 6 return [ 7 await db.schema 8 .createTable("users") 9 .addColumn("id", "text", (col) => col.primaryKey()) 10 .addColumn("username", "text", (col) => col.notNull().unique()) 11 .execute(), 12 ]; 13 }, 14 }, 15 } satisfies Migrations; 16 17 // TypeScript automatically knows about your 'users' table and its columns 18 const user = await db.selectFrom("users").selectAll().executeTakeFirst(); ``` ### When Migrations Run [Section titled “When Migrations Run”](#when-migrations-run) Migrations run when `createDb()` is called. If that happens at the module level (shown in the examples), then: **Development**:. Runs when you start your development server. **Production**: When you deploy with `npm run release`, the deployment process includes an initial request to your application, which triggers migration updates. ### Migration Failures and Rollback [Section titled “Migration Failures and Rollback”](#migration-failures-and-rollback) If a migration’s `up()` function fails, `rwsdk/db` automatically calls the corresponding `down()` function to undo any partial changes. This rollback is per-migration - previously successful ones are not affected. Because SQLite doesn’t support transactional DDL (Data Definition Language) statements, a failed migration can leave the database in a partially modified state. It is therefore important to write `down()` functions that are idempotent and can run safely even if `up()` only partially succeeded. ```ts 1 // Example of a defensive down() function 2 async down(db) { 3 // Defensively drop tables that might not exist if `up()` failed 4 await db.schema.dropTable("posts").ifExists().execute(); 5 await db.schema.dropTable("users").ifExists().execute(); 6 } ``` *** ## Setup [Section titled “Setup”](#setup) You’ll need to create three files and update your Wrangler configuration: ### 1. Define Your Migrations [Section titled “1. Define Your Migrations”](#1-define-your-migrations) src/db/migrations.ts ```ts 1 import { type Migrations } from "rwsdk/db"; 2 3 export const migrations = { 4 "001_initial_schema": { 5 async up(db) { 6 return [ 7 await db.schema 8 .createTable("todos") 9 .addColumn("id", "text", (col) => col.primaryKey()) 10 .addColumn("text", "text", (col) => col.notNull()) 11 .addColumn("completed", "integer", (col) => 12 col.notNull().defaultTo(0), 13 ) 14 .addColumn("createdAt", "text", (col) => col.notNull()) 15 .execute(), 16 ]; 17 }, 18 19 async down(db) { 20 await db.schema.dropTable("todos").ifExists().execute(); 21 }, 22 }, 23 } satisfies Migrations; ``` ### 2. Create Your Database Instance [Section titled “2. Create Your Database Instance”](#2-create-your-database-instance) src/db/index.ts ```ts 1 import { env } from "cloudflare:workers"; 2 import { type Database, createDb } from "rwsdk/db"; 3 import { type migrations } from "@/db/migrations"; 4 5 export type AppDatabase = Database; 6 export type Todo = AppDatabase["todos"]; 7 8 export const db = createDb( 9 env.DATABASE, 10 "todo-database", // unique key for this database instance 11 ); ``` ### 3. Create Your Durable Object Class [Section titled “3. Create Your Durable Object Class”](#3-create-your-durable-object-class) src/db/durableObject.ts ```ts 1 import { SqliteDurableObject } from "rwsdk/db"; 2 import { migrations } from "@/db/migrations"; 3 4 export class Database extends SqliteDurableObject { 5 migrations = migrations; 6 } ``` ### 4. Export from Worker [Section titled “4. Export from Worker”](#4-export-from-worker) src/worker.tsx ```ts 1 export { Database } from "@/db/durableObject"; 2 3 // ... rest of your worker code ``` ### 5. Configure Wrangler [Section titled “5. Configure Wrangler”](#5-configure-wrangler) wrangler.jsonc ```jsonc { "durable_objects": { "bindings": [ { "name": "DATABASE", "class_name": "Database", }, ], }, "migrations": [ { "tag": "v1", "new_sqlite_classes": ["Database"], }, ], } ``` After updating `wrangler.jsonc`, run `pnpm generate` to update the generated type definitions. Ensure `src/db/index.ts`, the Durable Object export in `src/worker.tsx`, and the Wrangler configuration all refer to the same binding and class names. The examples use `Database`. *** ## Usage Examples [Section titled “Usage Examples”](#usage-examples) ### Basic CRUD Operations [Section titled “Basic CRUD Operations”](#basic-crud-operations) ```ts 1 import { db } from "@/db"; 2 3 // Create a todo 4 const todo = { 5 id: crypto.randomUUID(), 6 text: "Finish the documentation", 7 completed: 0, 8 createdAt: new Date().toISOString(), 9 }; 10 await db.insertInto("todos").values(todo).execute(); 11 12 // Find a todo 13 const foundTodo = await db 14 .selectFrom("todos") 15 .selectAll() 16 .where("id", "=", todo.id) 17 .executeTakeFirst(); 18 19 // Update a todo 20 await db 21 .updateTable("todos") 22 .set({ completed: 1 }) 23 .where("id", "=", todo.id) 24 .execute(); 25 26 // Delete a todo 27 await db.deleteFrom("todos").where("id", "=", todo.id).execute(); ``` ### Complex Queries with Joins [Section titled “Complex Queries with Joins”](#complex-queries-with-joins) While the guestbook example is simple, you can still perform joins. For a more detailed example, see the **Patterns** section below. ### Real-World Example: Passkey Authentication [Section titled “Real-World Example: Passkey Authentication”](#real-world-example-passkey-authentication) Here’s how the [passkey addon](https://github.com/redwoodjs/passkey-addon) uses `rwsdk/db`: ```ts 1 // Create a new credential 2 export async function createCredential( 3 credential: Omit, 4 ): Promise { 5 const newCredential: Credential = { 6 id: crypto.randomUUID(), 7 createdAt: new Date().toISOString(), 8 ...credential, 9 }; 10 11 await db.insertInto("credentials").values(newCredential).execute(); 12 return newCredential; 13 } 14 15 // Find credentials for a user 16 export async function getUserCredentials( 17 userId: string, 18 ): Promise { 19 return await db 20 .selectFrom("credentials") 21 .selectAll() 22 .where("userId", "=", userId) 23 .execute(); 24 } ``` *** ## Patterns [Section titled “Patterns”](#patterns) ### Nesting Relational Data (ORM-like Behavior) [Section titled “Nesting Relational Data (ORM-like Behavior)”](#nesting-relational-data-orm-like-behavior) While `rwsdk/db` uses a query builder instead of a full ORM, you can still structure your query results to include nested relational data. Kysely provides helper functions like `jsonObjectFrom` and `jsonArrayFrom` that make this easy. For this example, we’ll switch to a more complex schema involving blog posts and users to better demonstrate joins. **1. The Schema** First, let’s assume a schema with `users` and `posts`. src/db/migrations.ts ```ts 1 // Abridged for clarity 2 await db.schema 3 .createTable("users") 4 .addColumn("id", "text", (col) => col.primaryKey()) 5 .addColumn("username", "text", (col) => col.notNull().unique()) 6 .execute(); 7 8 await db.schema 9 .createTable("posts") 10 .addColumn("id", "text", (col) => col.primaryKey()) 11 .addColumn("title", "text", (col) => col.notNull()) 12 .addColumn("userId", "text", (col) => col.notNull().references("users.id")) 13 .execute(); ``` **2. The Query** With the schema in place, you can write a query to fetch posts and embed the author’s information. src/db/queries.ts ```ts 1 import { db } from "@/db"; 2 import { jsonObjectFrom } from "kysely/helpers/sqlite"; 3 4 export async function getAllPostsWithAuthors() { 5 return await db 6 .selectFrom("posts") 7 .selectAll("posts") 8 .select((eb) => [ 9 jsonObjectFrom( 10 eb 11 .selectFrom("users") 12 .select(["id", "username"]) 13 .whereRef("users.id", "=", "posts.userId"), 14 ).as("author"), 15 ]) 16 .execute(); 17 } ``` **3. The Result** The `getAllPostsWithAuthors` function will return an array of post objects, each with a nested author object: ```json [ { "id": "post-123", "title": "My First Post", "author": { "id": "user-abc", "username": "Alice" } } ] ``` This pattern allows you to fetch complex, nested data structures in a single, efficient query. *** ## Seeding Your Database [Section titled “Seeding Your Database”](#seeding-your-database) For development and testing, you’ll often need a consistent set of data. You can create a seed script to populate your database with default values. ### 1. Create a Seed Script [Section titled “1. Create a Seed Script”](#1-create-a-seed-script) Create a script that exports an async function as the default export. This script will have access to your application’s environment, including your Durable Object bindings, when run via `rwsdk worker-run`. src/scripts/seed.ts ```ts 1 import { db } from "@/db"; 2 3 export default async () => { 4 console.log("… Seeding todos"); 5 await db.deleteFrom("todos").execute(); 6 7 await db 8 .insertInto("todos") 9 .values([ 10 { 11 id: crypto.randomUUID(), 12 text: "Write the seed script", 13 completed: 1, 14 createdAt: new Date().toISOString(), 15 }, 16 { 17 id: crypto.randomUUID(), 18 text: "Update the documentation", 19 completed: 0, 20 createdAt: new Date().toISOString(), 21 }, 22 ]) 23 .execute(); 24 25 console.log("✔ Finished seeding todos 🌱"); 26 }; ``` ### 2. Add a `seed` script to `package.json` [Section titled “2. Add a seed script to package.json”](#2-add-a-seed-script-to-packagejson) Add a script to your `package.json` to run your seed file using the `rwsdk worker-run` command. package.json ```json { "scripts": { "seed": "rwsdk worker-run ./src/scripts/seed.ts" } } ``` ### 3. Run the Seed Script [Section titled “3. Run the Seed Script”](#3-run-the-seed-script) Now you can seed your database from the command line: ```bash npm run seed ``` *** ## API Reference [Section titled “API Reference”](#api-reference) ### `createDb()` [Section titled “createDb()”](#createdb) Creates a database instance connected to a Durable Object. ```ts 1 createDb(durableObjectNamespace: DurableObjectNamespace, key: string): Database ``` * `durableObjectNamespace`: Your Durable Object binding from the environment * `key`: Unique identifier for this database instance * Returns: Kysely database instance with your inferred types ### `Database` Type [Section titled “Database\ Type”](#databaset-type) The main database type that provides access to your tables and their schemas. ```ts 1 type AppDatabase = Database; 2 type Todo = AppDatabase["todos"]; // Inferred table type ``` ### `Migrations` Type [Section titled “Migrations Type”](#migrations-type) Use to define the structure for your database migrations. ```ts 1 export const migrations = { 2 "001_create_todos": { 3 async up(db) { 4 await db.schema 5 .createTable("todos") 6 .addColumn("id", "text", (col) => col.primaryKey()) 7 .addColumn("text", "text", (col) => col.notNull()) 8 .addColumn("completed", "integer", (col) => col.notNull().defaultTo(0)) 9 .execute(); 10 }, 11 async down(db) { 12 await db.schema.dropTable("todos").execute(); 13 }, 14 }, 15 } satisfies Migrations; ``` ### `SqliteDurableObject` [Section titled “SqliteDurableObject”](#sqlitedurableobject) Base class for your Durable Object that handles SQLite operations. ```ts 1 class YourDurableObject extends SqliteDurableObject { 2 migrations = yourMigrations; 3 } ``` For complete query builder documentation, see the [Kysely documentation](https://kysely.dev/docs). Everything you can do with Kysely, you can do with `rwsdk/db`. *** ## FAQ [Section titled “FAQ”](#faq) **Q: Why use SQL instead of an ORM?** A: We’re not replacing ORMs - `rwsdk/db` works alongside your existing tools. We believe a lightweight, SQL-based query builder is a better fit as the out of the box solution, but you’re always free to use your preferred ORM or database solution where it makes sense for your application. **Q: What about latency and performance?** A: Durable Objects run in a single location, so there’s a latency consideration compared to globally distributed databases. However, they excel at simplicity and isolation. For many use cases, the ease of setup benefit outweighs the latency trade-off. You can also create multiple database instances with different keys to distribute load geographically if needed. **Q: Is this suitable for production use?** A: This is currently a preview feature, which means the API may evolve based on feedback. The underlying technologies (SQLite, Durable Objects, Kysely) are all production-ready, but we recommend testing thoroughly and having migration strategies ready as the API stabilizes. **Q: How do I handle database backups?** A: Durable Objects automatically persist data, but like D1, there aren’t built-in backup features. For critical applications, implement additional backup strategies. You can export data periodically or replicate to external systems as needed. **Q: Why does rwsdk/db auto-rollback failed migrations instead of leaving recovery to the developer?** A: We recognize that in many scenarios, particularly in production, a developer is best equipped to handle a failed migration with full context. Manual recovery can offer more granular control than a one-size-fits-all automated approach. However, `rwsdk/db` opts for automated rollbacks by default to ensure database integrity. The primary reason is that SQLite does not support transactions for schema changes (DDL). A failed `up()` migration could otherwise leave the database in an inconsistent, half-migrated state. By automatically running the `down()` function, we return the database to a known-good state. This is critical for the zero-setup, runtime-isolated environments `rwsdk/db` is designed for, where direct manual intervention may not be feasible. To work effectively with this automated system, it’s best to plan migrations carefully. Each `down()` function should be written to cleanly undo only what its corresponding `up()` function does. This practice makes it much easier and safer to reason about the database state, fix the migration, and redeploy. # Realtime > A tutorial on how to use the useSyncedState hook for realtime shared state. RedwoodSDK provides built-in support for real-time applications through shared state synchronization. The primary way to implement this is via the `useSyncedState` hook. `useSyncedState` looks exactly like React’s native `useState`, except it has bidirectional syncing with the server and all other connected clients. ## What is it? [Section titled “What is it?”](#what-is-it) * It’s a hook that synchronizes state across multiple clients (tabs, devices, users) in real-time. * The server is the source of truth. * It allows you to build collaborative features without needing an external realtime service. ## Why would you use it? [Section titled “Why would you use it?”](#why-would-you-use-it) * **Realtime**: Updates are instant for all users on the page. * **Native**: It’s built into RedwoodSDK. * **Cloudflare**: It leverages Cloudflare Durable Objects for coordination. ## Where would you use it? [Section titled “Where would you use it?”](#where-would-you-use-it) * Any component where you want data to update instantly for everyone. * Examples: Chat apps, collaborative forms, live dashboards, presence indicators. Note This is a low-level primitive. Currently, all values are stored in **memory** within the Durable Object. If the Durable Object is evicted or the worker restarts, the state is wiped. However, you can add callbacks to persist data to a database if needed. ## Tutorial: From 0 to 1 [Section titled “Tutorial: From 0 to 1”](#tutorial-from-0-to-1) Here is the easiest way to get started. ### 1. Setup the Worker [Section titled “1. Setup the Worker”](#1-setup-the-worker) In your `src/worker.tsx`, you need to export the `SyncedStateServer` (the Durable Object) and register its routes. src/worker.tsx ```tsx 1 import { env } from "cloudflare:workers"; 2 import { 3 SyncedStateServer, 4 syncedStateRoutes, 5 } from "rwsdk/use-synced-state/worker"; 6 import { defineApp } from "rwsdk/worker"; 7 8 // 1. Export the Durable Object so Cloudflare can find it 9 export { SyncedStateServer }; 10 11 export default defineApp([ 12 // ... your other middleware 13 // 2. Register the synced state routes 14 ...syncedStateRoutes(() => env.SYNCED_STATE_SERVER), 15 ]); ``` ### 2. Update Wrangler Config [Section titled “2. Update Wrangler Config”](#2-update-wrangler-config) You need to tell Cloudflare about the Durable Object. Add the following to your `wrangler.jsonc`: wrangler.jsonc ```jsonc "durable_objects": { "bindings": [ { "name": "SYNCED_STATE_SERVER", "class_name": "SyncedStateServer" } ] }, "migrations": [ { "tag": "v1", "new_sqlite_classes": ["SyncedStateServer"] } ] ``` > **Note**: After changing `wrangler.jsonc`, run `pnpm generate` to update your types. ### 3. Use the Hook [Section titled “3. Use the Hook”](#3-use-the-hook) Now you can use `useSyncedState` in your components. It works just like `useState`, but takes a second argument: a unique key, and an optional third argument: a room ID. src/components/SharedCounter.tsx ```tsx 1 "use client"; 2 3 import { useSyncedState } from "rwsdk/use-synced-state/client"; 4 5 export const SharedCounter = () => { 6 // "counter" is the unique key for this piece of state 7 // Without a room ID, this state is global across all clients 8 const [count, setCount] = useSyncedState(0, "counter"); 9 10 return ( 11
12

Count: {count}

13 14
15 ); 16 }; ``` Open this component in two different browser windows. When you click increment in one, it updates in the other instantly! ### Rooms: Scoping State to Different Groups [Section titled “Rooms: Scoping State to Different Groups”](#rooms-scoping-state-to-different-groups) By default, state is global. But you can scope state to different “rooms” by passing a room ID as the third argument. This is useful for features like chat rooms, game sessions, or collaborative documents. src/components/RoomCounter.tsx ```tsx 1 "use client"; 2 3 import { useSyncedState } from "rwsdk/use-synced-state/client"; 4 5 export const RoomCounter = ({ roomId }: { roomId: string }) => { 6 // State is scoped to this specific room 7 // Users in different rooms won't see each other's updates 8 const [count, setCount] = useSyncedState(0, "counter", roomId); 9 10 return ( 11
12

Room: {roomId}

13

Count: {count}

14 15
16 ); 17 }; ``` When you use a room ID, state is isolated to that room. Users in `"room-1"` won’t see updates from users in `"room-2"`. *** ## Advanced: Scoping and Persistence [Section titled “Advanced: Scoping and Persistence”](#advanced-scoping-and-persistence) ### Scoping State with Room IDs vs Key Handlers [Section titled “Scoping State with Room IDs vs Key Handlers”](#scoping-state-with-room-ids-vs-key-handlers) There are two ways to scope state: 1. **Room IDs** (client-side): Pass a room ID as the third argument to `useSyncedState`. This is the simplest way to isolate state between different groups. 2. **Key Handlers** (server-side): Transform keys on the server to add prefixes or scoping logic. This is useful when you need server-enforced scoping based on authentication or other server-side data. #### Using Room IDs (Client-Side) [Section titled “Using Room IDs (Client-Side)”](#using-room-ids-client-side) src/components/ChatRoom.tsx ```tsx 1 "use client"; 2 3 import { useSyncedState } from "rwsdk/use-synced-state/client"; 4 5 export const ChatRoom = ({ roomId }: { roomId: string }) => { 6 // Each room has its own isolated state 7 const [messages, setMessages] = useSyncedState([], "messages", roomId); 8 9 // ... chat UI 10 }; ``` #### Using Key Handlers (Server-Side) [Section titled “Using Key Handlers (Server-Side)”](#using-key-handlers-server-side) Key handlers allow you to transform keys on the server, which is useful for server-enforced scoping: src/worker.tsx ```tsx 1 import { requestInfo } from "rwsdk/worker"; 2 3 SyncedStateServer.registerKeyHandler(async (key, stub) => { 4 // Access user ID from request context 5 const userId = requestInfo.ctx.userId; 6 7 // Scope keys that start with "user:" to the current user 8 if (key.startsWith("user:")) { 9 return `${key}:${userId}`; 10 } 11 12 return key; 13 }); ``` Then in your component: src/components/UserSettings.tsx ```tsx 1 "use client"; 2 3 import { useSyncedState } from "rwsdk/use-synced-state/client"; 4 5 export const UserSettings = () => { 6 // The key handler will transform this to "user:settings:123" (where 123 is the userId) 7 // Each user gets their own isolated settings 8 const [settings, setSettings] = useSyncedState({}, "user:settings"); 9 10 // ... settings UI 11 }; ``` #### Server-Side Room Transformation [Section titled “Server-Side Room Transformation”](#server-side-room-transformation) You can also transform room IDs on the server using a room handler. This is useful for features like “private” rooms that should be scoped per user: src/worker.tsx ```tsx 1 import { requestInfo } from "rwsdk/worker"; 2 3 SyncedStateServer.registerRoomHandler(async (roomId, reqInfo) => { 4 const userId = reqInfo?.ctx?.userId; 5 6 // Transform "private" room requests to user-specific rooms 7 if (roomId === "private" && userId) { 8 return `user:${userId}`; 9 } 10 11 // Pass through other room IDs as-is 12 return roomId ?? "syncedState"; 13 }); ``` Then clients can request a “private” room, and the server will automatically scope it to the current user: src/components/PrivateNotes.tsx ```tsx 1 "use client"; 2 3 import { useSyncedState } from "rwsdk/use-synced-state/client"; 4 5 export const PrivateNotes = () => { 6 // Server transforms "private" to "user:${userId}" automatically 7 const [notes, setNotes] = useSyncedState("", "notes", "private"); 8 9 // ... notes UI 10 }; ``` ### Persisting State [Section titled “Persisting State”](#persisting-state) Since the state is in-memory, you might want to save it to a database. You can register handlers for when state is set or retrieved. src/worker.tsx ```tsx 1 SyncedStateServer.registerSetStateHandler((key, value) => { 2 console.log("State updated:", key, value); 3 // db.save(key, value); 4 }); 5 6 SyncedStateServer.registerGetStateHandler((key, value) => { 7 // potentially load from DB if value is undefined 8 }); ``` ## Future Plans [Section titled “Future Plans”](#future-plans) We are working on making this even more powerful out of the box: * **Offline Support**: Local persistence (e.g., via IndexedDB) so your app works offline and syncs changes when the connection is restored. * **Durable Storage**: Built-in persistence to the Durable Object’s SQLite storage, ensuring state survives worker restarts without custom handlers. # Quick Start > From request to response in seconds! In this quick start you’ll go from zero to request/response in seconds and deploy to production in minutes! System requirements * [Node.js](https://nodejs.org/en/download) Create a new project by running the following command, replacing `my-project-name` with your project name: * npm ```sh npx create-rwsdk my-project-name ``` * pnpm ```sh pnpx create-rwsdk my-project-name ``` * yarn ```sh yarn dlx create-rwsdk my-project-name ``` ## Start developing [Section titled “Start developing”](#start-developing) ### Install the dependencies [Section titled “Install the dependencies”](#install-the-dependencies) ```bash cd my-project-name ``` * npm ```sh npm install ``` * pnpm ```sh pnpm install ``` * yarn ```sh yarn install ``` ### Run the development server [Section titled “Run the development server”](#run-the-development-server) RedwoodSDK is just a plugin for Vite, so you can use the same commands to run the development server as you would with any other Vite project. * npm ```sh npm run dev ``` * pnpm ```sh pnpm run dev ``` * yarn ```sh yarn run dev ``` ```bash VITE v6.2.0 ready in 500 ms ➜ Local: http://localhost:5173/ ➜ Network: use --host to expose ➜ press h + enter to show help ``` Access the development server in your browser, by default it’s available at , where you should see the RedwoodSDK welcome page displayed. How exciting, your first request/response in RedwoodSDK! ### Your first route [Section titled “Your first route”](#your-first-route) The entry point of your webapp is `src/worker.tsx`, open that file in your favorite editor. Here you’ll see the `defineApp` function, this is the main function that “defines your webapp,” where the purpose is to handle requests by returning responses to the client. src/worker.tsx ```tsx import { defineApp } from "rwsdk/worker"; import { route, render } from "rwsdk/router"; import { Document } from "@/app/document"; import { Home } from "@/app/pages/home"; export default defineApp([ render(Document, [route("/", () => new Response("Hello, World!"))]), ]); ``` You’re going to add your own route, insert the `"/ping"` route handler: src/worker.tsx ```diff import { defineApp } from "rwsdk/worker"; import { route, render } from "rwsdk/router"; export default defineApp([ render(Document, [ route("/", () => new Response("Hello, World!")), +route("/ping", function () { +return

Pong!

; + }), ]), ]); ``` Now when you navigate to you should see “Pong!” displayed on the page. Tip You might have noticed that we returned JSX instead of a `Response` object. This is because RedwoodSDK has built-in support for React Server Components, allowing you to return JSX directly from your routes. The JSX will be rendered on the server and sent to the client as HTML. ## Deploy to production [Section titled “Deploy to production”](#deploy-to-production) RedwoodSDK is built for the Cloudflare Development Platform. You can deploy your webapp to Cloudflare with a single command: * npm ```sh npm run release ``` * pnpm ```sh pnpm run release ``` * yarn ```sh yarn run release ``` The first time you run the command it might fail and ask you to create a workers.dev subdomain. Do as indicated and go to the dashboard and open the Workers menu. Opening the Workers landing page for the first time will create a workers.dev subdomain automatically [What's next? ](/core/overview)Learn everything you need to know to build webapps with RedwoodSDK! # Building with AI > Resources and tips for building RedwoodSDK applications with AI assistance. RedwoodSDK is designed to be AI-friendly. By following “Zero Magic” principles and staying close to web standards, it ensures that what you see in your source code is exactly what runs in the browser and on the server. This makes RedwoodSDK code highly predictable for AI tools. ## Context files [Section titled “Context files”](#context-files) RedwoodSDK provides `llms.txt` and `llms-full.txt` files that contain the full documentation content in a format optimized for AI consumption. These files are located at the root of the documentation site. * [llms.txt](https://docs.rwsdk.com/llms.txt) — A concise summary of the documentation. * [llms-full.txt](https://docs.rwsdk.com/llms-full.txt) — The full documentation content. Some AI tools, like Cursor or Windsurf, can auto-discover these files if you provide `https://docs.rwsdk.com` as a documentation source. ## Tips for AI-Powered Development [Section titled “Tips for AI-Powered Development”](#tips-for-ai-powered-development) ### 1. Leverage “Zero Magic” [Section titled “1. Leverage “Zero Magic””](#1-leverage-zero-magic) Because RedwoodSDK avoids hidden behavior and complex code generation, AI tools are less likely to hallucinate internal framework logic. When asking an AI to write code, emphasize that it should use standard Web APIs (Request, Response, Fetch) and idiomatic React Server Components. ### 2. Use `create-rwsdk` for Scaffolding [Section titled “2. Use create-rwsdk for Scaffolding”](#2-use-create-rwsdk-for-scaffolding) Rather than asking an AI to set up a project from scratch, always start with the official starter: ```bash npx create-rwsdk my-project-name ``` ### 3. Server Functions and RSCs [Section titled “3. Server Functions and RSCs”](#3-server-functions-and-rscs) AI tools are generally well-versed in React, but they may need reminders about React Server Components (RSC) and Server Functions. If an AI is struggling with data fetching, remind it that it can use `async/await` directly in components or define `"use server";` functions for server-side logic. ### 4. Cloudflare Runtime Aware [Section titled “4. Cloudflare Runtime Aware”](#4-cloudflare-runtime-aware) RedwoodSDK runs on the Cloudflare Workers runtime (workerd). When asking for infrastructure help (e.g., using D1, R2, or Durable Objects), remind the AI that these are available via standard Cloudflare bindings. ## Community Support [Section titled “Community Support”](#community-support) If you’re stuck or want to share how you’re using AI with RedwoodSDK, join our community: Discord Join the [RedwoodJS Discord](https://community.redwoodjs.com/) to chat with other developers and the core team. # Drizzle ORM > Integrating Drizzle ORM with Cloudflare D1 in RedwoodSDK. **Steps for integrating Drizzle/D1 into RWSDK** Create a Cloudflare D1 database: ```bash npx wrangler d1 create your_prod_database_name ``` *** Add database binding to wrangler: wrangler.jsonc ```jsonc "d1_databases": [ { "binding": "DB", "database_name": "your_prod_database_name", "database_id": "prod_database_id", "migrations_dir": "drizzle" } ], ``` *** Install Drizzle packages: ```bash npm i drizzle-orm npm i -D drizzle-kit ``` *** Create a `drizzle.config.ts` file and fill in like below. Note that in the example below, you only need the `dbCredentials` object IFF you want to access your dev database using Drizzle Studio. Some developers do not use Drizzle Studio and instead use TablePlus, which can access not only your dev database but also your production D1 on Cloudflare. If you won’t be using Drizzle Studio then remove the `dbCredentials` object from the example below. drizzle.config.ts ```ts 1 import { defineConfig } from "drizzle-kit"; 2 3 export default defineConfig({ 4 schema: "./src/db/schema.ts", 5 out: "drizzle", 6 dialect: "sqlite", 7 dbCredentials: { 8 url: "./path_to_your_dev_database", 9 }, 10 }); ``` *** Update your `package.json` to add in these scripts: ```json "migrate:new": "drizzle-kit generate", "migrate:dev": "wrangler d1 migrations apply DB --local", "migrate:prod": "wrangler d1 migrations apply DB --remote", ``` *** Update your worker entry file: src/worker.tsx ```ts 1 export interface Env { 2 DB: D1Database; 3 } ``` Run `npx wrangler types` to update your `worker-configuration.d.ts` configuration. *** Create a schema at `/src/db/schema.ts`. Here’s a basic one, which includes an implementation for CUIDs src/db/schema.ts ```ts 1 import { sqliteTable, text, integer, real, AnySQLiteColumn, index } from "drizzle-orm/sqlite-core"; 2 import { relations, sql } from 'drizzle-orm'; 3 4 let counter = 0; 5 6 function createId(): string { 7 const timestamp = Date.now().toString(36); 8 counter = (counter + 1) % 1296; 9 const count = counter.toString(36).padStart(2, '0'); 10 11 const array = new Uint8Array(8); 12 crypto.getRandomValues(array); 13 const random = Array.from(array).map(b => b.toString(36)).join('').slice(0, 14); 14 15 return `c${timestamp}${count}${random}`.slice(0, 25); 16 } 17 18 export const users = sqliteTable('users', { 19 id: text('id').primaryKey().$defaultFn(() => createId()), 20 name: text('name').notNull(), 21 email: text('slug').notNull().unique(), 22 createdAt: text('created_at').notNull().default(sql`(datetime('now', 'localtime'))`), 23 updatedAt: text('updated_at').notNull().default(sql`(datetime('now', 'localtime'))`), 24 }); 25 26 export type User = typeof users.$inferSelect; 27 export type UserInsert = typeof users.$inferInsert; ``` *** Configure app for database usage by creating `src/db/db.ts` as such: src/db/db.ts ```ts 1 import { drizzle } from "drizzle-orm/d1"; 2 import { env } from "cloudflare:workers"; 3 import * as schema from "./schema"; 4 5 export const db = drizzle(env.DB, { schema }); ``` *** And here’s an example for accessing the database: src/app/pages/dashboard.tsx ```ts 1 import { db } from "@/db/db"; 2 import { users, type User } from "@/db/schema"; 3 4 export const Dashboard = async ({ ctx }: { ctx: any }) => { 5 const allUsers: User[] = await db.select().from(users); 6 } ``` *** Before running the app and accessing your local database, you’ll need to generate and apply a migration based on your schema: ```bash npm run migrate:new npm run migrate:dev ``` Now you should be able to start the dev server (`npm run dev`) and access the database per your schema. # Debugging > How to debug your RedwoodSDK application in VS Code. This guide explains how to set up VS Code or Cursor to debug both your client-side and server-side (worker) code. ## Setup [Section titled “Setup”](#setup) For debugging to work, you’ll need a `.vscode/launch.json` file in your project. If you created your project with `create-rwsdk`, this file should already be there. If not, create the file and add the following configuration: .vscode/launch.json ```json { "version": "0.2.0", "configurations": [ { "name": "Debug Vite App (Client)", "type": "chrome", "request": "launch", "url": "http://localhost:5173", "webRoot": "${workspaceFolder}", "sourceMaps": true, "skipFiles": ["/**"] }, { "name": "Attach to Worker", "type": "node", "request": "attach", "port": 9229, "address": "localhost", "restart": false, "protocol": "inspector", "skipFiles": ["/**"], "localRoot": "${workspaceFolder}", "remoteRoot": "${workspaceFolder}", "sourceMaps": true }, { "name": "Attach to Worker (Port 9299)", "type": "node", "request": "attach", "port": 9299, "address": "localhost", "restart": false, "protocol": "inspector", "skipFiles": ["/**"], "localRoot": "${workspaceFolder}", "remoteRoot": "${workspaceFolder}", "sourceMaps": true } ] } ``` Note You can also find the latest version of this configuration in the [starter project repository](https://github.com/redwoodjs/sdk/blob/main/starter/.vscode/launch.json). ## Debugging Server-Side Code (Worker) [Section titled “Debugging Server-Side Code (Worker)”](#debugging-server-side-code-worker) To debug server-side code, such as server components or server functions: 1. **Start the dev server** in your terminal: ```bash npm run dev ``` 2. **Attach the debugger**: * In VS Code, open the “Run and Debug” panel (Cmd+Shift+D on Mac, Ctrl+Shift+D on Windows). * Select **“Attach to Worker”** from the dropdown and press the play button (F5). * If the terminal shows a message like “Default inspector port 9229 not available, using 9299 instead,” use the **“Attach to Worker (Port 9299)”** configuration instead. 3. **Set breakpoints**: Place breakpoints in your server-side code (e.g., in `src/worker.tsx` or a server component). They should now be hit when the code is executed. ## Debugging Client-Side Code [Section titled “Debugging Client-Side Code”](#debugging-client-side-code) 1. Make sure your dev server is already running. 2. In the “Run and Debug” panel, select **“Debug Vite App (Client)”** and press F5. 3. This will open a new Chrome window. Breakpoints in your client-side code (e.g., components with a `"use client"` directive) will now work. ## Limitations [Section titled “Limitations”](#limitations) Currently, debugging server-side rendering (SSR) of components is not fully supported. However, you can debug other worker code paths, including server components and server functions, as well as all client-side code. # Email Templates > How to create and use layout components in your RedwoodSDK project The [React Email](https://react.email/) project makes it easy to create email templates. It includes unstyled components and the Tailwind CSS support. ## Installation [Section titled “Installation”](#installation) Install the React Email components to your project by running the following command in the Terminal: ```bash pnpm add @react-email/components ``` This assumes that you’ve already installed `Resend` to your project. If not, you can install the React Email components and Resend in one go: ```bash pnpm add @react-email/components resend ``` Then, install the React Email Preview: ```bash npx create-email@latest ``` ![](/_astro/installed-react-email.DnuQ-ShD_sFySL.webp) This will create a new directory called `react-email-starter`. ```bash cd react-email-starter pnpm install pnpm dev ``` ![](/_astro/react-email-dev.Diq3CYXZ_ZLJwUC.webp) Now, you can open a browser at and see the preview. ![](/_astro/react-email-preview-in-browser.L7ZvsuqJ_1EQRdQ.webp) In the left sidebar, you’ll notice that React Email has 4 email examples you can preview. These correspond with the `.tsx` files inside the `react-email-starter/emails` directory: ![](/_astro/react-email-template-files.CYOUFaBl_otOvd.webp) All the assets for these example emails are within the `react-email-starter/emails/static` directory. You can delete all the contents inside the `emails` directory. Or, oftentimes, I’ll create a sub directory called `archive` and move the contents there. ## Creating a New Email Template [Section titled “Creating a New Email Template”](#creating-a-new-email-template) 1. Create a new file in the `emails` directory with a `.tsx` extension. 2. Inside your email file, paste the following code: src/emails/welcome-email.tsx ```tsx 1 import { 2 Body, 3 Container, 4 Head, 5 Heading, 6 Html, 7 Preview, 8 } from "@react-email/components"; 9 10 export default function WelcomeEmail() { 11 12 13 Hello World 14 15 16 Hello World 17 18 19 20 ); ``` Default Export Your React Email component must be a default export in order for the browser preview to pick it up. You’ll notice that React Email has several primitives, making it easy to create a new email template. You can see a full list of components on the [React Email documentation](https://react.email/docs/introduction). React Email also has several [prebuilt components](https://react.email/components) for [galleries](https://react.email/components/gallery), [e-commerce](https://react.email/components/ecommerce), [articles](https://react.email/components/articles), etc. 3. Adjust the template to your liking. Keep in mind that you can pass in props, personalizing the template and making it more dynamic. src/emails/welcome-email.tsx ```tsx 10 interface WelcomeEmailProps { 11 name: string; 12 } 13 14 export default function WelcomeEmail({ name }: WelcomeEmailProps) { 15 16 17 Hello {name} 18 19 20 Hello {name} 21 22 23 24 ); ``` 4. When you’ve finished building the email template, you can get the code by clicking on the Code button in the browser preview. ![](/_astro/react-email-get-code.ClyOhZRP_2oP0zJ.webp) From here, you download or copy and paste the React code, HTML, or Plain Text into your project. Create a new folder inside the `src/app` directory called `emails` and paste the React Email code into the new file. * src/ * app/ * emails/ * WelcomeEmail.tsx 5. Updating your Resend Code: Now, you can update your Resend code (pulled from the example on [Sending Email page](/guides/email/sending-email)) to use the new email template. src/app/emails/WelcomeEmail.tsx ```tsx 1 import WelcomeEmail from "@/app/emails/WelcomeEmail"; 2 3 const { data, error } = await resend.emails.send({ 4 from: "Acme ", 5 to: email, 6 subject: "👋 Hello World", 7 react: , 8 }); ``` ## Using Tailwind within Email Templates [Section titled “Using Tailwind within Email Templates”](#using-tailwind-within-email-templates) 1. `import` the Tailwind component at the top of your email template: src/emails/WelcomeEmail.tsx ```tsx 1 import { Tailwind } from "@react-email/components"; ``` 2. Wrap your email template in the `Tailwind` component: src/emails/WelcomeEmail.tsx ```tsx Hello World ``` Tailwind Version React Email uses the 3.4.10 version of Tailwind CSS. 3. If you want to use a custom theme, this will need to be defined as a `config` prop, passed into the `Tailwind` component. src/emails/WelcomeEmail.tsx ```tsx ... ``` If you go this route, we recommend putting the `config` prop in a separate file, importing it into your email template, and passing it into the `Tailwind` component. src/emails/tailwind.config.ts ```tsx 1 export default { 2 theme: { 3 extend: { 4 } 5 } 6 } ``` src/emails/WelcomeEmail.tsx ```tsx 1 import tailwindConfig from "./tailwind.config"; 2 3 ``` ## Further Reading [Section titled “Further Reading”](#further-reading) * [React Email](https://react.email/) * [React Email Components](https://react.email/docs/components/html) * [React Email Pre-Built Components](https://react.email/components) * [React Email and Tailwind CSS Documentation](https://react.email/docs/components/tailwind) # Sending Email > How to send email in your RedwoodSDK project Email Providers [Resend](https://resend.com/) is one of the most popular email services for developers. It’s easy to use and has a generous free tier. But, there are plenty of other wonderful providers: [SendGrid](https://sendgrid.com/), [Mailgun](https://www.mailgun.com/), [Postmark](https://postmarkapp.com/), and [Mail Trap](https://mailtrap.io/). ## Setting Up Resend [Section titled “Setting Up Resend”](#setting-up-resend) 1. Go to [Resend](https://resend.com/) and click on **Get Started** to create an account. ![](/_astro/1-resend-homepage.CMXiIB0L_2qT1Ov.webp) ![](/_astro/2-resend-create-account.4usL4MAt_Z1kXJUp.webp) 2. Once you’ve created an account, you’ll be redirected to a page with instructions for sending your first email. ![](/_astro/3-resend-send-first-email.BbVrK_KD_ejsyT.webp) Create an API key by clicking on the “Add API Key” button. ![](/_astro/4-resend-create-api-key.C2Zm3mkw_29TPu6.webp) Copy the API and go to your .env file. Add a variable called RESEND\_API and paste your key: ```title=".env" RESEND_API=re_1234567890 ``` Environmental Variables If you don’t have an `.env` file, you can duplicate the `.env.example` file and rename it to `.env`. Cloudflare uses a `.dev.vars` file for environment variables. But, the common practice is to use a `.env` file. So, we’ve created a symlink for you. Anytime you make a change to the `.env` file, it will automatically update the `.dev.vars` file. If you’re missing the `.dev.vars` file, as soon as you run `pnpm dev`, it will be created for you. Environmental Variables You can find more information about [Environmental Variables here.](http://localhost:4321/core/env-vars) 3. Install the Resend package. Within the Terminal, run: ```bash pnpm add resend ``` Your setup is complete! 🥳 Now, we can send email. ## Sending Email [Section titled “Sending Email”](#sending-email) Now, we can send email. src/app/auth/actions.ts ```tsx 1 import { Resend } from "resend"; 2 3 const resend = new Resend(env.RESEND_API); 4 const { data, error } = await resend.emails.send({ 5 from: "Acme ", 6 to: email, 7 subject: "👋 Hello World", 8 text: `Hello World`, 9 }); ``` Verifying your Domain Until your domain with Resend, there are several important limitations and restrictions to be aware of: 1. **Sending from Unverified Domains**: * You can only send emails from Resend’s default addresses (`onboarding@resend.dev`) before your custom domain is verified. Sending from your own domain or branded addresses is not allowed until verification is complete. 2. **Deliverability and Professionalism**: * Emails sent from unverified domains or default addresses are intended only for initial testing. These emails are more likely to be flagged as spam or appear unprofessional to recipients 3. **Sending Limits**: * Free accounts have a daily sending limit of 100 emails per day and a monthly limit of 3,000 emails. These limits apply regardless of whether your domain is verified, but sending from your own domain is only possible after verification. * All accounts, including those not yet verified, are subject to a rate limit of 2 requests per second. This can be increased for trusted senders after domain verification and by contacting support. You can find more information about verifying your domain on [Resend’s documentation](https://resend.com/docs/dashboard/domains/introduction). When using Resend, you can send `text`, `react`, or `html` emails. ### Example: Sending Text Email [Section titled “Example: Sending Text Email”](#example-sending-text-email) ```tsx const { data, error } = await resend.emails.send({ from: "Acme ", to: email, subject: "👋 Hello World", text: `Hello World`, }); ``` ### Example: Sending React Email [Section titled “Example: Sending React Email”](#example-sending-react-email) ```tsx const Email = ({ name }: { name: string }) => { return
Hello {name}
; }; const { data, error } = await resend.emails.send({ from: "Acme ", to: email, subject: "👋 Hello World", react: , }); ``` Resend also backs the [React Email](https://react.email/) project. This library includes unstyled components and the Tailwind CSS support. More under [Email Templates](/guides/email/email-templates). ### Example: Sending HTML Email [Section titled “Example: Sending HTML Email”](#example-sending-html-email) ```tsx const { data, error } = await resend.emails.send({ from: "Acme ", to: email, subject: "👋 Hello World", html: "

Hello World

", }); ``` ## Test Emails [Section titled “Test Emails”](#test-emails) > Resend provides a set of safe email addresses specifically designed for testing, ensuring that you can simulate different email events without affecting your domain’s reputation. [Resend Documentation](https://resend.com/docs/knowledge-base/what-email-addresses-to-use-for-testing#list-of-addresses-to-use) A lot of developers will use `@example.com` or `@test.com` for testing. However, these addresses will often reject messages, leading to bounces. A high bounce rate can negatively impact your sender reputation and affect future deliverability. Therefore, Resend will return a `422` error if you attempt to use these addresses. Instead, Resend provides the following addresses: | **Address** | **Delivery Event Simulated** | | ---------------------- | ---------------------------- | | `delivered@resend.dev` | Email was delivered | | `bounced@resend.dev` | Email was bounced | ## Constants File [Section titled “Constants File”](#constants-file) We recommend creating a constants file to store reusable values. Inside your `src/app/shared` directory, create a new file called `constants.ts`. * src/ * app/ * shared/ * constants.ts Inside the `constants.ts` file, add the following: ```tsx 1 export const CONSTANTS = Object.freeze({ 2 FROM_EMAIL: "Acme ", 3 }); ``` Now, you can use the `FROM_EMAIL` constant in your code. ```ts import { CONSTANTS } from "~/shared/constants"; ... const { data, error } = await resend.emails.send({ from: CONSTANTS.FROM_EMAIL, to: email, subject: "👋 Hello World", text: `Hello World`, }); ``` Example Repository You can find an example repository with the code in this guide [here](https://github.com/ahaywood/email-kitchen). ## Further Reading [Section titled “Further Reading”](#further-reading) * [Resend’s Official Documentation](https://resend.com/docs/introduction) * [What email addresses to use for testing?](https://resend.com/docs/knowledge-base/what-email-addresses-to-use-for-testing#list-of-addresses-to-use) # Ark UI > A step-by-step guide for installing and configuring Ark UI headless components in RedwoodSDK projects, with styling examples using Tailwind CSS. ## Installing Ark UI [Section titled “Installing Ark UI”](#installing-ark-ui) Ark UI is a headless component library that provides unstyled, accessible components powered by state machines. It gives you complete control over styling while handling all the complex behavior and accessibility. 1. Install Ark UI * npm ```sh npm i @ark-ui/react ``` * pnpm ```sh pnpm add @ark-ui/react ``` * yarn ```sh yarn add @ark-ui/react ``` 2. Import and use components Ark UI components follow a namespace pattern. Here’s an example with a Dialog: src/app/pages/Home.tsx ```tsx 1 import { Dialog } from "@ark-ui/react/dialog"; 2 import { Portal } from "@ark-ui/react/portal"; 3 4 export function Home() { 5 return ( 6 7 Open Dialog 8 9 10 11 12 13 Dialog Title 14 15 This is a dialog description. 16 17 Close 18 19 20 21 22 ); 23 } ``` Note Components are completely unstyled by default. You’ll see functionality but no visual styling until you add CSS. 3. Run development server * npm ```sh npm run dev ``` * pnpm ```sh pnpm run dev ``` * yarn ```sh yarn run dev ``` ## Styling Ark UI Components [Section titled “Styling Ark UI Components”](#styling-ark-ui-components) Since Ark UI components are headless, you need to style them yourself. Each component part includes `data-scope` and `data-part` attributes for easy targeting. ### Using Tailwind CSS [Section titled “Using Tailwind CSS”](#using-tailwind-css) If you’re using [Tailwind CSS](/guides/frontend/tailwind), you can style components with utility classes: src/components/ui/dialog.tsx ```tsx 1 import { Dialog } from "@ark-ui/react/dialog"; 2 import { Portal } from "@ark-ui/react/portal"; 3 4 export function StyledDialog({ children }: { children: React.ReactNode }) { 5 return ( 6 7 8 Open Dialog 9 10 11 12 13 14 15 16 Dialog Title 17 18 19 Dialog description goes here. 20 21 22
{children}
23 24
25 26 Cancel 27 28
29
30
31
32
33 ); 34 } ``` ### Using Vanilla CSS [Section titled “Using Vanilla CSS”](#using-vanilla-css) Alternatively, target components using their data attributes: src/app/styles.css ```css 1 /* Dialog Backdrop */ 2 [data-scope="dialog"][data-part="backdrop"] { 3 position: fixed; 4 inset: 0; 5 background-color: rgba(0, 0, 0, 0.5); 6 backdrop-filter: blur(4px); 7 } 8 9 /* Dialog Content */ 10 [data-scope="dialog"][data-part="content"] { 11 background-color: white; 12 border-radius: 8px; 13 box-shadow: 0 10px 25px rgba(0, 0, 0, 0.1); 14 max-width: 28rem; 15 padding: 1.5rem; 16 } 17 18 /* Dialog Title */ 19 [data-scope="dialog"][data-part="title"] { 20 font-size: 1.5rem; 21 font-weight: 700; 22 margin-bottom: 0.5rem; 23 } ``` Tip For component states like `disabled`, `checked`, or `open`, Ark UI adds data attributes you can target with CSS selectors like `[data-disabled]`, `[data-checked]`, or `[data-state="open"]`. ## Component Patterns [Section titled “Component Patterns”](#component-patterns) ### Controlled Components [Section titled “Controlled Components”](#controlled-components) ```tsx 1 import { Slider } from "@ark-ui/react/slider"; 2 import { useState } from "react"; 3 4 export function ControlledSlider() { 5 const [value, setValue] = useState([30]); 6 7 return ( 8 setValue(details.value)} 11 > 12 Volume: {value} 13 14 15 16 17 18 19 20 21 22 ); 23 } ``` ### TypeScript Support [Section titled “TypeScript Support”](#typescript-support) Ark UI is fully typed. Import types from component namespaces: ```tsx 1 import { Select } from "@ark-ui/react/select"; 2 import type { SelectRootProps } from "@ark-ui/react/select"; 3 4 interface CustomSelectProps extends SelectRootProps { 5 label: string; 6 options: string[]; 7 } 8 9 export function CustomSelect({ label, options, ...props }: CustomSelectProps) { 10 return ( 11 12 {label} 13 {/* Select implementation */} 14 15 ); 16 } ``` Tree Shaking Import components from specific paths for better tree shaking: `import { Dialog } from "@ark-ui/react/dialog"` instead of `import { Dialog } from "@ark-ui/react"`. ## Pre-Styled Options [Section titled “Pre-Styled Options”](#pre-styled-options) If you want pre-styled Ark UI components instead of building from scratch: * **[Park UI](https://park-ui.com/)** - Ark UI components styled with Panda CSS * **[Tark UI](https://tarkui.com/)** - Ark UI components styled with Tailwind CSS ## Further Reading [Section titled “Further Reading”](#further-reading) * [Ark UI Documentation](https://ark-ui.com/) * [Ark UI Components](https://ark-ui.com/docs/components/accordion) * [Ark UI GitHub](https://github.com/chakra-ui/ark) * [Zag.js State Machines](https://zagjs.com/) # Chakra UI > A step-by-step guide for installing and configuring Chakra UI v3 in RedwoodSDK projects, including customization options and theming techniques. ## Installing Chakra UI [Section titled “Installing Chakra UI”](#installing-chakra-ui) Since RedwoodSDK is based on React and Vite, we can work through the [“Using Vite” documentation](https://chakra-ui.com/docs/get-started/frameworks/vite) from Chakra UI. Version Requirements The minimum Node version required is Node.20.x. Chakra UI v3 represents a major rewrite with significant changes from v2, including new dependencies, component structures, and theming approaches. 1. Install Chakra UI * npm ```sh npm i @chakra-ui/react @emotion/react ``` * pnpm ```sh pnpm add @chakra-ui/react @emotion/react ``` * yarn ```sh yarn add @chakra-ui/react @emotion/react ``` Removed Dependencies Unlike v2, Chakra UI v3 no longer requires `@emotion/styled` or `framer-motion`. These packages have been removed to improve performance and reduce bundle size. 2. Add Component Snippets Chakra UI v3 introduces a snippet-based system that gives you full control over components. Snippets are pre-built component compositions that are copied into your project. ```bash npx @chakra-ui/cli snippet add ``` This command adds the default snippet set and writes files into `src/components/ui/`. You can also add all snippets or choose specific ones. Tip If you find the number of snippets overwhelming, you can remove the ones you don’t need after installation. Only add snippets for components you plan to use. 3. Configure TypeScript Paths Update your `tsconfig.json` to include path mappings for the snippets: tsconfig.json ```diff { "compilerOptions": { "target": "ESNext", +"module": "ESNext", +"moduleResolution": "Bundler", +"skipLibCheck": true, "paths": { "@/*": ["./src/*"] } } } ``` For JavaScript projects, create a `jsconfig.json` file with the same configuration. 4. Install Vite TypeScript Paths Plugin To sync your TypeScript paths with Vite, install the `vite-tsconfig-paths` plugin: * npm ```sh npx install -D vite-tsconfig-paths ``` * pnpm ```sh pnpm install -D vite-tsconfig-paths ``` * yarn ```sh yarn install -D vite-tsconfig-paths ``` 5. Configure the Vite Plugin vite.config.mts ```diff 1 import { defineConfig } from "vite"; 2 import react from "@vitejs/plugin-react"; 3 +import tsconfigPaths from "vite-tsconfig-paths"; 4 import { redwood } from "rwsdk/vite"; 5 import { cloudflare } from "@cloudflare/vite-plugin"; 6 7 export default defineConfig({ 8 + plugins: [ 9 cloudflare({ 10 viteEnvironment: { name: "worker" }, 11 }), 12 redwood(), 13 react(), 14 tsconfigPaths(), 15 ], 16 }); ``` 6. Set Up the Provider The Chakra UI provider needs to wrap your application. In RedwoodSDK, you’ll want to add this to your root component or layout. First, create a provider component if the snippet didn’t generate one: src/components/ui/provider.tsx ```tsx 1 import { ChakraProvider, defaultSystem } from "@chakra-ui/react"; 2 import { ColorModeProvider } from "@/components/ui/color-mode"; 3 4 export function Provider(props: { children: React.ReactNode }) { 5 return ( 6 7 {props.children} 8 9 ); 10 } ``` Then wrap your routes with a layout: src/app/layouts/AppLayout.tsx ```tsx 1 import { Provider } from "@/components/ui/provider"; 2 3 export function AppLayout({ children }: { children?: React.ReactNode }) { 4 return {children}; 5 } ``` src/worker.tsx ```diff 1 +import { layout, render, route } from "rwsdk/router"; 2 import { defineApp } from "rwsdk/worker"; 3 4 import { Document } from "@/app/Document"; 5 import { AppLayout } from "@/app/layouts/AppLayout"; 6 +import { setCommonHeaders } from "@/app/headers"; 7 import { Home } from "@/app/pages/Home"; 8 9 export default defineApp([ 10 setCommonHeaders(), 11 render(Document, [layout(AppLayout, [route("/", Home)])]), 12 ]); ``` 7. Test Your Installation Try using some Chakra UI components in your app to verify everything is working: src/app/pages/Home.tsx ```tsx 1 import { Button, HStack, Heading } from "@chakra-ui/react"; 2 3 export function Home() { 4 return ( 5
6 Welcome to Chakra UI v3 7 8 9 10 11
12 ); 13 } ``` 8. Run Development Server * npm ```sh npm run dev ``` * pnpm ```sh pnpm run dev ``` * yarn ```sh yarn run dev ``` ## Customizing Chakra UI [Section titled “Customizing Chakra UI”](#customizing-chakra-ui) Chakra UI v3 uses a completely new theming system based on the `createSystem` API, inspired by Panda CSS. The old `extendTheme` approach from v2 is no longer used. ### Creating a Custom System [Section titled “Creating a Custom System”](#creating-a-custom-system) Create a theme configuration file: src/theme.ts ```ts 1 import { createSystem, defaultConfig, defineConfig } from "@chakra-ui/react"; 2 3 const customConfig = defineConfig({ 4 theme: { 5 tokens: { 6 colors: { 7 brand: { 8 50: { value: "#e6f7ff" }, 9 100: { value: "#bae7ff" }, 10 200: { value: "#91d5ff" }, 11 300: { value: "#69c0ff" }, 12 400: { value: "#40a9ff" }, 13 500: { value: "#1890ff" }, 14 600: { value: "#096dd9" }, 15 700: { value: "#0050b3" }, 16 800: { value: "#003a8c" }, 17 900: { value: "#002766" }, 18 }, 19 }, 20 fonts: { 21 heading: { value: "'Inter', sans-serif" }, 22 body: { value: "'Inter', sans-serif" }, 23 }, 24 }, 25 semanticTokens: { 26 colors: { 27 "bg.primary": { 28 value: { _light: "{colors.white}", _dark: "{colors.gray.900}" }, 29 }, 30 "text.primary": { 31 value: { _light: "{colors.gray.900}", _dark: "{colors.gray.100}" }, 32 }, 33 }, 34 }, 35 }, 36 }); 37 38 export const system = createSystem(defaultConfig, customConfig); ``` ### Using Your Custom System [Section titled “Using Your Custom System”](#using-your-custom-system) Update the provider to use your custom system: src/components/ui/provider.tsx ```diff 1 import { ChakraProvider } from "@chakra-ui/react"; 2 +import { system } from "@/theme"; 3 import { ColorModeProvider } from "@/components/ui/color-mode"; 4 5 export function Provider(props: { children: React.ReactNode }) { 6 +return ( 7 8 {props.children} 9 10 ); 11 } ``` ### Customization Options [Section titled “Customization Options”](#customization-options) Note The new theming system uses **tokens** (design primitives), **semantic tokens** (contextual tokens that reference other tokens), and **recipes** (component variants) for styling. #### Tokens [Section titled “Tokens”](#tokens) Tokens are the foundation of your design system. They represent raw design values: ```ts 1 defineConfig({ 2 theme: { 3 tokens: { 4 colors: { 5 // Color tokens 6 primary: { value: "#3182ce" }, 7 }, 8 spacing: { 9 // Spacing tokens 10 xs: { value: "0.5rem" }, 11 sm: { value: "1rem" }, 12 }, 13 radii: { 14 // Border radius tokens 15 base: { value: "0.375rem" }, 16 }, 17 }, 18 }, 19 }); ``` #### Semantic Tokens [Section titled “Semantic Tokens”](#semantic-tokens) Semantic tokens provide contextual meaning and can change based on conditions (like color mode): ```ts 1 defineConfig({ 2 theme: { 3 semanticTokens: { 4 colors: { 5 "bg.canvas": { 6 value: { 7 _light: "{colors.white}", 8 _dark: "{colors.gray.950}", 9 }, 10 }, 11 "text.heading": { 12 value: { 13 _light: "{colors.gray.900}", 14 _dark: "{colors.gray.50}", 15 }, 16 }, 17 }, 18 }, 19 }, 20 }); ``` #### Recipes [Section titled “Recipes”](#recipes) Recipes define component variants and styling patterns: ```ts 1 defineConfig({ 2 theme: { 3 recipes: { 4 button: { 5 base: { 6 fontWeight: "semibold", 7 borderRadius: "md", 8 }, 9 variants: { 10 variant: { 11 solid: { 12 bg: "brand.500", 13 color: "white", 14 }, 15 outline: { 16 borderWidth: "1px", 17 borderColor: "brand.500", 18 color: "brand.500", 19 }, 20 }, 21 }, 22 }, 23 }, 24 }, 25 }); ``` ### Ejecting the Default Theme [Section titled “Ejecting the Default Theme”](#ejecting-the-default-theme) If you want complete control over all tokens and recipes, you can eject the default theme: ```bash npx @chakra-ui/cli eject --outdir src/theme ``` This generates a file containing all default Chakra UI tokens and recipes, which you can then customize as needed. Caution Ejecting the theme gives you maximum control but also means you’re responsible for maintaining all theme values. Use this approach only if you need extensive customization. ## Color Mode [Section titled “Color Mode”](#color-mode) Chakra UI v3 uses `next-themes` for color mode management instead of the built-in color mode from v2. ### Using Color Mode [Section titled “Using Color Mode”](#using-color-mode) The snippet system should have generated a color mode component. You can use the `useColorMode` hook: ```tsx 1 import { Button } from "@chakra-ui/react"; 2 import { useColorMode } from "@/components/ui/color-mode"; 3 4 export function ColorModeToggle() { 5 const { colorMode, toggleColorMode } = useColorMode(); 6 7 return ( 8 11 ); 12 } ``` ### Forcing a Color Mode [Section titled “Forcing a Color Mode”](#forcing-a-color-mode) To lock a section to a specific color mode, use the `Theme` component: ```tsx 1 import { Theme } from "@chakra-ui/react"; 2 import { ColorModeProvider } from "@/components/ui/color-mode"; 3 4 export function DarkSection({ children }) { 5 return ( 6 7 {children} 8 9 ); 10 } ``` ## Component Changes from v2 to v3 [Section titled “Component Changes from v2 to v3”](#component-changes-from-v2-to-v3) Breaking Changes Chakra UI v3 introduces significant component API changes. Most components now use a namespace pattern with compound components. ### Common Migration Patterns [Section titled “Common Migration Patterns”](#common-migration-patterns) #### Before (v2) [Section titled “Before (v2)”](#before-v2) ```tsx 1 2 Actions 3 4 Download 5 Create a Copy 6 7 ``` #### After (v3) [Section titled “After (v3)”](#after-v3) ```tsx 1 2 3 4 5 6 Download 7 Create a Copy 8 9 ``` ### Icons [Section titled “Icons”](#icons) The `@chakra-ui/icons` package has been deprecated. Use icon libraries like `react-icons` or `lucide-react`: ```tsx 1 import { Icon } from "@chakra-ui/react"; 2 import { FaDownload } from "react-icons/fa"; 3 4 export function DownloadButton() { 5 return ( 6 12 ); 13 } ``` ## Managing Snippets [Section titled “Managing Snippets”](#managing-snippets) ### Adding More Snippets [Section titled “Adding More Snippets”](#adding-more-snippets) You can add additional snippets at any time: ```bash # Add all snippets npx @chakra-ui/cli snippet add --all # Add a specific snippet npx @chakra-ui/cli snippet add button # List available snippets npx @chakra-ui/cli snippet list # Specify output directory npx @chakra-ui/cli snippet add --outdir ./src/components/ui ``` ### Customizing Snippets [Section titled “Customizing Snippets”](#customizing-snippets) Since snippets are copied directly into your project, you have complete control to modify them. Edit the files in `src/components/ui/` to match your needs. ## Type Generation [Section titled “Type Generation”](#type-generation) Generate TypeScript types for your custom theme to get autocompletion and type safety: ```bash # Generate types for your theme npx @chakra-ui/cli typegen src/theme.ts # Watch for changes and regenerate npx @chakra-ui/cli typegen src/theme.ts --watch # Generate strict types for component variants npx @chakra-ui/cli typegen src/theme.ts --strict ``` ## Further Reading [Section titled “Further Reading”](#further-reading) * [Chakra UI v3 Documentation](https://chakra-ui.com/docs/get-started/installation) * [Migration Guide from v2 to v3](https://chakra-ui.com/docs/get-started/migration) * [Chakra UI CLI Documentation](https://chakra-ui.com/docs/get-started/cli) * [Theming and Customization](https://chakra-ui.com/docs/theming/customization/overview) * [Component Documentation](https://chakra-ui.com/docs/components/concepts/overview) * [next-themes Documentation](https://github.com/pacocoursey/next-themes) # Client Side Navigation (Single Page Apps) > Implement client side navigation in your RedwoodSDK project ## What is Client Side Navigation? [Section titled “What is Client Side Navigation?”](#what-is-client-side-navigation) Client-side navigation is a technique that allows users to move between pages without a full-page reload. Instead of the browser reloading the entire HTML document, the JavaScript runtime intercepts navigation events (like link clicks), fetches the next page’s content (usually as JavaScript modules or RSC payload), and updates the current view. This approach is commonly referred to as a Single Page App (SPA). In RedwoodSDK, you get SPA-like navigation with server-fetched React Server Components (RSC), so it’s fast and dynamic, but still uses the server for rendering. RedwoodSDK uses **RSC RPC** to emulate client-side navigation. src/client.tsx ```tsx 1 import { initClient, initClientNavigation } from "rwsdk/client"; 2 3 const { handleResponse, onHydrated } = initClientNavigation(); 4 initClient({ handleResponse, onHydrated }); ``` Note **Note:** The `onHydrated` callback is optional but recommended. It’s required if you’re using prefetching (see the [Prefetching Routes](#prefetching-routes) section), and it also handles cache eviction which helps prevent memory bloat. If you’re not using prefetching, you can omit it and only pass `handleResponse` to `initClient`. Once this is initialized, internal `` links will no longer trigger full-page reloads. Instead, the SDK will: 1. Intercept the link click, 2. Push the new URL to the browser’s history, 3. Fetch the new page’s RSC payload from the server using a **GET** request to the current URL with a `?__rsc` query parameter (making it cache-friendly for browsers and CDNs), 4. And hydrate it on the client. RedwoodSDK keeps everything minimal and transparent. No magic routing system. No nested router contexts. You get the benefits of a modern SPA without giving up control. ## Transitions and View Animations [Section titled “Transitions and View Animations”](#transitions-and-view-animations) Client-side navigation enables you to animate between pages without jank. Pair it with View Transitions in React 19 to create seamless visual transitions. ## Caveats [Section titled “Caveats”](#caveats) No routing system is included: RedwoodSDK doesn’t provide a client-side router. You can layer your own state management or page transitions as needed. Only internal links are intercepted: RedwoodSDK will only handle links pointing to the same origin. External links () or those with `target="\_blank"` behave normally. Middleware still runs: Every navigation hits your server again — so auth checks, headers, and streaming behavior remain intact. ## Configuring Scroll Behaviour [Section titled “Configuring Scroll Behaviour”](#configuring-scroll-behaviour) By default RedwoodSDK jumps to the **top** of the new page the moment the content finishes rendering – just like a traditional full page load. If you would like a different experience you can adjust it with `initClientNavigation`: Smooth scroll ```tsx 1 import { initClientNavigation } from "rwsdk/client"; 2 3 initClientNavigation({ 4 scrollBehavior: "smooth", 5 }); ``` ### Disable automatic scrolling [Section titled “Disable automatic scrolling”](#disable-automatic-scrolling) For infinite-scroll feeds or chat applications you might want to *keep* the user exactly where they were, by setting `history.scrollRestoration` to `"manual"` before each navigation action you’ll disable the automatic scrolling. src/client.tsx ```tsx 1 history.scrollRestoration = "manual"; ``` Alternatively you can set `scrollToTop: false` to disable it completely. src/client.tsx ```tsx 1 initClientNavigation({ 2 scrollToTop: false, 3 }); ``` ### Advanced: custom navigation callback [Section titled “Advanced: custom navigation callback”](#advanced-custom-navigation-callback) Need to run analytics or state updates before the request is sent? Provide your own `onNavigate` handler: ```tsx 1 initClientNavigation({ 2 scrollBehavior: "auto", 3 onNavigate: async () => { 4 await analytics.track("page_view", { path: window.location.pathname }); 5 }, 6 }); ``` ### Best Practices [Section titled “Best Practices”](#best-practices) * Use the default instant jump for content-heavy pages – it feels identical to a classic navigation and is the least surprising. * Prefer `scrollBehavior: "smooth"` for marketing sites where visual polish is important. * Set `scrollToTop: false` for timelines or lists that the user is expected to scroll through continuously. That’s it! No additional code or router configuration required – RedwoodSDK watches for DOM updates and performs the scroll automatically. ## Programmatic Navigation [Section titled “Programmatic Navigation”](#programmatic-navigation) While intercepting link clicks covers most navigation needs, you sometimes need to navigate programmatically - after a form submission, login event, or other user action. The `navigate` function allows you to trigger navigation from anywhere in your code: Navigate after form submission ```tsx 1 import { navigate } from "rwsdk/client"; 2 3 function handleFormSubmit(event: FormEvent) { 4 event.preventDefault(); 5 6 navigate("/dashboard"); 7 } ``` Redirect after login, replacing history ```tsx 1 import { navigate } from "rwsdk/client"; 2 3 async function handleLogin(credentials: Credentials) { 4 await loginUser(credentials); 5 6 navigate("/account", { history: "replace" }); 7 } ``` Navigate with custom scroll behavior ```tsx 1 import { navigate } from "rwsdk/client"; 2 3 function handleSpecialAction() { 4 navigate("/results", { 5 info: { 6 scrollBehavior: "smooth", 7 scrollToTop: true, 8 }, 9 }); 10 } ``` The `navigate` function accepts two parameters: * `href`: The destination path * `options`: An optional configuration object with: * `history`: Either `'push'` (default) to add a new history entry, or `'replace'` to replace the current one * `info.scrollToTop`: Whether to scroll to the top after navigation (default: `true`) * `info.scrollBehavior`: How to scroll - `'instant'` (default), `'smooth'`, or `'auto'` ## Prefetching Routes [Section titled “Prefetching Routes”](#prefetching-routes) You can improve navigation performance by prefetching routes that users are likely to visit next. RedwoodSDK automatically detects `` elements in your pages and fetches those routes in the background. ### How it Works [Section titled “How it Works”](#how-it-works) After each client-side navigation, RedwoodSDK scans the document for `` elements that point to same-origin routes. For each x-prefetch link found, it issues a background GET request with the `__rsc` query parameter and an `x-prefetch: true` header. Successful responses are stored in the browser’s Cache API. When a user navigates to a prefetched route, the cached response is used instead of making a network request, resulting in instant navigation. ### Basic Usage [Section titled “Basic Usage”](#basic-usage) Add `` tags to your pages or layouts to hint at likely next destinations: In a route or layout component (React 19) ```tsx 1 import { link } from "@/shared/links"; 2 3 export function HomePage() { 4 const aboutHref = link("/about"); 5 const contactHref = link("/contact"); 6 7 return ( 8 <> 9 {/* React 19 will hoist these tags into */} 10 11 12 13

Welcome

14
18 19 ); 20 } ``` ### Prefetching from Navigation Links [Section titled “Prefetching from Navigation Links”](#prefetching-from-navigation-links) A common pattern is to prefetch routes that are linked from the current page: Prefetching linked routes ```tsx 1 import { link } from "@/shared/links"; 2 3 export function BlogListPage({ posts }) { 4 return ( 5 <> 6 {posts.map((post) => { 7 const postHref = link("/blog/:slug", { slug: post.slug }); 8 return ( 9 15 ); 16 })} 17 18 ); 19 } ``` ### Cache Management [Section titled “Cache Management”](#cache-management) RedwoodSDK uses a generation-based cache eviction pattern: * Cache entries are automatically cleaned up after each navigation to ensure fresh content * Each browser tab maintains its own cache namespace * The system avoids races with in-flight prefetch requests * Cache entries are stored using the browser’s Cache API, following standard web platform semantics This ensures that prefetched content stays fresh while providing the performance benefits of cached navigation. ## API Reference [Section titled “API Reference”](#api-reference) ### `initClientNavigation(options?)` Experimental [Section titled “initClientNavigation(options?) ”](#initclientnavigationoptions) Initializes the client-side navigation. Call this function from your `client.tsx` entry point. **Returns:** An object with two properties that should be passed to `initClient`: * `handleResponse`: A function that handles navigation responses and errors (required for error handling) * `onHydrated`: A function that runs after each hydration to manage cache eviction and prefetching (optional but recommended; required if using prefetching) **Parameters:** * `options` (optional): A `ClientNavigationOptions` object: * `scrollToTop` (boolean, default: `true`): Whether to scroll to the top after navigation * `scrollBehavior` (`'instant' | 'smooth' | 'auto'`, default: `'instant'`): How scrolling happens * `onNavigate` (function, optional): Callback executed after history push but before RSC fetch **Example:** src/client.tsx ```tsx 1 import { initClient, initClientNavigation } from "rwsdk/client"; 2 3 const { handleResponse, onHydrated } = initClientNavigation(); 4 initClient({ handleResponse, onHydrated }); ``` **Example with options:** src/client.tsx ```tsx 1 import { initClient, initClientNavigation } from "rwsdk/client"; 2 3 const { handleResponse, onHydrated } = initClientNavigation({ 4 scrollBehavior: "smooth", 5 scrollToTop: true, 6 }); 7 initClient({ handleResponse, onHydrated }); ``` # Dark / Light Mode > A comprehensive guide to implementing dark and light mode themes in RedwoodSDK applications using cookies and direct DOM manipulation. This guide demonstrates how to implement dark and light mode themes in your RedwoodSDK application. The approach uses cookies to persist user preferences and direct DOM manipulation to toggle themes, without requiring a React context provider. Working Example See the [dark-mode playground](https://github.com/redwoodjs/sdk/tree/main/playground/dark-mode) for a complete, working implementation of this guide. ## Overview [Section titled “Overview”](#overview) The theme system supports three modes: * **`dark`**: Always use dark mode * **`light`**: Always use light mode * **`system`**: Follow the user’s system preference The implementation follows this flow: ```plaintext worker (read theme from cookie) ⮑ Document (set class on , calculate system theme before render) ⮑ Page components ⮑ ThemeToggle (client component that updates DOM and cookie) ``` ## Implementation [Section titled “Implementation”](#implementation) 1. **Read theme from cookie in the worker** In your `src/worker.tsx`, read the theme cookie and add it to the app context: src/worker.tsx ```tsx 1 import { render, route } from "rwsdk/router"; 2 import { defineApp } from "rwsdk/worker"; 3 4 import { Document } from "@/app/Document"; 5 import { Home } from "@/app/pages/Home"; 6 7 export interface AppContext { 8 theme?: "dark" | "light" | "system"; 9 } 10 11 export default defineApp([ 12 ({ ctx, request }) => { 13 // Read theme from cookie 14 const cookie = request.headers.get("Cookie"); 15 const match = cookie?.match(/theme=([^;]+)/); 16 ctx.theme = (match?.[1] as "dark" | "light" | "system") || "system"; 17 }, 18 render(Document, [route("/", Home)]), 19 ]); ``` 2. **Create a server action to set the theme** Create a server function that updates the theme cookie: src/app/actions/setTheme.ts ```tsx 1 "use server"; 2 3 import { requestInfo } from "rwsdk/worker"; 4 5 export async function setTheme(theme: "dark" | "light" | "system") { 6 requestInfo.response.headers.set( 7 "Set-Cookie", 8 `theme=${theme}; Path=/; Max-Age=31536000; SameSite=Lax`, 9 ); 10 } ``` 3. **Update Document to set theme class before render** The `Document` component needs to set the theme class on the `` element before React hydrates to prevent FOUC. This requires a small inline script: src/app/Document.tsx ```tsx 1 import React from "react"; 2 import { requestInfo } from "rwsdk/worker"; 3 import stylesUrl from "./styles.css?url"; 4 5 export const Document: React.FC<{ children: React.ReactNode }> = ({ 6 children, 7 }) => { 8 const theme = requestInfo?.ctx?.theme || "system"; 9 10 return ( 11 12 13 14 18 My App 19 20 21 22 23 {/* Script to set theme class before React hydrates */} 24 43 44 45 ); 46 }; ``` Preventing FOUC The inline script runs synchronously before React hydrates, ensuring the correct theme class is applied immediately. This prevents any flash of unstyled content when the page loads. 4. **Create a theme toggle component** Create a client component that toggles the theme by directly manipulating the DOM and calling the server action: src/app/components/ThemeToggle.tsx ```tsx 1 "use client"; 2 3 import { useEffect, useRef, useState } from "react"; 4 import { setTheme } from "../actions/setTheme"; 5 6 type Theme = "dark" | "light" | "system"; 7 8 export function ThemeToggle({ initialTheme }: { initialTheme: Theme }) { 9 const [theme, setThemeState] = useState(initialTheme); 10 const isInitialMount = useRef(true); 11 12 // Update DOM when theme changes 13 useEffect(() => { 14 const root = document.documentElement; 15 const shouldBeDark = 16 theme === "dark" || 17 (theme === "system" && 18 window.matchMedia("(prefers-color-scheme: dark)").matches); 19 20 if (shouldBeDark) { 21 root.classList.add("dark"); 22 } else { 23 root.classList.remove("dark"); 24 } 25 26 // Set data attribute for consistency 27 root.setAttribute("data-theme", theme); 28 29 // Persist to cookie via server action (only when theme actually changes, not on initial mount) 30 if (!isInitialMount.current) { 31 setTheme(theme).catch((error) => { 32 console.error("Failed to set theme:", error); 33 }); 34 } else { 35 isInitialMount.current = false; 36 } 37 }, [theme]); 38 39 // Listen for system theme changes when theme is "system" 40 useEffect(() => { 41 if (theme !== "system") return; 42 43 const mediaQuery = window.matchMedia("(prefers-color-scheme: dark)"); 44 const handleChange = () => { 45 const root = document.documentElement; 46 if (mediaQuery.matches) { 47 root.classList.add("dark"); 48 } else { 49 root.classList.remove("dark"); 50 } 51 }; 52 53 mediaQuery.addEventListener("change", handleChange); 54 return () => mediaQuery.removeEventListener("change", handleChange); 55 }, [theme]); 56 57 const toggleTheme = () => { 58 // Cycle through: system -> light -> dark -> system 59 if (theme === "system") { 60 setThemeState("light"); 61 } else if (theme === "light") { 62 setThemeState("dark"); 63 } else { 64 setThemeState("system"); 65 } 66 }; 67 68 return ( 69
70 Current theme: {theme} 71 78
79 ); 80 } ``` Tailwind Dark Mode This example uses Tailwind’s `dark:` variant. Make sure you have dark mode configured in your Tailwind setup. With Tailwind v4, you can use the `@custom-variant dark` directive in your CSS file. 5. **Use the theme toggle in your pages** Pass the theme from the context to your toggle component: src/app/pages/Home.tsx ```tsx 1 import { RequestInfo } from "rwsdk/worker"; 2 import { ThemeToggle } from "../components/ThemeToggle"; 3 4 export function Home({ ctx }: RequestInfo) { 5 const theme = ctx.theme || "system"; 6 7 return ( 8
9

Welcome

10 11
12 ); 13 } ``` ## Reading the Current Theme [Section titled “Reading the Current Theme”](#reading-the-current-theme) The `ThemeToggle` component above includes a display of the current theme. If you need to read the current theme in a separate client component, you can check the DOM directly: src/app/components/MyComponent.tsx ```tsx 1 "use client"; 2 3 import { useEffect, useState } from "react"; 4 5 export function MyComponent() { 6 const [isDark, setIsDark] = useState(false); 7 8 useEffect(() => { 9 // Check if dark class is present 10 setIsDark(document.documentElement.classList.contains("dark")); 11 12 // Optional: Listen for changes 13 const observer = new MutationObserver(() => { 14 setIsDark(document.documentElement.classList.contains("dark")); 15 }); 16 17 observer.observe(document.documentElement, { 18 attributes: true, 19 attributeFilter: ["class"], 20 }); 21 22 return () => observer.disconnect(); 23 }, []); 24 25 return ( 26
27

Current theme: {isDark ? "dark" : "light"}

28
29 ); 30 } ``` ## CSS Styling [Section titled “CSS Styling”](#css-styling) With Tailwind CSS, you can use the `dark:` variant to style elements differently in dark mode: src/app/styles.css ```css 1 @import "tailwindcss"; 2 3 @custom-variant dark (&:is(.dark *)); 4 5 /* Your custom styles */ 6 .my-component { 7 background-color: white; 8 color: black; 9 } 10 11 .dark .my-component { 12 background-color: #1a1a1a; 13 color: white; 14 } ``` Or with Tailwind utility classes: ```tsx 1
2 Content 3
``` ## Alternative: Data Attributes [Section titled “Alternative: Data Attributes”](#alternative-data-attributes) If you prefer using data attributes instead of class names, you can modify the `Document` and toggle component: src/app/Document.tsx ```tsx 1 // In the script 2 document.documentElement.setAttribute("data-theme", theme); ``` src/app/components/ThemeToggle.tsx ```tsx 1 // In the useEffect 2 root.setAttribute("data-theme", theme); ``` Then in your CSS: ```css 1 [data-theme="dark"] .my-component { 2 background-color: #1a1a1a; 3 } ``` ## Further Reading [Section titled “Further Reading”](#further-reading) * [Dark Mode Playground](https://github.com/redwoodjs/sdk/tree/main/playground/dark-mode) - Complete working example * [Tailwind CSS Dark Mode](https://tailwindcss.com/docs/dark-mode) # Documents > How to create custom HTML documents for different routes in your RedwoodSDK project In RedwoodSDK, Document components give you complete control over the HTML structure of each route. Unlike many frameworks that use a fixed HTML document structure, RedwoodSDK lets you define custom documents per route, controlling everything from the doctype to scripts and hydration strategy. ## A Basic Document [Section titled “A Basic Document”](#a-basic-document) 1. The starter project comes with a Document component. src/app/Document.tsx ```tsx 1 export const Document: React.FC<{ children: React.ReactNode }> = ({ 2 children, 3 }) => ( 4 5 6 7 8 RedwoodSDK App 9 10 11 12 {children} 13 14 15 16 ); ``` 2. Use the Document component in your routes: src/worker.tsx ```tsx 1 import { defineApp } from 'rwsdk/worker' 2 import { render, route } from 'rwsdk/router' 3 4 import { Document } from '@/app/Document.tsx' 5 import { HomePage } from '@/app/pages/HomePage.tsx' 6 7 export default defineApp([ 8 render(Document, [ 9 route('/', HomePage), 10 ]) 11 ]) ``` ## Multiple Document Types [Section titled “Multiple Document Types”](#multiple-document-types) One of the most powerful features of RedwoodSDK is the ability to use different Document components for different routes. You can create a specialized Document component for a static document, a realtime document, or an application document. Then, use different Documents for different routes: src/worker.tsx ```tsx 1 import { defineApp } from 'rwsdk/worker' 2 import { render, route, prefix } from 'rwsdk/router' 3 4 import { StaticDocument } from '@/app/StaticDocument.tsx' 5 import { ApplicationDocument } from '@/app/ApplicationDocument.tsx' 6 import { RealtimeDocument } from '@/app/RealtimeDocument.tsx' 7 4 collapsed lines 8 import { HomePage } from '@/app/pages/HomePage.tsx' 9 import { blogRoutes } from '@/app/routes/blog.tsx' 10 import { userRoutes } from '@/app/routes/user.tsx' 11 import { dashboardRoutes } from '@/app/routes/dashboard.tsx' 12 13 export default defineApp([ 14 render(StaticDocument, [ 15 route('/', HomePage), 16 prefix('/blog', blogRoutes), 17 ]), 18 19 render(ApplicationDocument, [ 20 prefix('/app/user', userRoutes), 21 ]), 22 23 render(RealtimeDocument, [ 24 prefix('/app/dashboard', dashboardRoutes), 25 ]) 26 ]) ``` Performance Optimization Only include JavaScript when you need it. For static content like blog posts or marketing pages, consider using a StaticDocument with no client-side JavaScript for maximum performance. ## Further Reading [Section titled “Further Reading”](#further-reading) * [Blog Post: Per-Route Documents in RedwoodSDK: Total Control Over Your HTML](https://rwsdk.com/blog/redwoodsdk-multiple-documents) # Error Handling > How to handle React errors in your RedwoodSDK application using React 19's error handling APIs RedwoodSDK supports React 19’s powerful error handling APIs, allowing you to catch and handle errors at the React root level. This enables production-ready error monitoring, custom recovery strategies, and better debugging capabilities. ## Overview [Section titled “Overview”](#overview) React 19 introduced two main error handling APIs: * **`onUncaughtError`**: Handles uncaught errors that escape error boundaries (async errors, event handler errors, etc.) * **`onCaughtError`**: Handles errors that are caught by error boundaries These APIs are available through the `hydrateRootOptions` parameter in `initClient`, which passes options directly to React’s `hydrateRoot` function. ## When to Use Each Handler [Section titled “When to Use Each Handler”](#when-to-use-each-handler) ### `onUncaughtError` [Section titled “onUncaughtError”](#onuncaughterror) Use `onUncaughtError` for errors that occur during the React lifecycle but are not caught by error boundaries: * Errors during initial hydration or rendering. * Errors inside `useEffect` or other lifecycle hooks. * Errors during React transitions. Caution Errors in imperative event handlers (e.g., `onClick`) or asynchronous timers (e.g., `setTimeout`) often bubble directly to the browser and may not be caught by `onUncaughtError`. For these, you should use global browser handlers (see [Universal Error Handling](#universal-error-handling) below). Example: Uncaught error in lifecycle ```tsx 1 "use client"; 2 3 import { useEffect } from "react"; 4 5 export function Component() { 6 useEffect(() => { 7 // This error will trigger onUncaughtError 8 throw new Error("Lifecycle error"); 9 }, []); 10 11 return
Component
; 12 } ``` ### `onCaughtError` [Section titled “onCaughtError”](#oncaughterror) Use `onCaughtError` for errors that are caught by error boundaries: * Component rendering errors * Errors in component lifecycle methods * Errors caught by `` components Example: Error caught by error boundary ```tsx 1 "use client"; 2 3 export function ErrorBoundary({ children }: { children: React.ReactNode }) { 4 // This error will trigger onCaughtError 5 return {children}; 6 } 7 8 export function Component() { 9 throw new Error("Component error"); 10 return
This won't render
; 11 } ``` ## Basic Setup [Section titled “Basic Setup”](#basic-setup) 1. Import `initClient` from `rwsdk/client`: src/client.tsx ```tsx 1 import { initClient } from "rwsdk/client"; ``` 2. Configure error handlers via `hydrateRootOptions`: src/client.tsx ```tsx 1 initClient({ 2 hydrateRootOptions: { 3 onUncaughtError: (error, errorInfo) => { 4 console.error("Uncaught error:", error); 5 console.error("Component stack:", errorInfo.componentStack); 6 }, 7 onCaughtError: (error, errorInfo) => { 8 console.error("Caught error:", error); 9 console.error("Component stack:", errorInfo.componentStack); 10 }, 11 }, 12 }); ``` 3. The error handlers will now catch and log all React errors in your application. ## Universal Error Handling [Section titled “Universal Error Handling”](#universal-error-handling) To ensure that *all* client-side errors (including event handlers, timeouts, and promise rejections) are caught and handled uniformly, you should combine React’s error handlers with global browser listeners. This pattern is particularly useful for redirecting users to a dedicated error page on any fatal error: src/client.tsx ```tsx 1 import { initClient } from "rwsdk/client"; 2 3 const redirectToError = () => { 4 // Use replace to avoid keeping the broken page in history 5 window.location.replace("/error"); 6 }; 7 8 // 1. Catch imperative errors (event handlers, timeouts, etc.) 9 window.addEventListener("error", (event) => { 10 console.error("Global error caught:", event.message); 11 redirectToError(); 12 }); 13 14 // 2. Catch unhandled promise rejections 15 window.addEventListener("unhandledrejection", (event) => { 16 console.error("Unhandled promise rejection:", event.reason); 17 redirectToError(); 18 }); 19 20 initClient({ 21 hydrateRootOptions: { 22 // 3. Catch React-specific uncaught errors (rendering, hydration) 23 onUncaughtError: (error, errorInfo) => { 24 console.error("React uncaught error:", error, errorInfo); 25 redirectToError(); 26 }, 27 // 4. Catch errors caught by error boundaries 28 onCaughtError: (error, errorInfo) => { 29 console.error("React caught error:", error, errorInfo); 30 redirectToError(); 31 }, 32 }, 33 }); ``` ## Integration with Monitoring Services [Section titled “Integration with Monitoring Services”](#integration-with-monitoring-services) ### Sentry [Section titled “Sentry”](#sentry) src/client.tsx ```tsx 1 import { initClient } from "rwsdk/client"; 2 import * as Sentry from "@sentry/browser"; 3 4 initClient({ 5 hydrateRootOptions: { 6 onUncaughtError: (error, errorInfo) => { 7 Sentry.captureException(error, { 8 contexts: { 9 react: { 10 componentStack: errorInfo.componentStack, 11 errorBoundary: errorInfo.errorBoundary?.constructor.name, 12 }, 13 }, 14 tags: { errorType: "uncaught" }, 15 }); 16 }, 17 onCaughtError: (error, errorInfo) => { 18 Sentry.captureException(error, { 19 contexts: { 20 react: { 21 componentStack: errorInfo.componentStack, 22 errorBoundary: errorInfo.errorBoundary?.constructor.name, 23 }, 24 }, 25 tags: { errorType: "caught" }, 26 }); 27 }, 28 }, 29 }); ``` ### Custom Monitoring Service [Section titled “Custom Monitoring Service”](#custom-monitoring-service) src/client.tsx ```tsx 1 import { initClient } from "rwsdk/client"; 2 3 function sendToMonitoring( 4 error: unknown, 5 errorInfo: { componentStack: string; errorBoundary?: React.Component | null }, 6 type: "uncaught" | "caught", 7 ) { 8 fetch("/api/errors", { 9 method: "POST", 10 headers: { "Content-Type": "application/json" }, 11 body: JSON.stringify({ 12 error: error instanceof Error ? error.message : String(error), 13 stack: error instanceof Error ? error.stack : undefined, 14 componentStack: errorInfo.componentStack, 15 errorBoundary: errorInfo.errorBoundary?.constructor.name, 16 type, 17 timestamp: new Date().toISOString(), 18 }), 19 }); 20 } 21 22 initClient({ 23 hydrateRootOptions: { 24 onUncaughtError: (error, errorInfo) => { 25 sendToMonitoring(error, errorInfo, "uncaught"); 26 }, 27 onCaughtError: (error, errorInfo) => { 28 sendToMonitoring(error, errorInfo, "caught"); 29 }, 30 }, 31 }); ``` ## Error Recovery Strategies [Section titled “Error Recovery Strategies”](#error-recovery-strategies) ### Show User-Friendly Messages [Section titled “Show User-Friendly Messages”](#show-user-friendly-messages) src/client.tsx ```tsx 1 import { initClient } from "rwsdk/client"; 2 3 function showErrorToast(message: string) { 4 // Your toast implementation 5 console.log("Error:", message); 6 } 7 8 initClient({ 9 hydrateRootOptions: { 10 onUncaughtError: (error, errorInfo) => { 11 // Log for debugging 12 console.error("Uncaught error:", error, errorInfo); 13 14 // Show user-friendly message 15 showErrorToast("Something went wrong. Please try again."); 16 17 // Send to monitoring 18 sendToMonitoring(error, errorInfo); 19 }, 20 }, 21 }); ``` ### Reload on Critical Errors [Section titled “Reload on Critical Errors”](#reload-on-critical-errors) src/client.tsx ```tsx 1 import { initClient } from "rwsdk/client"; 2 3 function isCriticalError(error: unknown): boolean { 4 // Define your critical error logic 5 return error instanceof Error && error.message.includes("CRITICAL"); 6 } 7 8 initClient({ 9 hydrateRootOptions: { 10 onUncaughtError: (error, errorInfo) => { 11 console.error("Uncaught error:", error, errorInfo); 12 13 if (isCriticalError(error)) { 14 // Reload page for critical errors 15 window.location.reload(); 16 } else { 17 // Handle non-critical errors gracefully 18 showErrorToast("An error occurred. Please refresh the page."); 19 } 20 }, 21 }, 22 }); ``` ## Best Practices [Section titled “Best Practices”](#best-practices) ### 1. Always Log Errors [Section titled “1. Always Log Errors”](#1-always-log-errors) Even if you’re sending errors to a monitoring service, log them locally for debugging: ```tsx 1 onUncaughtError: (error, errorInfo) => { 2 console.error("Uncaught error:", error); 3 console.error("Component stack:", errorInfo.componentStack); 4 // Then send to monitoring 5 }; ``` ### 2. Include Component Stack [Section titled “2. Include Component Stack”](#2-include-component-stack) The `errorInfo.componentStack` provides valuable debugging information. Always include it in your error reports: ```tsx 1 Sentry.captureException(error, { 2 contexts: { 3 react: { 4 componentStack: errorInfo.componentStack, 5 }, 6 }, 7 }); ``` ### 3. Distinguish Error Types [Section titled “3. Distinguish Error Types”](#3-distinguish-error-types) Use tags or metadata to distinguish between caught and uncaught errors: ```tsx 1 onUncaughtError: (error, errorInfo) => { 2 sendToMonitoring(error, { ...errorInfo, type: "uncaught" }); 3 }, 4 onCaughtError: (error, errorInfo) => { 5 sendToMonitoring(error, { ...errorInfo, type: "caught" }); 6 }, ``` ### 4. Don’t Block the UI [Section titled “4. Don’t Block the UI”](#4-dont-block-the-ui) Error handlers should not throw errors themselves. Keep them lightweight: ```tsx 1 onUncaughtError: (error, errorInfo) => { 2 try { 3 // Safe error handling 4 sendToMonitoring(error, errorInfo); 5 } catch (e) { 6 // Fallback to console if monitoring fails 7 console.error("Error in error handler:", e); 8 } 9 }, ``` ## Server-Side Error Handling [Section titled “Server-Side Error Handling”](#server-side-error-handling) For server-side errors (errors in Server Components, middleware, route handlers, and RSC actions), use the `except` function from `rwsdk/router`. This provides a declarative way to handle errors that integrates with your routing structure. ### Basic Usage [Section titled “Basic Usage”](#basic-usage) src/worker.tsx ```tsx 1 import { except, route } from "rwsdk/router"; 2 import { defineApp } from "rwsdk/worker"; 3 4 export default defineApp([ 5 except((error) => { 6 console.error("Server error:", error); 7 return ; 8 }), 9 10 route("/", () => ), 11 ]); ``` ### Integration with Monitoring [Section titled “Integration with Monitoring”](#integration-with-monitoring) You can combine `except` with monitoring services. Since monitoring calls are often asynchronous, use `ctx.waitUntil()` to ensure the worker doesn’t terminate before the error is sent: src/worker.tsx ```tsx 1 import { except, route } from "rwsdk/router"; 2 import { defineApp } from "rwsdk/worker"; 3 4 export default defineApp([ 5 except(async (error, { request, cf: ctx }) => { 6 // Send to monitoring service asynchronously without blocking the response 7 ctx.waitUntil( 8 sendToMonitoring(error, { 9 url: request.url, 10 method: request.method, 11 }), 12 ); 13 14 // Return user-friendly error page 15 return ; 16 }), 17 18 route("/", () => ), 19 ]); ``` ### Nested Error Handling [Section titled “Nested Error Handling”](#nested-error-handling) You can define multiple `except` handlers for different sections of your application: src/worker.tsx ```tsx 1 import { except, prefix, route } from "rwsdk/router"; 2 import { defineApp } from "rwsdk/worker"; 3 4 export default defineApp([ 5 // Global error handler 6 except((error) => { 7 return ; 8 }), 9 10 prefix("/api", [ 11 // API-specific error handler 12 except((error) => { 13 return Response.json( 14 { error: error instanceof Error ? error.message : "API Error" }, 15 { status: 500 }, 16 ); 17 }), 18 19 route("/users", async () => { 20 // This error will be caught by the API handler 21 throw new Error("Database error"); 22 }), 23 ]), 24 25 route("/", () => ), 26 ]); ``` For more details on `except`, see the [router documentation](/reference/sdk-router/#except). ## Relationship to Error Boundaries [Section titled “Relationship to Error Boundaries”](#relationship-to-error-boundaries) Error boundaries are React components that catch errors in their child component tree. However, they have important limitations in a React Server Components (RSC) world: * **Client-only**: Error boundaries only work in client components (`"use client"`), not in server components * **Forces client components**: Using error boundaries requires nesting components inside them, which forces all child components to be client components, defeating the purpose of RSC * **Limited placement**: In RSC architectures, there’s often no good place to wrap server components with error boundaries since they render on the server * **Post-hydration only**: Error boundaries only catch errors after client-side hydration, not during initial server rendering Root-level error handlers (`onUncaughtError` and `onCaughtError`) are more suitable for RSC applications because they: * Work for both server-rendered and client-rendered errors (post-hydration) * Don’t require wrapping components or converting them to client components * Catch errors that escape error boundaries * Provide a single place to handle all React errors for monitoring and logging * Preserve the benefits of RSC by not forcing components to be client components For server-side rendering errors, use the `except` function from `rwsdk/router` (see [router error handling documentation](/reference/sdk-router/#except)). ## Scope and Limitations [Section titled “Scope and Limitations”](#scope-and-limitations) ### What These APIs Handle [Section titled “What These APIs Handle”](#what-these-apis-handle) * Component rendering errors (post-hydration). * Errors inside `useEffect` or other lifecycle methods. * Errors during React transitions. * Errors that escape error boundaries. ### What They Don’t Handle Reliably [Section titled “What They Don’t Handle Reliably”](#what-they-dont-handle-reliably) * **Imperative event handlers**: Errors in `onClick`, `onBlur`, etc., often bubble directly to the browser. * **Asynchronous code**: `setTimeout`, `setInterval`, or third-party callbacks outside of React’s control. * **Unhandled rejections**: Promise failures that are not part of a React transition. * **Server-side RSC rendering errors**: Use the [`except` function](/reference/sdk-router/#except) or wrap `defineApp`’s `fetch` method. * **SSR errors**: Handled server-side. Tip For server-side error handling, see the [router documentation on error handling](/reference/sdk-router/#error-handling). ## Common Patterns [Section titled “Common Patterns”](#common-patterns) ### Pattern 1: Development vs Production [Section titled “Pattern 1: Development vs Production”](#pattern-1-development-vs-production) src/client.tsx ```tsx 1 import { initClient } from "rwsdk/client"; 2 3 const isDevelopment = import.meta.env.DEV; 4 5 initClient({ 6 hydrateRootOptions: { 7 onUncaughtError: (error, errorInfo) => { 8 if (isDevelopment) { 9 // Detailed logging in development 10 console.error("Uncaught error:", error); 11 console.error("Component stack:", errorInfo.componentStack); 12 } else { 13 // Send to monitoring in production 14 sendToMonitoring(error, errorInfo); 15 } 16 }, 17 }, 18 }); ``` ### Pattern 2: User Feedback [Section titled “Pattern 2: User Feedback”](#pattern-2-user-feedback) src/client.tsx ```tsx 1 import { initClient } from "rwsdk/client"; 2 3 initClient({ 4 hydrateRootOptions: { 5 onUncaughtError: (error, errorInfo) => { 6 // Log error 7 console.error("Uncaught error:", error, errorInfo); 8 9 // Send to monitoring 10 sendToMonitoring(error, errorInfo); 11 12 // Show user feedback 13 const errorMessage = 14 error instanceof Error ? error.message : "Unknown error"; 15 showErrorNotification(`Error: ${errorMessage}`); 16 }, 17 }, 18 }); ``` ## Summary [Section titled “Summary”](#summary) React 19’s error handling APIs provide powerful tools for monitoring and handling errors in production. By configuring `onUncaughtError` and `onCaughtError` through `hydrateRootOptions`, you can: * Track errors in production * Integrate with monitoring services * Implement custom recovery strategies * Improve debugging with component stacks These root-level error handlers are particularly well-suited for React Server Components applications, where traditional error boundaries have limited utility. # Layouts > How to create and use layouts in your RedwoodSDK project RedwoodSDK provides a powerful `layout()` function for creating shared UI layouts across your routes. This allows you to maintain consistent page structures, implement nested layouts, and avoid code duplication. ### Key Features [Section titled “Key Features”](#key-features) * Composable: Works seamlessly with existing `prefix()`, `render()`, and `route()` functions * Nested Support: Multiple `layout()` calls create properly nested component hierarchies * SSR/RSC Safe: Automatic client component detection prevents serialization errors * Middleware Friendly: Preserves middleware functions in route arrays ## Example with Code [Section titled “Example with Code”](#example-with-code) 1. Create a layout component: src/app/layouts/AppLayout.tsx ```tsx 1 import type { LayoutProps } from 'rwsdk/router' 2 3 export function AppLayout({ children, requestInfo }: LayoutProps) { 4 return ( 5
6
7 11 {requestInfo && ( 12 Path: {new URL(requestInfo.request.url).pathname} 13 )} 14
15
{children}
16
© {new Date().getFullYear()}
17
18 ); 19 } ``` 2. Use the layout in your routes: src/app/worker.tsx ```tsx 1 import { layout, route, render } from 'rwsdk/router' 2 import { AppLayout } from './layouts/AppLayout' 3 import HomePage from './pages/HomePage' 4 import AboutPage from './pages/AboutPage' 5 6 export default defineApp([ 7 render(Document, [ 8 layout(AppLayout, [ 9 route("/", HomePage), 10 route("/about", AboutPage), 11 ]) 12 ]) 13 ]) ``` 3. Create nested layouts: src/app/layouts/AdminLayout.tsx ```tsx 1 import type { LayoutProps } from 'rwsdk/router' 2 3 export function AdminLayout({ children }: LayoutProps) { 4 "use client" // Client component example 5 6 return ( 7
8 9
{children}
10
11 ); 12 } ``` 4. Combine layouts with other router functions: src/app/worker.tsx ```tsx 1 export default defineApp([ 2 render(Document, [ 3 layout(AppLayout, [ 4 route("/", HomePage), 5 prefix("/admin", [ 6 layout(AdminLayout, [ 7 route("/", AdminDashboard), 8 route("/users", UserManagement), 9 ]) 10 ]) 11 ]) 12 ]) 13 ]) ``` Nesting Order Layouts are applied with outer layouts first. For example: ```tsx 1 layout(Outer, [layout(Inner, [route("/", Page)])]) 2 // Results in: ``` ## Layout Props [Section titled “Layout Props”](#layout-props) Layout components receive two props: * `children`: The wrapped route content * `requestInfo`: Request context (only passed to server components) There’s a specific type for the `LayoutProps` prop: src/app/layouts/AppLayout.tsx ```tsx 1 import type { LayoutProps } from 'rwsdk/router' 2 3 export function AppLayout({ children, requestInfo }: LayoutProps) { 4 ... ``` Client Components The `layout()` function automatically detects client components and only passes `requestInfo` to server components to prevent serialization errors. ## Complex Composition [Section titled “Complex Composition”](#complex-composition) Each of these examples work: src/app/worker.tsx ```tsx prefix("/api", layout(ApiLayout, routes)) // ✅ layout(AppLayout, prefix("/admin", routes)) // ✅ render(Document, layout(AppLayout, routes)) // ✅ `` ``` # Meta Data > How to add meta tags and SEO elements to your RedwoodSDK project using React 19 conventions [React 19](https://react.dev/blog/2024/12/05/react-19#support-for-metadata-tags) introduced a more streamlined approach to managing document metadata. In RedwoodSDK, you can leverage these conventions to easily add and manage meta tags for SEO, social sharing, and other purposes directly within your components. ## Title and Meta Tags [Section titled “Title and Meta Tags”](#title-and-meta-tags) Meta tags are directly built-in to React 19, with `` component: ```tsx 1 import React from "react"; 2 3 export default function ProductPage() { 4 return ( 5 <> 6 Product Name 7 8 9 10

Product Name

11 {/* Rest of your component */} 12 13 ); 14 } ``` When this component renders, React will automatically handle updating the document’s `` section. ## Complete SEO Setup [Section titled “Complete SEO Setup”](#complete-seo-setup) Here’s a more comprehensive example including Open Graph and Twitter card meta tags: ```tsx 1 import React from "react"; 2 3 export default function BlogPostPage({ post }) { 4 const { title, description, image, publishDate, author } = post; 5 6 return ( 7 <> 8 {/* Basic Meta Tags */} 9 {title} | My Blog 10 11 12 {/* Open Graph / Facebook */} 13 14 15 16 17 18 19 20 {/* Twitter */} 21 22 23 24 25 26 {/* Canonical URL */} 27 28 29 {/* Page Content */} 30
31

{title}

32 {/* Rest of your blog post content */} 33
34 35 ); 36 } ``` ## Further Reading [Section titled “Further Reading”](#further-reading) * [React 19 Documentation](https://react.dev/) * [Google SEO Documentation](https://developers.google.com/search/docs/fundamentals/seo-starter-guide) * [Open Graph Protocol](https://ogp.me/) * [Twitter Cards Documentation](https://developer.twitter.com/en/docs/twitter-for-websites/cards/overview/abouts-cards) * [Schema.org](https://schema.org/) for structured data # Open Graph Images > How to create dynamic Open Graph images in your RedwoodSDK project An Open Graph (OG) image is a specific image used when a webpage is shared on social media platforms like Facebook, LinkedIn, and Twitter/X. It serves as a visual preview that appears in link shares, providing a visual representation of the page’s content. These are defined through the page’s meta tags: ```html ``` You can create a default, static OG image for the entire project, however, custom OG images are recommended for a better social sharing experience. Within React 19, you can include `meta` tags directly within your page components and they’ll be rendered in the head. ([More details on the Meta Data documentation](/guides/frontend/metadata/)) *** ## Creating Dynamic OG Images [Section titled “Creating Dynamic OG Images”](#creating-dynamic-og-images) There’s a fantastic package called `workers-og` that allows you to create dynamic Open Graph images using Cloudflare Workers. 🙌 First, install the `workers-og` package: ```bash pnpm install workers-og ``` Now, we have two options. You can use standard HTML and CSS to create your Open Graph image, or you can use a React component. ## Using HTML and CSS [Section titled “Using HTML and CSS”](#using-html-and-css) Within the `worker.tsx` file, let’s create a new route, called `/og`: src/worker.tsx ```tsx 1 render(Document, [ 2 route("/og", () => { 3 4 const title = "Hello, World!"; 5 6 const html = ` 7
8
9

${title}

10
11
12 `; 13 14 15 return new ImageResponse(html, { 16 width: 1200, 17 height: 630, 18 }); 19 }), ``` 
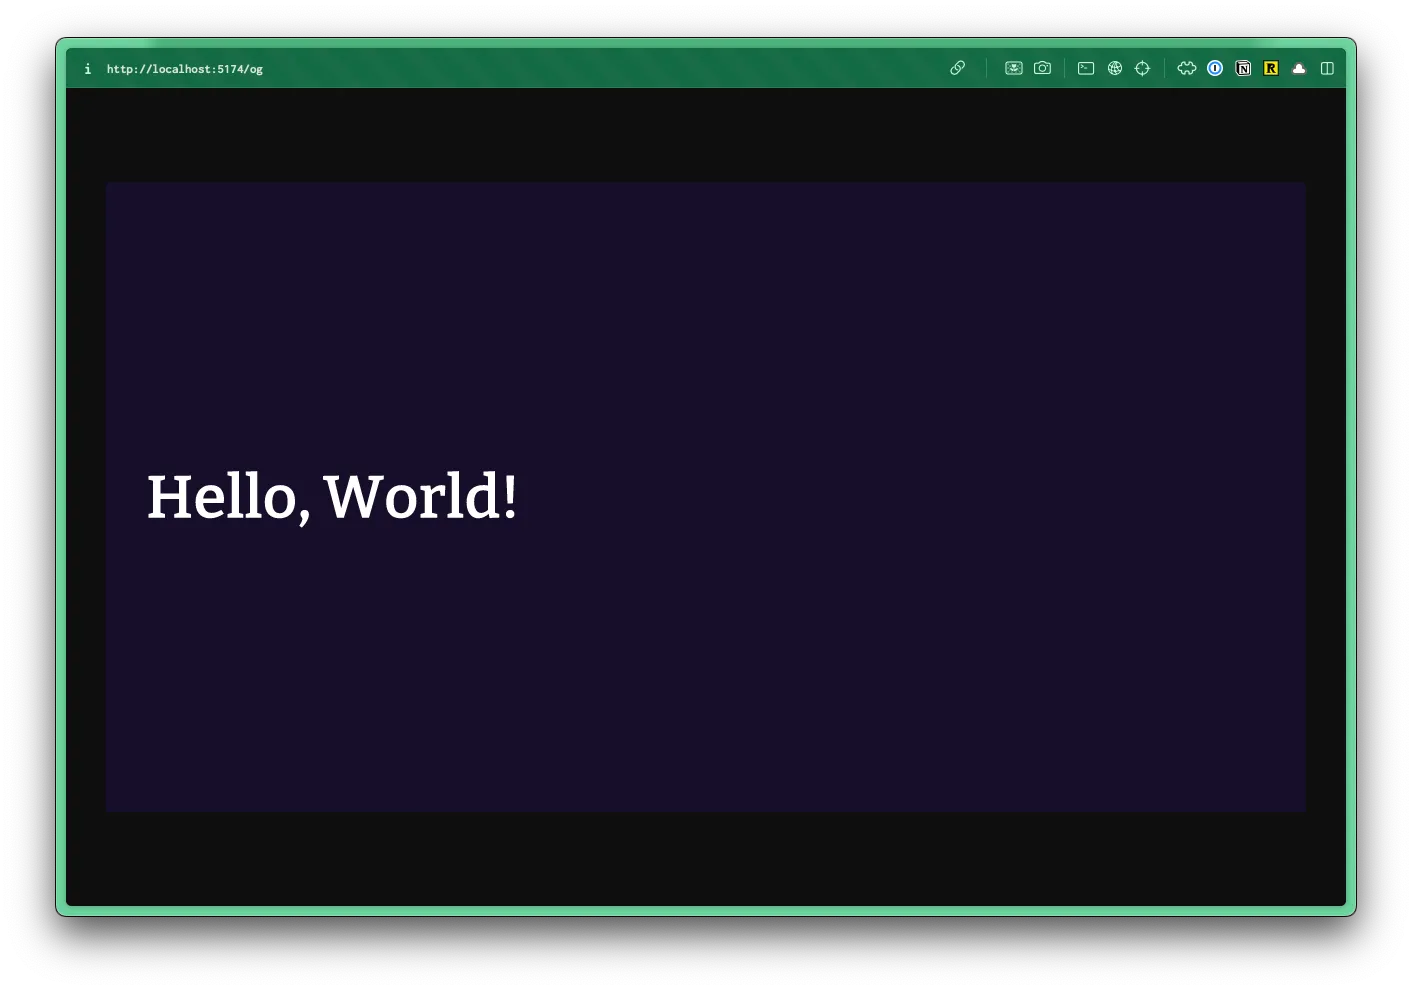
In this example, I hard coded the title, `Hello, World!`. However, you can pass parameters through the URL and make database calls to fetch the data you need. Then, when returning the image, you’ll notice I’m passing in the `html` variable and specifying the `width` and `height` of the image. Within the browser, you can visit the `/og` route to see the image: ![](/_astro/og-html-example.4t9A1rhP_Z9sBEL.webp) ## Using React [Section titled “Using React”](#using-react) You can also use a React component, which probably feels more natural, especially for passing around props and parameters. For this example, I’m going to create a new component inside the `src/app/components` directory, called `Og.tsx`: src/app/components/Og.tsx ```tsx 1 const Og = ({ title }: { title: string }) => { 2 return ( 3
4
5

{title}

6
7
8 ) 9 } 10 11 export default Og ``` Using TailwindCSS Even though these examples are using the `style` attribute, if you’re using TailwindCSS, you should still have access to your classes. These routes are still wrapped in a `Document` component, where Tailwind is being imported. (For reference see the [Tailwind guide](/guides/frontend/tailwind)). Now, within your `worker.tsx` file, let’s create a new route, called `/og-react`: src/worker.tsx ```tsx 1 . 2 import Og from "@/app/components/Og"; 3 ... 4 route("/og-react", () => { 5 6 const title = "Hello, Amy!"; 7 const og = ; 8 9 10 return new ImageResponse(og, { 11 width: 1200, 12 height: 630, 13 }); 14 }), ``` Within the browser, you can visit the `/og-react` route to see the image: ![](/_astro/og-react-example.BXztasKE_Z2jhufr.webp) ## Updating the Meta Tags [Section titled “Updating the Meta Tags”](#updating-the-meta-tags) Now that you have your dynamic OG image, you can update the meta tags in your page component to use the new OG image. src/app/pages/Home.tsx ```tsx 1 ``` You can test your OG image by visiting the [Open Graph Image Tester](https://www.opengraph.xyz/) and entering your URL (not localhost). ![](/_astro/opengraph-xyz.BS4I2AZt_Z1O3mHX.webp) ## Further Reading [Section titled “Further Reading”](#further-reading) * [Example Repo](https://github.com/ahaywood/og-kitchen) * [workers-og](https://github.com/kvnang/workers-og/tree/main) * [Open Graph Image Tester](https://www.opengraph.xyz/) # Public Assets > How to serve static files in your RedwoodSDK project ## Setting Up the Public Directory [Section titled “Setting Up the Public Directory”](#setting-up-the-public-directory) RedwoodSDK provides a simple way to serve static assets like images, fonts, and other files through the public directory. 1. Create a `public` directory in the root of your project: ```bash mkdir public ``` 2. Place any static assets you want to serve in this directory: * public/ * images/ * logo.png * background.jpg * fonts/ * custom-font.woff2 * documents/ * sample.pdf * favicon.ico 3. Access your static assets in your application using root-relative URLs: ```tsx 1 // In your component 2 function Header() { 3 return ( 4
5 Logo 6

My Application

7
8 ); 9 } ``` Or, for custom fonts, reference them in your CSS: ```css 1 @font-face { 2 font-family: "CustomFont"; 3 src: url("/fonts/custom-font.woff2") format("woff2"); 4 } ``` ## Common Use Cases [Section titled “Common Use Cases”](#common-use-cases) ### Images and Media [Section titled “Images and Media”](#images-and-media) Store and serve images, videos, and other media files: ```tsx 1 Hero Banner 2 ``` ### Fonts [Section titled “Fonts”](#fonts) Host custom font files for your application: ```css 1 /* In your CSS */ 2 @font-face { 3 font-family: "BrandFont"; 4 src: url("/fonts/brand-font.woff2") format("woff2"); 5 font-weight: 400; 6 font-style: normal; 7 } 8 9 /* Then use it with Tailwind */ 10 @theme { 11 --font-brand: "BrandFont", sans-serif; 12 } ``` ### Favicon and Browser Icons [Section titled “Favicon and Browser Icons”](#favicon-and-browser-icons) Store favicon and other browser icons: ```tsx 1 // In your Document.tsx 2 3 4 5 6 ``` Security Considerations Remember that all files in the public directory are accessible to anyone who knows the URL. Don’t store sensitive information in this directory. ## Production Considerations [Section titled “Production Considerations”](#production-considerations) In production, files in the public directory: * Do not go through the JavaScript bundling process * Maintain their file structure and naming ## Further Reading [Section titled “Further Reading”](#further-reading) * [Static File Serving in Vite](https://vitejs.dev/guide/assets.html#the-public-directory) * [Image Optimization Best Practices](https://web.dev/fast/#optimize-your-images) * [Web Font Best Practices](https://web.dev/font-best-practices/) # shadcn/ui > A comprehensive guide to installing and configuring ShadCN UI components within RedwoodSDK projects, with step-by-step instructions for proper integration with TailwindCSS v4. ## Installing shadcn/ui [Section titled “Installing shadcn/ui”](#installing-shadcnui) 1. [Install TailwindCSS](/guides/frontend/tailwind). 2. Install shadcn/ui * npm ```sh npx shadcn@latest init ``` * pnpm ```sh pnpx shadcn@latest init ``` * yarn ```sh yarn dlx shadcn@latest init ``` It will ask you what theme you want to use. ![](/_astro/shadcn-neutral-theme.SOrd9N3G_ZBLMn.webp) 
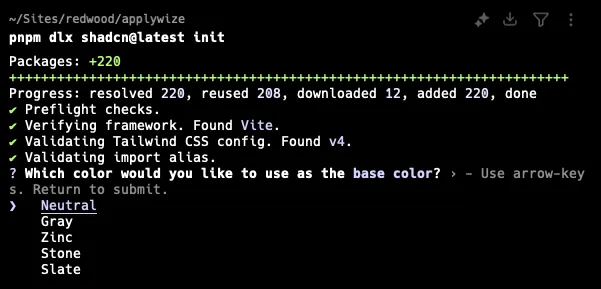
This command will create a `components.json` file in the root of your project. It contains all the configuration for our shadcn/ui components. If you want to match RedwoodSDK conventions, add the following aliases to the `components.json` file: components.json ```json ... "aliases": { "components": "@/app/components", "utils": "@/app/lib/utils", "ui": "@/app/components/ui", "lib": "@/app/lib", "hooks": "@/app/hooks" }, ... ``` shadcn/ui Organization In our configuration, the `lib` directory is nested inside the `app` directory. The shadcn/ui command line tool may not honor our setup, creating another `lib` directory in the `src` (or `@`) directory. You’ll need to manually move the folder to the `app` directory. If you’re copying and pasting code from the shadcn/ui website, you’ll also need to update the import paths. 3. Now, you should be able to add components: You can add components in bulk by running: * npm ```sh npx shadcn@latest add ``` * pnpm ```sh pnpx shadcn@latest add ``` * yarn ```sh yarn dlx shadcn@latest add ``` Or, you can add a single component by running: * npm ```sh npx shadcn@latest add ``` * pnpm ```sh pnpx shadcn@latest add ``` * yarn ```sh yarn dlx shadcn@latest add ``` Components will be added to the `src/app/components/ui` folder. * src/ * app/ * components/ * ui/ * … ## Toaster (sonner) [Section titled “Toaster (sonner)”](#toaster-sonner) By default, the shadcn `Toaster` (from `sonner`) might not work if added directly to the `Document` because it needs to be client-side and properly encapsulated within the route tree where toasts are triggered. To make it work: 1. Create a “Client Component” for the Toaster. 2. Create a Layout that encapsulates your routes. 3. Render the Toaster within that Layout. src/app/components/toaster.tsx ```tsx 1 "use client"; 2 3 import { Toaster as Sonner } from "@/app/components/ui/sonner"; 4 5 export function Toaster() { 6 return ; 7 } ``` src/app/layouts/main-layout.tsx ```tsx 1 import { Toaster } from "@/app/components/Toaster"; 2 3 export function MainLayout({ children }: { children: React.ReactNode }) { 4 return ( 5 <> 6 {children} 7 8 9 ); 10 } ``` React Server Components By default, all pages and components within RedwoodSDK are server components. However, most of the ShadCN components require reactivity. Therefore, you may need to add `use client` to the top of your component file. ## Further reading [Section titled “Further reading”](#further-reading) * [ShadCN](https://ui.shadcn.com/) * [TailwindCSS v4](https://tailwindcss.com/docs/installation/using-vite) # Storybook > A step-by-step guide for installing and configuring Storybook in RedwoodSDK projects. What is Storybook? Storybook is a tool for developing UI components in isolation. It allows us to create and test components without needing to run our full application. It can also be a great way to document our components. Developing UI in isolation is especially useful if we have a component that relies on network requests or our database — we can mock any dependencies and focus on building the component itself. This guide covers setup and some basics. For full documentation and some demos, see the [Storybook site](https://storybook.js.org). ## Installing Storybook [Section titled “Installing Storybook”](#installing-storybook) Because the RedwoodSDK is based on React and Vite, we can work through the [“React & Vite” documentation](https://storybook.js.org/docs/get-started/frameworks/react-vite): 1. Install Storybook: * npm ```sh npm create storybook@latest ``` * pnpm ```sh pnpm create storybook@latest ``` * yarn ```sh yarn create storybook ``` 2. Select what we want to use Storybook for — I selected both Documentation and Testing, though this guide will only cover the documentation part: ![](/_astro/sb-select-use.CbtLetD8_wfJqp.webp) 3. It’ll say it can’t detect the framework. Select React — it’ll automatically detect Vite: ![](/_astro/sb-select-react.DtDtWkev_2vL6hX.webp) 4. Storybook will finish installing, and then start our Storybook server: ![](/_astro/sb-started.CX1KIYEQ_Zyu881.webp) 5. It should automatically open our browser to Storybook, and if it doesn’t, we can go to `localhost:6006` to see it: ![](/_astro/sb-served-site.Qw61POKR_2mhHiF.webp) 6. It also added `storybook` and `storybook-build` scripts to our `package.json` file. We can always run the `storybook` script to start the Storybook server, and `storybook-build` script to build our Storybook site for production: ```json { "scripts": { "storybook": "storybook dev -p 6006", "storybook-build": "storybook build" } } ``` Wait, Storybook is showing me some random components! Storybook comes with some boilerplate components and stories. We can delete the `src/stories` folder to get rid of them. Still, if you’re new to Storybook, I recommend keeping them around for a bit and taking a look at the files it added. They demonstrate how to set up a Storybook component and how to use and customize the Storybook UI. ## Adding a Component to Storybook [Section titled “Adding a Component to Storybook”](#adding-a-component-to-storybook) In writing this guide, we’ve started by following the [quick start instructions](../../getting-started/quick-start) and set up the starter project. The starter project comes with a very basic `Home` component: src/app/pages/Home.tsx ```tsx 1 import { RequestInfo } from "rwsdk/worker"; 2 3 export function Home({ ctx }: RequestInfo) { 4 return ( 5
6

7 {ctx.user?.username 8 ? `You are logged in as user ${ctx.user.username}` 9 : "You are not logged in"} 10

11
12 ); 13 } ``` Given that this is very basic, we’d most likely want to build this out a bit more. Storybook is the perfect place to do that! Let’s see what that looks like. 1. Create a new file: `src/app/pages/Home.stories.tsx` src/app/pages/Home.stories.tsx ```tsx 1 import type { Meta, StoryObj } from "@storybook/react"; 2 3 import { Home } from "./Home"; 4 5 const meta: Meta = { 6 component: Home, 7 }; 8 9 export default meta; 10 type Story = StoryObj; 11 12 export const NotLoggedIn: Story = { 13 args: { 14 ctx: { 15 user: null, 16 session: null, 17 }, 18 }, 19 }; ``` What is \`args\`? [`args` is how we tell Storybook what props to pass to our component](https://storybook.js.org/docs/writing-stories/args). We can think of it as the “input” to our component. In this case, we’re passing the `ctx` prop to the `Home` component. As always, if we don’t give a component its required props, it’ll complain about it. 2. Save, and go back to our Storybook site. We should see a new “Home” section in the sidebar: ![](/_astro/sb-home-story-1.CWIWi4mS_ZelxKb.webp) 3. Great! What if we want to mock the logged in user? We can do that by adding a new story, this time passing in a user object to the `ctx` prop: src/app/pages/Home.stories.tsx ```diff 1 import type { Meta, StoryObj } from "@storybook/react"; 2 3 import { Home } from "./Home"; 4 5 const meta: Meta = { 6 component: Home, 7 }; 8 9 export default meta; 10 type Story = StoryObj; 11 12 export const NotLoggedIn: Story = { 13 args: { 14 ctx: { 15 user: null, 16 session: null, 17 }, 18 }, 19 }; 20 21 +export const LoggedIn: Story = { 22 + args: { 23 + ctx: { 24 + user: { 25 + id: "1", 26 + username: "redwood_fan_123", 27 + createdAt: new Date(), 28 + }, 29 + session: null, 30 + }, 31 + }, 32 +}; ``` 4. Save it, and go back to our Storybook site. We should see a new “Logged In” story: ![](/_astro/sb-home-story-2.C_KFvQ2i_1BuWpx.webp) What even is a story? Given that the tool we’re using is called “Storybook,” it makes sense that it’s made up of “stories.” A story captures a single state of a component. It can be thought of as a “use case” for the component. For example, in our case, we have two stories: “Not Logged In” and “Logged In.” Each story shows a different state of the `Home` component. We can have as many stories as we want for a component. In fact, it’s recommended to have a story for each state of the component. As we continue building a component, checking back on its stories is also a great way to make sure that we haven’t broken anything. Read more about this in the [official Getting Started documentation](https://storybook.js.org/docs/get-started/whats-a-story). 5. Great! But what if we want to be able to play around with the username that’s displayed? Sure, we can always click into the generated controls and change the username, but it’s a little ugly. What if we want to just have a dropdown with some options?\ \ Thankfully, Storybook lets us override the generated controls via [argTypes](https://storybook.js.org/docs/api/arg-types)!\ \ Username is nested in our `ctx` prop, and Storybook controls are meant to correspond with a given prop, so we need to create an array of all the `ctx` possibilities we want to test out. We can then give them each a pretty name, and Storybook will generate a dropdown for us — if we specify a list of options, [Storybook will know to use a dropdown control](https://storybook.js.org/docs/api/arg-types#control).\ \ Let’s do it: src/app/pages/Home.stories.tsx ```diff 20 collapsed lines 1 import type { Meta, StoryObj } from "@storybook/react"; 2 3 import { Home } from "./Home"; 4 5 const meta: Meta = { 6 component: Home, 7 }; 8 9 export default meta; 10 type Story = StoryObj; 11 12 export const NotLoggedIn: Story = { 13 args: { 14 ctx: { 15 user: null, 16 session: null, 17 }, 18 }, 19 }; 20 21 export const LoggedIn: Story = { 22 args: { 23 ctx: { 24 user: { 25 id: "1", 26 username: "redwood_fan_123", 27 createdAt: new Date(), 28 }, 29 session: null, 30 }, 31 }, 32 + argTypes: { 33 + ctx: { 34 + options: ["redwood_fan_123", "storybook_user", "example_user"], 35 + mapping: { 36 + redwood_fan_123: { 37 + user: { id: "1", username: "redwood_fan_123", createdAt: new Date() }, 38 + session: null, 39 + }, 40 + storybook_user: { 41 + user: { id: "2", username: "storybook_user", createdAt: new Date() }, 42 + session: null, 43 + }, 44 + example_user: { 45 + user: { id: "3", username: "example_user", createdAt: new Date() }, 46 + session: null, 47 + }, 48 + }, 49 + }, 50 + }, 51 }; ``` 6. Save it, and go back to our Storybook site. we should see a new dropdown for the `ctx` prop — give it a try! ![](/_astro/sb-ctx-argtypes.BwSLlv2n_Z3WBPd.webp) You did it! 🎉\ We now have a fully functional Storybook set up with a component that we can play around with. ## Mocking a dependency that’s not a prop [Section titled “Mocking a dependency that’s not a prop”](#mocking-a-dependency-thats-not-a-prop) In the previous section, we mocked the `ctx` prop. But what if we want to mock a dependency that isn’t a prop? For example, let’s say we have a component that makes calls to our database via Prisma. 1. The starter project doesn’t ship with a database, so let’s imagine we’ve added one with a `User` table. What’s the most obvious thing to do? List out all the users! Let’s add this to our `Home` component: src/app/pages/Home.tsx ```diff 1 import { RequestInfo } from "rwsdk/worker"; 2 +import { db } from "@/db"; 3 4 export async function Home({ ctx }: RequestInfo) { 5 const users = await db.user.findMany(); 6 return ( 7
8

9 {ctx.user?.username 10 ? `You are logged in as user ${ctx.user.username}` 11 : "You are not logged in"} 12

13 +
    14 + {users.map((user) => ( 15 +
  • {user.username}
  • 16 + ))} 17 +
18
19 ); 20 } ``` 2. Now, if we go to our Storybook site, we’ll see that it throws an intimidating error. Take a closer look, and we’ll see that it’s coming from the Prisma client: ![](/_astro/sb-prisma-error.BEdu3VBO_1iqL3D.webp) 
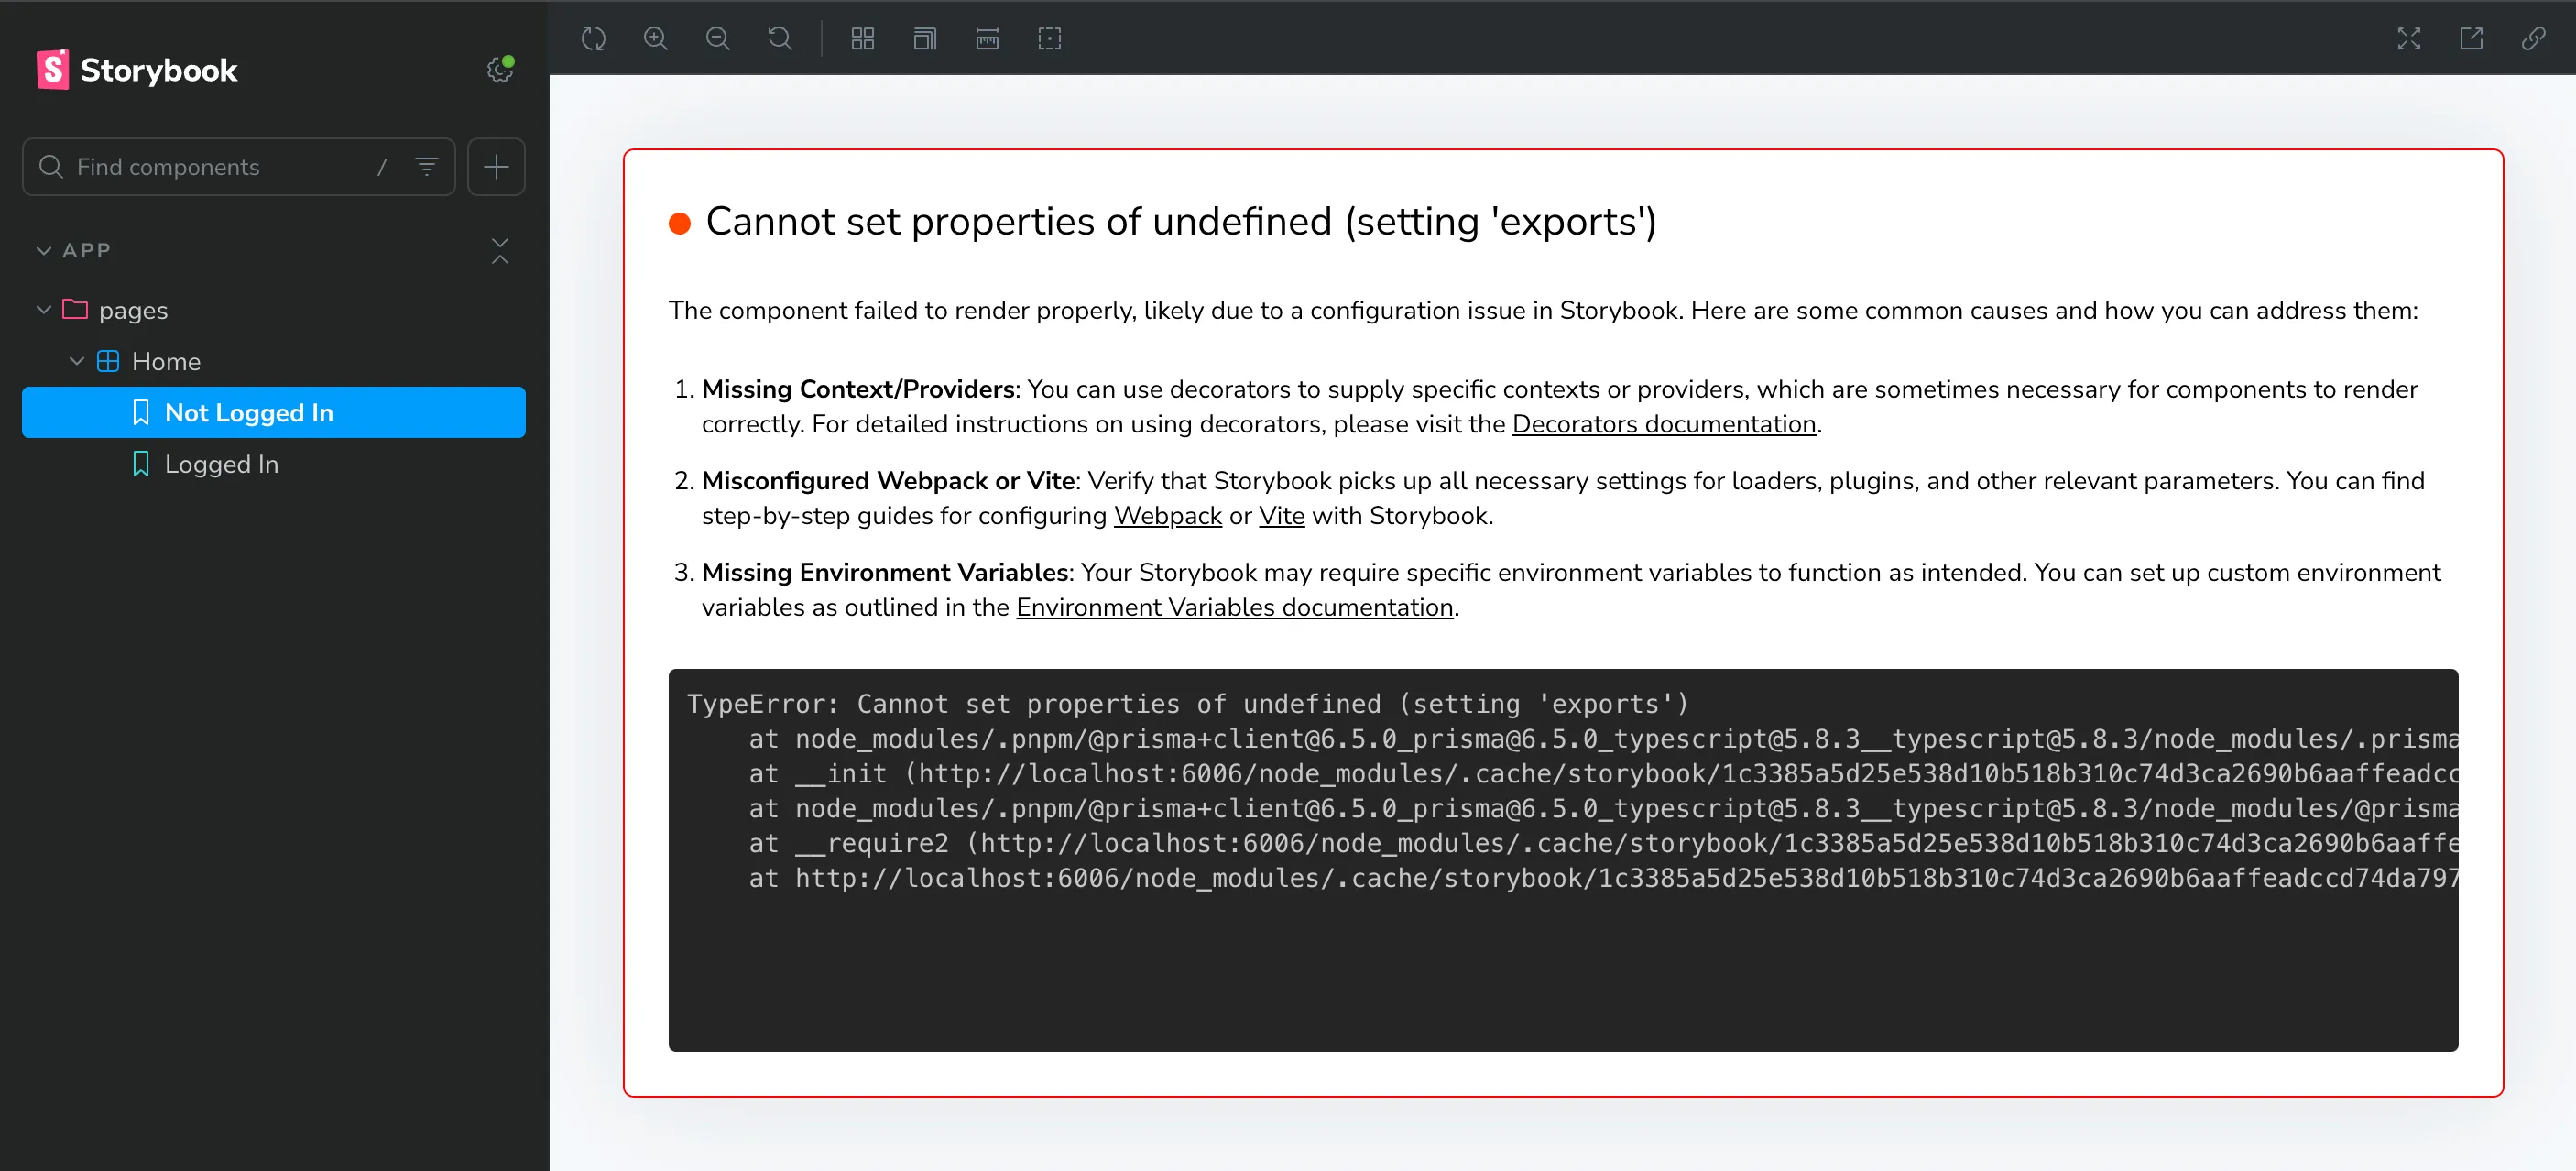
3. We need to mock our Prisma client. There are a few ways to do this, and [Storybook](https://storybook.js.org/docs/writing-stories/mocking-data-and-modules/mocking-modules) and [Prisma](https://www.prisma.io/blog/testing-series-1-8eRB5p0Y8o) both have great documentation on this. For the sake of this guide, we’re going to do this the most straightforward way. First, we need to create a mocked version of our Prisma client. Create a new file right next to our existing `db.ts` — `src/db.mock.ts`: src/db.mock.ts ```ts 1 /** 2 * First, mock the imported client. 3 */ 4 export let db: unknown; 5 6 /** 7 * Then, create a function to set the mock client. 8 * We do this so that we can have test-specific mocks, 9 * rather than having only one version of the mocked client. 10 * 11 * @param [dbMock={}] An object to use as the mock client. Be sure to mock any Prisma functions used by the component we're testing. 12 */ 13 export function setupDb(dbMock: unknown = {}) { 14 db = dbMock; 15 } ``` 4. Now, we need to tell Storybook to use this mocked version of the Prisma client. We’ll do this using [a Vite alias](https://storybook.js.org/docs/writing-stories/mocking-data-and-modules/mocking-modules#builder-aliases).\ (We can instead use [subpath imports](https://storybook.js.org/docs/writing-stories/mocking-data-and-modules/mocking-modules#subpath-imports), but it requires a bit more setup — we’d need to change any existing imports.) One of the Storybook config files is [`.storybook/main.ts`](https://storybook.js.org/docs/api/main-config/main-config) — this defines the behavior of our Storybook project. Open it up and add the following: .storybook/main.ts ```diff 1 import type { StorybookConfig } from "@storybook/react-vite"; 2 +import { mergeConfig } from "vite"; 3 +import path from "path"; 4 5 const config: StorybookConfig = { 6 features: { 7 +/** 8 * `experimentalRSC` is required for rendering async server components in Storybook. 9 * It works by wrapping all stories in a Suspense boundary: 10 * https://github.com/storybookjs/storybook/blob/14e18d956fd714c594782fbf23c42765a8b599cd/code/renderers/react/src/entry-preview.tsx#L20-L24 11 */ 12 + experimentalRSC: true, 13 + }, 14 stories: ["../src/**/*.mdx", "../src/**/*.stories.@(js|jsx|mjs|ts|tsx)"], 15 addons: [ 16 "@storybook/addon-essentials", 17 "@storybook/addon-onboarding", 18 "@chromatic-com/storybook", 19 "@storybook/experimental-addon-test", 20 ], 21 framework: { 22 name: "@storybook/react-vite", 23 options: {}, 24 }, 25 +viteFinal: async (config) => { 26 +return mergeConfig(config, { 27 + resolve: { 28 + alias: { 29 +"@/db": path.resolve(__dirname, "../src/db.mock.ts"), 30 + }, 31 + }, 32 + }); 33 + }, 34 }; 35 export default config; ``` 5. Every time we edit one of the Storybook configs, we’ll need to restart the Storybook server. However, if we do this before we finish mocking the Prisma client, [our component will infinitely re-render](https://github.com/storybookjs/storybook/issues/30317). Let’s finish mocking the Prisma client first. Go back to our story, and add the following: src/app/pages/Home.stories.tsx ```diff 1 import type { Meta, StoryObj } from "@storybook/react"; 2 3 +// Must include the `.mock` portion of filename to specify that that's what we want to import 4 +import { setupDb } from "@/db.mock"; 5 6 import { Home } from "./Home"; 7 8 const meta: Meta = { 9 +// https://storybook.js.org/docs/writing-tests/component-testing#beforeeach 10 +beforeEach: async () => { 11 +setupDb({ 12 + user: { 13 +findMany: () => [ 14 + { id: "1", username: "redwood_fan_123", createdAt: new Date() }, 15 + { id: "2", username: "storybook_user", createdAt: new Date() }, 16 + { id: "3", username: "example_user", createdAt: new Date() }, 17 + ], 18 + }, 19 + }); 20 + }, 21 component: Home, 22 }; 44 collapsed lines 23 24 export default meta; 25 type Story = StoryObj; 26 27 export const NotLoggedIn: Story = { 28 args: { 29 ctx: { 30 user: null, 31 session: null, 32 }, 33 }, 34 }; 35 36 export const LoggedIn: Story = { 37 args: { 38 ctx: { 39 user: { 40 id: "1", 41 username: "redwood_fan_123", 42 createdAt: new Date(), 43 }, 44 session: null, 45 }, 46 }, 47 argTypes: { 48 ctx: { 49 options: ["redwood_fan_123", "storybook_user", "example_user"], 50 mapping: { 51 redwood_fan_123: { 52 user: { id: "1", username: "redwood_fan_123", createdAt: new Date() }, 53 session: null, 54 }, 55 storybook_user: { 56 user: { id: "2", username: "storybook_user", createdAt: new Date() }, 57 session: null, 58 }, 59 example_user: { 60 user: { id: "3", username: "example_user", createdAt: new Date() }, 61 session: null, 62 }, 63 }, 64 }, 65 }, 66 }; ``` 6. Now, restart the Storybook server (`CTRL + C` to stop it), and go back to the Storybook site. We should see our mocked list of users: * npm Start Storybook Server ```sh npm run storybook ``` * pnpm Start Storybook Server ```sh pnpm run storybook ``` * yarn Start Storybook Server ```sh yarn run storybook ``` ![](/_astro/sb-mocked-user-list.C738XzPO_Z1OboUN.webp) What are these errors I'm seeing in the dev tools console? If we happen to open the dev tools, we’ll see the following: ![](/_astro/sb-client-component-console-error.BFGF2BoU_Z1wMHQk.webp) Remember that Storybook is rendering our server components by wrapping them in a Suspense boundary? This is a known issue with doing things that way, and can be ignored for now. See the [GitHub issue](https://github.com/storybookjs/storybook/issues/25891#issuecomment-1975916580) for an explanation. ## Continued Learning [Section titled “Continued Learning”](#continued-learning) You did it! 🚀 We now have a fully functioning Storybook project, and have started to explore the benefits of developing UI in isolation. We’re also well on our way to having a robust, well-documented, and well-tested UI component library for our RedwoodSDK project. Some great resources for next steps are: * [Testing UIs with Storybook](https://storybook.js.org/docs/writing-tests/) * [Documenting components with Storybook](https://storybook.js.org/docs/writing-docs/) * [Publishing your Storybook](https://storybook.js.org/docs/sharing) # Tailwind CSS > A step-by-step guide for installing and configuring Tailwind CSS v4 in RedwoodSDK projects, including customization options and font integration techniques. ## Installing Tailwind [Section titled “Installing Tailwind”](#installing-tailwind) Since the RedwoodSDK is based on React and Vite, we can work through the [“Using Vite” documentation](https://tailwindcss.com/docs/installation/using-vite). 1. Install Tailwind CSS * npm ```sh npm i tailwindcss @tailwindcss/vite ``` * pnpm ```sh pnpm add tailwindcss @tailwindcss/vite ``` * yarn ```sh yarn add tailwindcss @tailwindcss/vite ``` 2. Configure the Vite Plugin vite.config.mts ```diff 1 import { defineConfig } from "vite"; 2 +import tailwindcss from "@tailwindcss/vite"; 3 import { redwood } from "rwsdk/vite"; 4 import { cloudflare } from "@cloudflare/vite-plugin"; 5 6 export default defineConfig({ 7 + environments: { 8 + ssr: {}, 9 + }, 10 plugins: [ 11 cloudflare({ 12 viteEnvironment: { name: "worker" }, 13 }), 14 redwood(), 15 +tailwindcss() 16 ], 17 }); ``` Environment Configuration Tailwindcss currently uses [the non-deprecated internal `createResolver()` vite API method.](https://github.com/tailwindlabs/tailwindcss/blob/main/packages/%40tailwindcss-vite/src/index.ts#L22) [The code and its docstring indicate that it relies on an `ssr` being present](https://github.com/vitejs/vite/blob/c0e3dba3108e479ab839205cfb046db327bdaf43/packages/vite/src/node/config.ts#L1498). This isn’t the case for us, since we only have a `worker` environment instead of `ssr`. To prevent builds from getting blocked on this, we stub out the ssr environment here. 3. Create a `src/app/styles.css` file, and import Tailwind CSS src/app/styles.css ```diff 1 +@import "tailwindcss"; ``` 4. Import your CSS and add a `` to the `styles.css` file.\ In the `Document.tsx` file, within the `` section, add: src/app/Document.tsx ```diff 1 +import styles from "./styles.css?url"; 2 ... 3 4 ... 5 + 6 ... 7 ``` 5. To test that Tailwind is working, you’ll need to style something in your app. Use the [Tailwind CSS docs](https://tailwindcss.com/docs/styling-with-utility-classes) to understand how to use the utility classes.\ For example, you can just pick a random element in your app and add a blue background color to it by adding `className="bg-blue-500"` to it.\` 6. Now, you can run `dev` and the element you styled should look different. * npm ```sh npm run dev ``` * pnpm ```sh pnpm run dev ``` * yarn ```sh yarn run dev ``` ## Customizing TailwindCSS [Section titled “Customizing TailwindCSS”](#customizing-tailwindcss) With Tailwind v4, there is no longer a `tailwind.config.js` file for customizations. Instead, we use the `styles.css` file. All of your customizations should be within a `@theme` block. ```css 1 @import "tailwindcss"; 2 @theme { 3 --color-bg: #e4e3d4; 4 } ``` Now, this custom color can be used: ```tsx 1
2

Hello World

3
``` ## Further reading [Section titled “Further reading”](#further-reading) * [TailwindCSS](https://tailwindcss.com/) * [VS Code, Tailwind CSS IntelliSense Plugin](https://marketplace.visualstudio.com/items?itemName=bradlc.vscode-tailwindcss) # React Compiler > Enable the React Compiler with RedwoodSDK (Vite) The React Compiler can optimize your components automatically. RedwoodSDK works with the compiler via Vite — you only need to add the Babel plugin and runtime, and enable it in your Vite config. Reference See the related discussion and error context in the GitHub issue comment: [Enabling React Compiler in RedwoodSDK](https://github.com/redwoodjs/sdk/issues/623#issuecomment-3204098488). ## Install [Section titled “Install”](#install) First, you’ll need to be on the latest release of RedwoodSDK: ```bash pnpm add rwsdk@latest ``` Next, install the React Compiler Babel plugin, and Vite’s React plugin. ```bash pnpm add react@latest react-dom@latest react-server-dom-webpack@latest pnpm add -D babel-plugin-react-compiler@latest @vitejs/plugin-react@latest ``` Versions Use React 19, Vite 6+, and the latest RedwoodSDK. The compiler works for both client and server components; no code changes are required. ## Configure Vite [Section titled “Configure Vite”](#configure-vite) Enable the compiler by adding the React plugin with the compiler Babel plugin. Place it before the Cloudflare and RedwoodSDK plugins. vite.config.mts ```diff 1 import { defineConfig } from "vite"; 2 import { redwood } from "rwsdk/vite"; 3 import { cloudflare } from "@cloudflare/vite-plugin"; 4 import react from "@vitejs/plugin-react"; 5 6 export default defineConfig({ 7 plugins: [ 8 +react({ 9 + babel: { 10 + plugins: ["babel-plugin-react-compiler"], 11 + }, 12 + }), 13 cloudflare({ 14 viteEnvironment: { name: "worker" }, 15 }), 16 redwood(), 17 ], 18 }); ``` If you already have a Vite config, simply add this to your plugins: ```ts 1 react({ 2 babel: { 3 plugins: ["babel-plugin-react-compiler"], 4 }, 5 }), ``` ## Troubleshooting [Section titled “Troubleshooting”](#troubleshooting) * After enabling, if HMR behaves oddly, clear Vite cache: `rm -rf node_modules/.vite` and restart the dev server. ## Verify Your Setup [Section titled “Verify Your Setup”](#verify-your-setup) Check React DevTools: 1. Install the React Developer Tools browser extension 2. Open your app in development mode 3. Open React DevTools 4. Look for the ✨ emoji next to component names If the compiler is working: * Components will show a “Memo ✨” badge in React DevTools * Expensive calculations will be automatically memoized * No manual `useMemo` is required Source: [React Compiler Installation](https://react.dev/learn/react-compiler/installation) # React Server Function Streams > Sending chunked stream responses from server function to the client This pattern is useful for sending partial responses to the client, such as when you’re waiting for data from an external API, like an AI model. ## Example [Section titled “Example”](#example) First create a server function that returns a stream. In this example we’re using Cloudflare’s AI, and we’re streaming the response back to the client. app/pages/Chat/functions.ts ```tsx 1 "use server"; 2 3 export async function sendMessage(prompt: string) { 4 console.log("Running AI with Prompt:", prompt); 5 const response = await env.AI.run("@cf/meta/llama-4-scout-17b-16e-instruct", { 6 prompt, 7 stream: true, 8 }); 9 return response as unknown as ReadableStream; 10 } ``` Now on the client component, we can use the `consumeEventStream` function to parse the chunks whilst keeping the UI updated. app/pages/Chat/Chat.tsx ```tsx 1 "use client"; 2 3 import { sendMessage } from "./functions"; 4 import { useState } from "react"; 5 import { consumeEventStream } from "rwsdk/client"; 6 7 export function Chat() { 8 const [message, setMessage] = useState(""); 9 const [reply, setReply] = useState(""); 10 const [isLoading, setIsLoading] = useState(false); 11 const onSubmit = async (e: React.FormEvent) => { 12 e.preventDefault(); 13 14 setIsLoading(true); 15 16 setReply(""); 17 (await sendMessage(message)).pipeTo( 18 consumeEventStream({ 19 onChunk: (event) => { 20 setReply((prev) => { 21 if (event.data === "[DONE]") { 22 setIsLoading(false); 23 return prev; 24 } 25 return (prev += JSON.parse(event.data).response); 26 }); 27 }, 28 }) 29 ); 30 }; 31 32 return ( 33
34
{reply}
35 36
37 setMessage(e.target.value)} 42 /> 43 46
47
48 ); 49 } ``` For a working example, please see the [Chat example](https://github.com/redwoodjs/example-streaming-ai-chat/tree/main). # Troubleshooting > Common issues and solutions when building RedwoodSDK applications ## React Server Components Configuration Errors [Section titled “React Server Components Configuration Errors”](#react-server-components-configuration-errors) ### Error: “A client-only module was incorrectly resolved with the ‘react-server’ condition” [Section titled “Error: “A client-only module was incorrectly resolved with the ‘react-server’ condition””](#error-a-client-only-module-was-incorrectly-resolved-with-the-react-server-condition) This error occurs when client-only modules (like `rwsdk/client`, `rwsdk/__ssr`, or `rwsdk/__ssr_bridge`) are being resolved with the `react-server` condition, which they should not be. #### What This Means [Section titled “What This Means”](#what-this-means) RedwoodSDK uses Node.js package.json [export conditions](https://nodejs.org/api/packages.html#conditional-exports) to ensure the correct code is loaded for each environment: * **Worker environment** (React Server Components): Uses `react-server` condition for server-only modules * **SSR environment**: Does NOT use `react-server` condition * **Client environment**: Uses `browser` condition When client-only modules are incorrectly resolved with `react-server`, it indicates a configuration issue. #### How to Fix [Section titled “How to Fix”](#how-to-fix) 1. **Check your Vite configuration** If you’re using RedwoodSDK’s `configPlugin`, the resolve conditions are set automatically. However, if you’re manually configuring Vite, ensure: ```ts 1 // Worker environment (RSC) 2 resolve: { 3 conditions: ["workerd", "react-server", "module", "node"]; 4 } 5 6 // SSR environment 7 resolve: { 8 conditions: ["workerd", "module", "browser"]; 9 // Note: NO "react-server" condition 10 } 11 12 // Client environment 13 resolve: { 14 conditions: ["browser", "module"]; 15 } ``` 2. **Verify you’re not overriding resolve conditions** Check your `vite.config.ts` or `vite.config.mts` to ensure you’re not manually overriding `resolve.conditions` in a way that conflicts with RedwoodSDK’s configuration. ```ts 1 // ❌ Don't do this 2 export default defineConfig({ 3 environments: { 4 ssr: { 5 resolve: { 6 conditions: ["react-server", "workerd"], // Wrong! 7 }, 8 }, 9 }, 10 }); 11 12 // ✅ Let RedwoodSDK handle it 13 import { configPlugin } from "rwsdk/vite"; 14 export default defineConfig({ 15 plugins: [ 16 configPlugin({ 17 /* ... */ 18 }), 19 ], 20 }); ``` 3. **Check for incorrect imports** Ensure that client-only code is not being imported in server components: ```tsx 1 // ❌ Don't import client-only modules in server components 2 import { initClient } from "rwsdk/client"; // This is client-only! 3 4 export default function ServerComponent() { 5 // This will cause the error 6 return
Server Component
; 7 } 8 9 // ✅ Client-only imports should only be in client components 10 ("use client"); 11 import { initClient } from "rwsdk/client"; 12 13 export default function ClientComponent() { 14 return
Client Component
; 15 } ``` 4. **Intermittent errors (race conditions)** If this error appears intermittently, especially during development server startup, it may indicate a race condition in dependency optimization. This can happen with large libraries. Try: * Restarting the dev server * Clearing Vite’s cache: `rm -rf node_modules/.vite` * If the issue persists, it may be a bug in RedwoodSDK - please [file an issue](https://github.com/redwoodjs/sdk/issues) #### Understanding Export Conditions [Section titled “Understanding Export Conditions”](#understanding-export-conditions) RedwoodSDK’s package.json uses export conditions to route imports correctly: ```json { "exports": { "./client": { "react-server": "./dist/runtime/entries/no-react-server.js", "default": "./dist/runtime/entries/client.js" }, "./worker": { "react-server": "./dist/runtime/entries/worker.js", "default": "./dist/runtime/entries/react-server-only.js" } } } ``` * When `rwsdk/client` is imported with `react-server` condition → throws error (client code shouldn’t run in RSC) * When `rwsdk/client` is imported with `default` condition → loads client code ✅ * When `rwsdk/worker` is imported with `react-server` condition → loads worker code ✅ * When `rwsdk/worker` is imported with `default` condition → throws error (server code shouldn’t run in client) The build system automatically selects the correct condition based on the environment, but configuration issues can cause the wrong condition to be used. *** ## Directive Scan Errors [Section titled “Directive Scan Errors”](#directive-scan-errors) ### Error: “Directive scan failed. This often happens due to syntax errors in files using ‘use client’ or ‘use server’” [Section titled “Error: “Directive scan failed. This often happens due to syntax errors in files using ‘use client’ or ‘use server’””](#error-directive-scan-failed-this-often-happens-due-to-syntax-errors-in-files-using-use-client-or-use-server) This error occurs during RedwoodSDK’s initial scan of your codebase to identify files with `"use client"` and `"use server"` directives. The scan uses esbuild to parse and analyze your files, and it can fail if it encounters syntax errors or other issues. #### What This Means [Section titled “What This Means”](#what-this-means-1) RedwoodSDK scans all files in your `src` directory to: * Identify which files are client components (`"use client"`) * Identify which files are server functions (`"use server"`) * Build a dependency graph to classify modules correctly * Handle MDX files by compiling them The scan must successfully parse all files to build an accurate picture of your application structure. #### How to Fix [Section titled “How to Fix”](#how-to-fix-1) 1. **Check for syntax errors** The most common cause is syntax errors in files that use directives. Check the error stack trace in the console - it will usually point to the problematic file. Common syntax errors include: * Missing closing braces or parentheses * Incorrect JSX syntax * TypeScript type errors that prevent parsing * Invalid import statements ```tsx 1 // ❌ Missing closing brace 2 "use client"; 3 export function Component() { 4 return
Hello 5 // Missing closing brace and tag 6 } 7 8 // ✅ Correct syntax 9 "use client"; 10 export function Component() { 11 return
Hello
; 12 } ``` 2. **Check MDX files** If you’re using MDX files, ensure they compile correctly. MDX compilation errors can cause the scan to fail. ```mdx ## // ❌ Invalid MDX syntax ## title: My Page {requestInfo.request.url}
; 7 } 8 9 // ✅ Do this instead - requestInfo is passed as props 10 import type { RequestInfo } from "rwsdk/worker"; 11 12 export default function MyPage({ request, ctx }: RequestInfo) { 13 const url = new URL(request.url); 14 return
{url.pathname}
; 15 } ``` 2. **In route handlers and middleware** Route handlers and middleware receive `requestInfo` as a parameter: ```tsx 1 // ✅ Route handler - requestInfo is the parameter 2 import { route } from "rwsdk/router"; 3 import type { RequestInfo } from "rwsdk/worker"; 4 5 route("/users/:id", ({ params, request, ctx }: RequestInfo) => { 6 // Use params, request, ctx directly 7 return ; 8 }); 9 10 // ✅ Middleware - requestInfo is the parameter 11 function authMiddleware(requestInfo: RequestInfo) { 12 // Access requestInfo directly 13 if (!requestInfo.ctx.user) { 14 return new Response("Unauthorized", { status: 401 }); 15 } 16 } ``` 3. **In server functions (“use server”)** Server functions also receive `requestInfo` automatically. You can access it via the `requestInfo` import: ```tsx 1 // ✅ Server function - use requestInfo import 2 "use server"; 3 import { requestInfo } from "rwsdk/worker"; 4 5 export async function myServerAction() { 6 // requestInfo is available here 7 const { ctx, params } = requestInfo; 8 // ... your code 9 } ``` Note: The `requestInfo` import (not `getRequestInfo()`) works in server functions because they run within the request context. 4. **Avoid calling getRequestInfo() in delayed callbacks** If you need request context in a callback that executes after the request completes (like `setTimeout`, `setInterval`, or promise callbacks that run after the function returns), you need to capture the values you need before the callback: ```tsx 1 // ❌ This won't work 2 "use server"; 3 import { getRequestInfo } from "rwsdk/worker"; 4 5 export async function myAction() { 6 setTimeout(() => { 7 const info = getRequestInfo(); // Error! Context is lost 8 }, 1000); 9 } 10 11 // ✅ Capture what you need first 12 ("use server"); 13 import { requestInfo } from "rwsdk/worker"; 14 15 export async function myAction() { 16 const userId = requestInfo.ctx.user.id; // Capture value 17 setTimeout(() => { 18 // Use the captured value, not getRequestInfo() 19 console.log(userId); 20 }, 1000); 21 } ``` 5. **Don’t call getRequestInfo() in client components** Client components run in the browser and don’t have access to server-side request context: ```tsx 1 // ❌ This will never work 2 "use client"; 3 import { getRequestInfo } from "rwsdk/worker"; 4 5 export default function ClientComponent() { 6 const info = getRequestInfo(); // Error! Client components don't have request context 7 return
Client
; 8 } 9 10 // ✅ Pass data as props instead 11 ("use client"); 12 export default function ClientComponent({ userId }: { userId: string }) { 13 return
User: {userId}
; 14 } 15 16 // In server component: 17 export default function ServerPage({ ctx }: RequestInfo) { 18 return ; 19 } ``` 6. **Module-level code** Code that runs at the module level (top-level of a file) executes before any request is handled: ```tsx 1 // ❌ This won't work - runs at module load time 2 import { getRequestInfo } from "rwsdk/worker"; 3 4 const info = getRequestInfo(); // Error! No request context yet 5 6 export default function Page() { 7 return
Page
; 8 } 9 10 // ✅ Move it inside a function that runs during request handling 11 import type { RequestInfo } from "rwsdk/worker"; 12 13 export default function Page({ request }: RequestInfo) { 14 // Access request here, inside the component 15 return
{request.url}
; 16 } ``` 7. **Queue handlers and cron triggers** Queue handlers and scheduled tasks (cron triggers) run outside of the HTTP request lifecycle, so they don’t have request context: ```tsx 1 // ❌ This won't work - queue handlers don't have request context 2 import { getRequestInfo } from "rwsdk/worker"; 3 4 const app = defineApp([ 5 /* routes */ 6 ]); 7 8 export default { 9 fetch: app.fetch, 10 async queue(batch) { 11 const info = getRequestInfo(); // Error! No request context in queue handler 12 for (const message of batch.messages) { 13 // Process message 14 } 15 }, 16 }; 17 18 // ✅ Pass data through the message body instead 19 const app = defineApp([ 20 route("/send-email", ({ ctx }: RequestInfo) => { 21 // Capture data from request context 22 env.QUEUE.send({ 23 userId: ctx.user.id, 24 email: ctx.user.email, 25 // ... other data you need 26 }); 27 return new Response("Queued"); 28 }), 29 ]); 30 31 export default { 32 fetch: app.fetch, 33 async queue(batch) { 34 for (const message of batch.messages) { 35 const { userId, email } = message.body as { 36 userId: number; 37 email: string; 38 }; 39 // Use the data from the message, not request context 40 await sendEmail(email); 41 } 42 }, 43 }; ``` The same applies to cron triggers: ```tsx 1 // ❌ This won't work 2 import { getRequestInfo } from "rwsdk/worker"; 3 4 export default { 5 fetch: app.fetch, 6 async scheduled(controller) { 7 const info = getRequestInfo(); // Error! No request context in cron 8 // ... scheduled task 9 }, 10 }; 11 12 // ✅ Cron triggers don't have request context - they're background tasks 13 export default { 14 fetch: app.fetch, 15 async scheduled(controller) { 16 // Do your scheduled work without request context 17 await cleanupOldData(); 18 await generateReports(); 19 }, 20 }; ``` #### Understanding Request Context [Section titled “Understanding Request Context”](#understanding-request-context) RedwoodSDK uses Node.js `AsyncLocalStorage` to provide request-scoped data. This means: 1. **Request context is set** when a request starts (in the router’s `handle` method) 2. **Context is available** to all code that runs synchronously within that request 3. **Context is lost** when: * The request completes * Code runs in a different async context (like `setTimeout`, `setInterval`) * Code runs in a client component (browser environment) The `requestInfo` import works in server functions because they’re called during the request lifecycle. The `getRequestInfo()` function throws an error if called outside this context to prevent bugs from accessing stale or missing data. Tip If you need to pass request data to code that runs outside the request context, capture the specific values you need as variables before the context is lost. # Vitest > Learn how to write integration tests for your RedwoodSDK application. RedwoodSDK supports integration testing using **Vitest** and **Cloudflare Workers Pool**. ## The “Test Bridge” Pattern [Section titled “The “Test Bridge” Pattern”](#the-test-bridge-pattern) Since tests run in an isolated worker process (powered by `vitest-pool-workers`), they cannot directly access your running application’s state or database bindings in the same way a unit test might. To bridge this gap, this guide uses a pattern where the test runner communicates with your worker via a special HTTP route (`/_test`). 1. **Test Side**: Uses an `vitestInvoke` helper to send a POST request with the action name and arguments. 2. **Worker Side**: A `handleVitestRequest` handler receives the request, executes the actual Server Action within the worker’s context (with full access to `ctx`, D1, KV, etc.), and returns the result. You can interpret this as “RPC from Test Runner to Worker”. ## 1. Configure Vitest [Section titled “1. Configure Vitest”](#1-configure-vitest) Note Currently, tests must run against the **built worker** to handle RSC transforms correctly. You will need two things in your `vitest.config.ts`: 1. Use `defineWorkersConfig` from `@cloudflare/vitest-pool-workers/config`. 2. Point the pool to your **built** `wrangler.json`. vitest.config.ts ```ts 1 import { defineWorkersConfig } from "@cloudflare/vitest-pool-workers/config"; 2 3 export default defineWorkersConfig({ 4 test: { 5 include: ["src/**/*.test.{ts,tsx}"], 6 poolOptions: { 7 workers: { 8 wrangler: { 9 // Use the built worker output so `rwsdk/worker` and RSCs resolve correctly. 10 configPath: "./dist/worker/wrangler.json", 11 }, 12 }, 13 }, 14 }, 15 }); ``` ## 2. Setup the Test Bridge [Section titled “2. Setup the Test Bridge”](#2-setup-the-test-bridge) Expose a `/_test` route in your `src/worker.tsx` to handle incoming test requests using `rwsdk-community`. You can find a complete working example in our [Vitest Playground](https://github.com/redwoodjs/sdk/tree/main/community/playground/vitest-showcase). src/worker.tsx ```tsx 1 import { render, route } from "rwsdk/router"; 2 import { defineApp } from "rwsdk/worker"; 3 import { handleVitestRequest } from "rwsdk-community/worker"; 4 import * as appActions from "./app/actions"; 5 import * as testUtils from "./app/test-utils"; 6 7 export default defineApp([ 8 // ... other middleware 9 10 // 1. Expose the test bridge route 11 route("/_test", { 12 post: ({ request }) => handleVitestRequest(request, { 13 ...appActions, 14 ...testUtils // Optional: expose specific test utilities 15 }), 16 }), 17 18 // ... your application routeswe use 19 render(Document, [route("/", Home)]), 20 ]); ``` ## 3. Write a Test [Section titled “3. Write a Test”](#3-write-a-test) Use the `vitestInvoke` helper from `rwsdk-community/test` to call your exposed actions. src/tests/example.test.ts ```ts 1 import { expect, it, describe, beforeAll } from "vitest"; 2 import { vitestInvoke } from "rwsdk-community/test"; 3 4 describe("Integration Test", () => { 5 it("should create an item", async () => { 6 // 1. Call a server action via the bridge 7 const id = await vitestInvoke("createItem", "Test Item"); 8 9 // 2. Verify result 10 expect(id).toBeGreaterThan(0); 11 12 // 3. Verify side effects (e.g. ask DB for count) 13 const count = await vitestInvoke("getItemCount"); 14 expect(count).toBe(1); 15 }); 16 }); ``` # Realtime (Legacy) > Legacy realtime updates using WebSockets and Cloudflare Durable Objects. Deprecated This API is deprecated and will be removed in a future version. Please use the new [useSyncedState](/experimental/realtime) hook instead. The SDK includes built-in support for **realtime updates** using **Cloudflare Durable Objects** and **WebSockets**. With just a few lines of setup, you can enable bidirectional communication between clients and the server — without polling. *** ## Setup [Section titled “Setup”](#setup) You’ll need to connect three parts: ### 1. Client Setup [Section titled “1. Client Setup”](#1-client-setup) On the client side, initialize the realtime connection with a `key`. This `key` determines which group of clients should share updates. More on this below. src/client.tsx ```ts 1 import { initRealtimeClient } from "rwsdk/realtime/client"; 2 3 initRealtimeClient({ 4 key: window.location.pathname, // Used to group related clients 5 }); ``` ### 2. Export the Durable Object [Section titled “2. Export the Durable Object”](#2-export-the-durable-object) src/worker.tsx ```ts 1 export { RealtimeDurableObject } from "rwsdk/realtime/durableObject"; ``` ### 3. Wire Up the Worker Route [Section titled “3. Wire Up the Worker Route”](#3-wire-up-the-worker-route) src/worker.tsx ```ts 1 import { realtimeRoute } from "rwsdk/realtime/worker"; 2 import { env } from "cloudflare:workers"; 3 4 export default defineApp([ 5 realtimeRoute(() => env.REALTIME_DURABLE_OBJECT), 6 // ... your routes 7 ]); ``` ### 4. Add the Durable Object to `wrangler.jsonc` [Section titled “4. Add the Durable Object to wrangler.jsonc”](#4-add-the-durable-object-to-wranglerjsonc) ```plaintext "durable_objects": { "bindings": [ // ... { "name": "REALTIME_DURABLE_OBJECT", "class_name": "RealtimeDurableObject", }, ], }, ``` After updating `wrangler.jsonc`, run `pnpm generate` to update the generated type definitions. *** ## Sync State Hook (Experimental) [Section titled “Sync State Hook (Experimental)”](#sync-state-hook-experimental) [useSyncedState ](/core/usesyncedstate/)Keep state synchronized across tabs, devices, and users with realtime updates. *** ## Understanding Realtime in the SDK [Section titled “Understanding Realtime in the SDK”](#understanding-realtime-in-the-sdk) React Server Components provide a way of **describing the UI you want to render based the latest app state**. When an event happens (whether user or system-initiated), the app state is updated, the server re-renders the UI, and the client receives the result. In RedwoodSDK, we build on top of this model for real time updates. 1. **An event happens** — user action or external trigger 2. **App state is updated** — using your existing RSC action handlers 3. **Re-render is triggered** — either automatically (as a result of an action) or explicitly via `renderRealtimeClients()` 4. **Each client re-renders** — by calling your server code and receiving the latest state This means you don’t need to wire up subscriptions or manually track diffs — just write your app as usual and let the server deliver updated UI to each connected client. *** ## Scoping Updates [Section titled “Scoping Updates”](#scoping-updates) Each realtime connection is scoped by a `key`. This `key` determines which clients are considered part of the same group, so they can receive the same updates. All clients with the same `key` are connected to the same Durable Object instance. Updates affecting one client are pushed to others in the same group. For example: ```ts 1 initRealtimeClient({ key: "/chat/room-42" }); ``` Only clients in `room-42` will receive updates related to that room. *** ## Client ➝ Server ➝ Client Updates [Section titled “Client ➝ Server ➝ Client Updates”](#client--server--client-updates) For updates that begin from user interaction, consider this example: ```tsx 1 const Note = async ({ ctx }: RequestInfo) => { 2 return ; 3 }; ``` Here, the `ctx` has been populated with the latest content for the relevant note. This is just a normal React Server Component. What’s new is that when one client triggers an action, **all other clients** with the same `key` will re-run this server logic too. *** ## Server ➝ Client Updates [Section titled “Server ➝ Client Updates”](#server--client-updates) You can update clients even when the event didn’t originate from a user action — for example, background events, notifications, or admin triggers. Use `renderRealtimeClients()` to trigger a re-render for all clients connected to a given `key`: ```ts 1 import { renderRealtimeClients } from "rwsdk/realtime/worker"; 2 import { env } from "cloudflare:workers"; 3 4 await renderRealtimeClients({ 5 durableObjectNamespace: env.REALTIME_DURABLE_OBJECT, 6 key: "/note/some-id", 7 }); ``` *** ## Why WebSockets and Durable Objects? [Section titled “Why WebSockets and Durable Objects?”](#why-websockets-and-durable-objects) To support realtime updates on Cloudflare, WebSockets and Durable Objects are a natural fit. WebSockets give us a persistent, bidirectional connection - not just for pushing updates to the client, but also for sending actions back to the server. Since that connection is already open, we can reuse it for both directions, avoiding the overhead of establishing new HTTP requests. Durable Objects are well-suited for managing these connections: they can **persist across requests**, maintain in-memory state, and coordinate updates between connected clients. ## API Reference [Section titled “API Reference”](#api-reference) ```ts 1 initRealtimeClient({ key?: string }): Promise ``` Initialises the realtime WebSocket client. * `key`: (optional) Identifies which group of clients this user belongs to. ```ts 1 realtimeRoute((env) => DurableObjectNamespace): RouteDefinition ``` Connects the WebSocket route in your worker to the appropriate Durable Object. ```ts 1 renderRealtimeClients({ 2 durableObjectNamespace, 3 key?: string, 4 }): Promise ``` Triggers a re-render for all clients with a given `key`. * `durableObjectNamespace`: your binding to the Durable Object * `key`: the scope of clients to re-render # Migrating from 0.x to 1.x > A guide for upgrading your RedwoodSDK project. This guide is for users who have an existing RedwoodSDK project and wish to upgrade from a `0.x` version to `1.x`. ## Required Migration Steps [Section titled “Required Migration Steps”](#required-migration-steps) To upgrade your project, you must first take the following steps to avoid breaking changes. ### 1. Upgrade `rwsdk` [Section titled “1. Upgrade rwsdk”](#1-upgrade-rwsdk) First, upgrade to the latest version of `rwsdk`: ```sh pnpm add rwsdk@latest ``` ### 2. Update `package.json` Dependencies [Section titled “2. Update package.json Dependencies”](#2-update-packagejson-dependencies) In version `1.x`, several core packages like `react` and `wrangler` have been moved to `peerDependencies`. You must now explicitly add them to your project’s `package.json`. You can add the required packages by running the following commands in your project root: ```sh pnpm add react@latest react-dom@latest react-server-dom-webpack@latest pnpm add -D @cloudflare/vite-plugin@latest wrangler@latest @cloudflare/workers-types@latest ``` After updating, run `pnpm install` to apply the updates. ### 3. Update `wrangler.jsonc` [Section titled “3. Update wrangler.jsonc”](#3-update-wranglerjsonc) The Cloudflare Workers runtime now requires a newer compatibility date to support the features used by modern React. * Set the `compatibility_date` in your `wrangler.jsonc` to `2025-08-21` or later. wrangler.jsonc ```jsonc { // ... "compatibility_date": "2025-08-21" // ... } ``` After updating `wrangler.jsonc`, run `pnpm generate` to update the generated type definitions. ### 4. Review Middleware for RSC Action Compatibility [Section titled “4. Review Middleware for RSC Action Compatibility”](#4-review-middleware-for-rsc-action-compatibility) React Server Component (RSC) actions now run through the global middleware pipeline. Previously, action requests bypassed all middleware. This change allows logic for authentication and session handling to apply consistently. However, if you have existing middleware, it will now execute for RSC actions, which may introduce unintended side effects. You must review your existing global middleware to ensure it is compatible. A new `isAction` boolean flag is now available on the `requestInfo` object passed to middleware, making it easy to conditionally apply logic. **Example:** If you have middleware that should only run for page requests (e.g., logging), you must add a condition to bypass it for action requests: src/worker.tsx ```typescript const loggingMiddleware = ({ isAction, request }) => { // Check if the request is for an RSC action. if (isAction) { // It's an action, so we skip the logging logic. return; } // Otherwise, it's a page request, so we log it. const url = new URL(request.url); console.log('Page requested:', url.pathname); }; export default defineApp([ loggingMiddleware, // ... your other middleware and routes ]); ``` ### 5. Update response header usage [Section titled “5. Update response header usage”](#5-update-response-header-usage) The `headers` property on the request context was removed. Set response headers using `response.headers`. Before: ```typescript const myMiddleware = (requestInfo) => { requestInfo.headers.set('X-Custom-Header', 'my-value'); }; ``` After: ```typescript const myMiddleware = (requestInfo) => { requestInfo.response.headers.set('X-Custom-Header', 'my-value'); }; ``` ### 6. Remove `resolveSSRValue` wrapper [Section titled “6. Remove resolveSSRValue wrapper”](#6-remove-resolvessrvalue-wrapper) The `resolveSSRValue` helper was removed. Call SSR-only functions directly from worker code. Before: ```typescript import { env } from 'cloudflare:workers'; import { resolveSSRValue } from 'rwsdk/worker'; import { ssrSendWelcomeEmail } from '@/app/email/ssrSendWelcomeEmail'; export async function sendWelcomeEmail(formData: FormData) { const doSendWelcomeEmail = await resolveSSRValue(ssrSendWelcomeEmail); const email = formData.get('email') as string; const { data, error } = await doSendWelcomeEmail(env.RESEND_API, email); } ``` After: ```typescript import { env } from 'cloudflare:workers'; import { ssrSendWelcomeEmail } from '@/app/email/ssrSendWelcomeEmail'; export async function sendWelcomeEmail(formData: FormData) { const email = formData.get('email') as string; const { data, error } = await ssrSendWelcomeEmail(env.RESEND_API, email); } ``` ## Optional Refactoring Guide: Adopting the Passkey Addon [Section titled “Optional Refactoring Guide: Adopting the Passkey Addon”](#optional-refactoring-guide-adopting-the-passkey-addon) The most significant change in `1.x` is the removal of the `standard` starter in favor of a single, unified `starter` project and the introduction of the officially supported passkey addon. **Your existing authentication code, which was generated from the old `standard` starter, is your own code and will continue to work.** You are not required to change it. The SDK remains backwards-compatible with that implementation. The passkey addon is recommended for **new projects** or projects that have **not yet launched to production**. ### Important Considerations for Migration [Section titled “Important Considerations for Migration”](#important-considerations-for-migration) The passkey addon uses a **SQLite-based Durable Object** for session and user storage, whereas the old `standard` starter used a **D1 database with Prisma**. Migrating from one to the other is a complex task that requires manually moving data between systems. Because of this complexity, we recommend that existing applications with live user data continue to use their D1/Prisma-based implementation. ### What’s Changed? [Section titled “What’s Changed?”](#whats-changed) * The `standard` starter and its associated tutorial have been removed. * Passkey (WebAuthn) functionality is now provided via a version-locked, downloadable **addon**. This gives you full ownership of the code. * The new implementation uses a lightweight, SQLite-based Durable Object, removing the need for Prisma in the starter. If you decide to migrate, you can follow the [**Authentication Guide**](/experimental/authentication/) to install the passkey addon and adapt it to your existing data models. # create-rwsdk > A step-by-step guide for creating a new RedwoodSDK project. `create-rwsdk` is a command line tool for creating new RedwoodSDK projects ```bash npx create-rwsdk my-project ``` At Redwood, we try to reduce the magic as much as possible. So, even though we have a command line tool for creating new projects, it’s important to us that we share what’s happening under the hood. At it’s core, the `create-rwsdk` command looks at the most recent GitHub release, downloads the attached `tar.gz` file, and extracts it to the current directory. ## Usage [Section titled “Usage”](#usage) ```bash npx create-rwsdk [project-name] [options] ``` #### Arguments [Section titled “Arguments”](#arguments) * `[project-name]`: Name of the project directory to create (optional, will prompt if not provided) #### Options [Section titled “Options”](#options) * `-f, --force`: Force overwrite if directory exists * `--release `: Use a specific release version (e.g., `v1.0.0-alpha.1`) * `--pre`: Use the latest pre-release (e.g., alpha, beta, rc) * `-h, --help`: Display help information * `-V, --version`: Display version number ### Examples [Section titled “Examples”](#examples) Create a new project: ```bash npx create-rwsdk my-awesome-app ``` Create a new project with an interactive prompt for the project name: ```bash npx create-rwsdk # You will be prompted: What is the name of your project? ``` Force overwrite an existing directory: ```bash npx create-rwsdk my-awesome-app --force ``` Create a project from the latest pre-release: ```bash npx create-rwsdk my-awesome-app --pre ``` Create a project from a specific release version: ```bash npx create-rwsdk my-awesome-app --release v1.0.0-alpha.10 ``` ## Next steps after creating a project [Section titled “Next steps after creating a project”](#next-steps-after-creating-a-project) ```bash cd pnpm install pnpm dev ``` # sdk/client > Client Side Functions The `rwsdk/client` module provides a set of functions for client-side operations. ## `initClient` [Section titled “initClient”](#initclient) The `initClient` function is used to initialize the React Client. This hydrates the RSC flight payload that’s add at the bottom of the page. This makes the page interactive. ### Parameters [Section titled “Parameters”](#parameters) `initClient()` accepts an optional configuration object: | Parameter | Type | Description | | -------------------- | ------------------------------------- | ----------------------------------------------------------------------------------------------------------------------------------------------------------- | | `transport` | `Transport` | Custom transport for server communication (defaults to `fetchTransport`) | | `hydrateRootOptions` | `HydrationOptions` | Options passed directly to React’s `hydrateRoot`. Supports all React 19 hydration options including error handling (see examples below). | | `handleResponse` | `(response: Response) => boolean` | Custom response handler for navigation errors (navigation GETs) | | `onHydrated` | `() => void` | Callback invoked after a new RSC payload has been committed on the client | | `onActionResponse` | `(actionResponse) => boolean \| void` | Optional hook invoked when an action returns a Response; return `true` to signal that the response has been handled and default behaviour should be skipped | ### Error Handling [Section titled “Error Handling”](#error-handling) React 19 introduced powerful error handling APIs that you can use via `hydrateRootOptions`: * **`onUncaughtError`**: Handles uncaught errors (async errors, event handler errors, errors that escape error boundaries) * **`onCaughtError`**: Handles errors caught by error boundaries * **`onRecoverableError`**: Handles recoverable errors during rendering These handlers are **client-side only** and do not handle server-side RSC rendering errors or router-level errors. ### Usage Examples [Section titled “Usage Examples”](#usage-examples) Basic usage ```tsx 1 import { initClient } from "rwsdk/client"; 2 3 initClient(); ``` With error handling ```tsx 1 import { initClient } from "rwsdk/client"; 2 3 initClient({ 4 hydrateRootOptions: { 5 onUncaughtError: (error, errorInfo) => { 6 console.error("Uncaught error:", error); 7 console.error("Component stack:", errorInfo.componentStack); 8 // Send to monitoring service 9 sendToSentry(error, errorInfo); 10 }, 11 onCaughtError: (error, errorInfo) => { 12 console.error("Caught error:", error); 13 // Handle errors from error boundaries 14 sendToSentry(error, errorInfo); 15 }, 16 }, 17 }); ``` Integration with Sentry ```tsx 1 import { initClient } from "rwsdk/client"; 2 import * as Sentry from "@sentry/browser"; 3 4 initClient({ 5 hydrateRootOptions: { 6 onUncaughtError: (error, errorInfo) => { 7 Sentry.captureException(error, { 8 contexts: { 9 react: { 10 componentStack: errorInfo.componentStack, 11 errorBoundary: errorInfo.errorBoundary?.constructor.name, 12 }, 13 }, 14 tags: { errorType: "uncaught" }, 15 }); 16 }, 17 onCaughtError: (error, errorInfo) => { 18 Sentry.captureException(error, { 19 contexts: { 20 react: { 21 componentStack: errorInfo.componentStack, 22 errorBoundary: errorInfo.errorBoundary?.constructor.name, 23 }, 24 }, 25 tags: { errorType: "caught" }, 26 }); 27 }, 28 }, 29 }); ``` Custom error recovery ```tsx 1 import { initClient } from "rwsdk/client"; 2 3 initClient({ 4 hydrateRootOptions: { 5 onUncaughtError: (error, errorInfo) => { 6 // Log error 7 logError(error, errorInfo); 8 9 // Show user-friendly message 10 showErrorToast("Something went wrong. Please try again."); 11 12 // Optionally reload the page for critical errors 13 if (isCriticalError(error)) { 14 window.location.reload(); 15 } 16 }, 17 }, 18 }); ``` With client-side navigation ```tsx 1 import { initClient, initClientNavigation } from "rwsdk/client"; 2 3 const { handleResponse } = initClientNavigation(); 4 initClient({ handleResponse }); ``` ## `initClientNavigation` [Section titled “initClientNavigation”](#initclientnavigation) The `initClientNavigation` function is used to initialize the client side navigation. An event handler is assocated to clicking the document. If the clicked element contains a link, href, and the href is a relative path, the event handler will be triggered. This will then fetch the RSC payload for the new page, and hydrate it on the client. ## `ClientNavigationOptions` [Section titled “ClientNavigationOptions”](#clientnavigationoptions) `initClientNavigation()` accepts an optional **`ClientNavigationOptions`** object that lets you control how the browser scrolls after each navigation: | Option | Type | Default | Description | | ---------------- | --------------------------------- | ----------- | ---------------------------------------------------------------------------------------------------------------------------------------------------------------------------------------- | | `scrollToTop` | `boolean` | `true` | Whether to scroll to the top of the page after a successful navigation. Set it to `false` when you want to preserve the existing scroll position (for example, an infinite-scroll list). | | `scrollBehavior` | `'instant' \| 'smooth' \| 'auto'` | `'instant'` | How the scroll *happens* when `scrollToTop` is `true` (ignored otherwise). | | `onNavigate` | `() => Promise \| void` | — | Callback executed **after** the history entry is pushed but **before** the new RSC payload is fetched. Use it to run custom analytics or side-effects. | ### Usage Examples [Section titled “Usage Examples”](#usage-examples-1) Default behaviour – jump to top instantly ```tsx 1 import { initClientNavigation } from "rwsdk/client"; 2 3 initClientNavigation(); ``` Smooth scrolling to top ```tsx 1 initClientNavigation({ 2 scrollBehavior: "smooth", 3 }); ``` Preserve scroll position ```tsx 1 initClientNavigation({ 2 scrollToTop: false, 3 }); ``` Custom onNavigate logic ```tsx 1 initClientNavigation({ 2 scrollBehavior: "auto", 3 onNavigate: async () => { 4 // e.g. send page-view to analytics before RSC fetch starts 5 await myAnalytics.track(window.location.pathname); 6 }, 7 }); ``` ### Rationale & Defaults [Section titled “Rationale & Defaults”](#rationale--defaults) RedwoodSDK mirrors the behaviour of classic Multi Page Apps where each link click brings you back to the **top** of the next page. This is the most common expectation and is therefore the default. You can turn it off or make it smooth with a single option – no additional libraries required. ## `navigate` [Section titled “navigate”](#navigate) The `navigate` function is used to programmatically navigate to a new page. It accepts a `href` parameter (the destination URL) and an optional `options` object. | Option | Type | Default | Description | | --------------------- | --------------------------------- | ----------- | ------------------------------------------------------------------------------------------------------------- | | `history` | `'push' \| 'replace'` | `'push'` | Determines how the history stack is updated. `'push'` adds a new entry, `'replace'` replaces the current one. | | `info.scrollToTop` | `boolean` | `true` | Whether to scroll to the top of the page after navigation. | | `info.scrollBehavior` | `'instant' \| 'smooth' \| 'auto'` | `'instant'` | How the scroll happens when `scrollToTop` is `true`. | ### Usage Examples [Section titled “Usage Examples”](#usage-examples-2) Basic navigation ```tsx 1 import { navigate } from "rwsdk/client"; 2 3 navigate("/about"); ``` Navigation with replace ```tsx 1 import { navigate } from "rwsdk/client"; 2 3 navigate("/profile", { history: "replace" }); ``` Navigation with smooth scroll ```tsx 1 import { navigate } from "rwsdk/client"; 2 3 navigate("/dashboard", { 4 info: { 5 scrollBehavior: "smooth", 6 }, 7 }); ``` # sdk/router > The RedwoodSDK router RedwoodSDK’s router is a lightweight server-side router that’s designed to work with `defineApp` from `rwsdk/worker`. ## `route` [Section titled “route”](#route) The `route` function is used to define a route. ```ts 1 import { route } from "rwsdk/router"; 2 3 route("/", () => new Response("Hello, World!")); ``` ### Method-Based Routing [Section titled “Method-Based Routing”](#method-based-routing) The `route` function also accepts a `MethodHandlers` object to handle different HTTP methods on the same path: ```ts 1 route("/api/users", { 2 get: () => new Response(JSON.stringify(users)), 3 post: () => new Response("Created", { status: 201 }), 4 delete: () => new Response("Deleted", { status: 204 }), 5 }); ``` Method handlers can also be arrays of functions for route-specific middleware: ```ts 1 route("/api/users", { 2 get: [isAuthenticated, getUsersHandler], 3 post: [isAuthenticated, validateUser, createUserHandler], 4 }); ``` **Type signature**: ```ts 1 type MethodHandlers = { 2 delete?: RouteHandler; 3 get?: RouteHandler; 4 head?: RouteHandler; 5 patch?: RouteHandler; 6 post?: RouteHandler; 7 put?: RouteHandler; 8 config?: { 9 disable405?: true; 10 disableOptions?: true; 11 }; 12 custom?: { 13 [method: string]: RouteHandler; 14 }; 15 }; ``` **Custom methods**: For non-standard HTTP methods (e.g., WebDAV): ```ts 1 route("/api/search", { 2 custom: { 3 report: () => new Response("Report data"), 4 }, 5 }); ``` **Default behavior**: * OPTIONS requests return `204 No Content` with `Allow` header * Unsupported methods return `405 Method Not Allowed` with `Allow` header * Use `config.disableOptions` or `config.disable405` to opt out ## Important Notes [Section titled “Important Notes”](#important-notes) **HEAD Requests**: Unlike Express.js, RedwoodSDK does not automatically map HEAD requests to GET handlers. You must explicitly define a HEAD handler if you want to support HEAD requests. ```ts 1 route("/api/users", { 2 get: getHandler, 3 head: getHandler, // Explicitly provide HEAD handler 4 }); ``` ## `prefix` [Section titled “prefix”](#prefix) The `prefix` function is used to modify the matched string of a group of routes, by adding a prefix to the matched string. This essentially allows you to group related functionality into a seperate file, import those routes and place it into your `defineApp` function. app/pages/user/routes.ts ```ts 1 import { route } from "rwsdk/router"; 2 3 import { LoginPage } from "./LoginPage"; 4 5 export const routes = [ 6 route("/login", LoginPage), 7 route("/logout", () => { 8 /* handle logout*/ 9 }), 10 ]; ``` worker.ts ```ts 1 import { prefix } from "rwsdk/router"; 2 3 import { routes as userRoutes } from "@/app/pages/user/routes"; 4 5 defineApp([prefix("/user", userRoutes)]); ``` This will match `/user/login` and `/user/logout` ## render [Section titled “render”](#render) The `render` function is used to statically render the contents of a JSX element. It cannot contain any dynamic content. Use this to control the output of your HTML. ### Options [Section titled “Options”](#options) The `render` function accepts an optional third parameter with the following options: * **`rscPayload`** (boolean, default: `true`) - Toggle the RSC payload that’s appended to the Document. Disabling this will mean that interactivity can no longer work. Your document should not include any client side initialization. * **`ssr`** (boolean, default: `true`) - Enable or disable server-side rendering beyond the ‘use client’ boundary on these routes. When disabled, ‘use client’ components will render only on the client. This is useful for client components which only work in a browser environment. NOTE: disabling `ssr` requires `rscPayload` to be enabled. ```tsx 1 import { render } from "rwsdk/router"; 2 3 import { ReactDocument } from "@/app/Document"; 4 import { StaticDocument } from "@/app/Document"; 5 6 import { routes as appRoutes } from "@/app/pages/app/routes"; 7 import { routes as docsRoutes } from "@/app/pages/docs/routes"; 8 import { routes as spaRoutes } from "@/app/pages/spa/routes"; 9 10 export default defineApp([ 11 // Default: SSR enabled with RSC payload 12 render(ReactDocument, [prefix("/app", appRoutes)]), 13 14 // Static rendering: SSR enabled, RSC payload disabled 15 render(StaticDocument, [prefix("/docs", docsRoutes)], { rscPayload: false }), 16 17 // Client-side only: SSR disabled, RSC payload enabled 18 render(ReactDocument, [prefix("/spa", spaRoutes)], { ssr: false }), 19 ]); ``` ## `except` [Section titled “except”](#except) The `except` function defines an error handler that catches errors from subsequent routes, middleware, and RSC actions in the routing tree. Error handlers are searched backwards from where the error occurred, allowing you to create nested error handling with different handlers for different sections of your application. ### Basic Usage [Section titled “Basic Usage”](#basic-usage) ```tsx 1 import { except, route } from "rwsdk/router"; 2 import { defineApp } from "rwsdk/worker"; 3 4 export default defineApp([ 5 except((error) => { 6 console.error(error); 7 return new Response("Something went wrong", { status: 500 }); 8 }), 9 route("/", () => ), 10 route("/api/users", async () => { 11 throw new Error("Database connection failed"); 12 }), 13 ]); ``` ### Returning JSX Elements [Section titled “Returning JSX Elements”](#returning-jsx-elements) You can return a React component from an `except` handler to render a custom error page: ```tsx 1 import { except, route } from "rwsdk/router"; 2 import { defineApp } from "rwsdk/worker"; 3 4 function ErrorPage({ error }: { error: unknown }) { 5 return ( 6
7

Error

8

{error instanceof Error ? error.message : "An error occurred"}

9
10 ); 11 } 12 13 export default defineApp([ 14 except((error) => { 15 return ; 16 }), 17 route("/", () => ), 18 ]); ``` ### Multiple Handlers and Nesting [Section titled “Multiple Handlers and Nesting”](#multiple-handlers-and-nesting) You can define multiple `except` handlers in your route tree. The router searches backwards from where the error occurred to find the nearest handler. This allows you to create nested error handling: ```tsx 1 import { except, prefix, route } from "rwsdk/router"; 2 import { defineApp } from "rwsdk/worker"; 3 4 export default defineApp([ 5 // Global catch-all handler 6 except((error) => { 7 return ; 8 }), 9 10 prefix("/admin", [ 11 // Specific handler for admin routes 12 except((error) => { 13 if (error instanceof PermissionError) { 14 return new Response("Admin Access Denied", { status: 403 }); 15 } 16 // Return nothing (void) to let it bubble up to the global handler 17 }), 18 19 route("/dashboard", AdminDashboard), 20 route("/settings", AdminSettings), 21 ]), 22 23 route("/", Home), 24 ]); ``` In this example: * An error in `/admin/dashboard` is first checked by the admin-specific handler * If the admin handler doesn’t handle it (returns `void`), the error bubbles up to the global handler * Errors in other routes (like `/`) are handled by the global handler ### Error Bubbling [Section titled “Error Bubbling”](#error-bubbling) If an `except` handler itself throws an error, that new error will bubble up to the next `except` handler further back in the tree: ```tsx 1 export default defineApp([ 2 except((error) => { 3 // This handler catches errors from the inner handler 4 return ; 5 }), 6 7 except(() => { 8 // This handler throws, so the error bubbles up 9 throw new Error("Handler error"); 10 }), 11 12 route("/", () => { 13 throw new Error("Route error"); 14 }), 15 ]); ``` ### What Errors Are Caught [Section titled “What Errors Are Caught”](#what-errors-are-caught) `except` handlers catch errors from: * **Global middleware**: Errors thrown in middleware functions * **Route handlers**: Errors thrown in route components or functions * **Route-specific middleware**: Errors thrown in middleware arrays * **RSC actions**: Errors thrown during RSC action execution ### Type Signature [Section titled “Type Signature”](#type-signature) ```ts 1 function except( 2 handler: ( 3 error: unknown, 4 requestInfo: T, 5 ) => MaybePromise 6 ): ExceptHandler; ``` *** ## Error Handling [Section titled “Error Handling”](#error-handling) Errors in route handlers and middleware are handled automatically by RedwoodSDK. The framework provides several ways to handle errors: ### Using `ErrorResponse` [Section titled “Using ErrorResponse”](#using-errorresponse) The `ErrorResponse` class allows you to return structured errors with status codes: ```ts 1 import { route } from "rwsdk/router"; 2 import { ErrorResponse } from "rwsdk/worker"; 3 4 route("/api/users/:id", async ({ params }) => { 5 const user = await getUserById(params.id); 6 if (!user) { 7 throw new ErrorResponse(404, "User not found"); 8 } 9 return Response.json(user); 10 }); ``` When an `ErrorResponse` is thrown, RedwoodSDK automatically converts it to an HTTP response with the specified status code and message. ### Try-Catch in Route Handlers [Section titled “Try-Catch in Route Handlers”](#try-catch-in-route-handlers) You can use try-catch blocks to handle errors in your route handlers: ```ts 1 import { route } from "rwsdk/router"; 2 import { ErrorResponse } from "rwsdk/worker"; 3 4 route("/api/users", async ({ request }) => { 5 try { 6 const data = await request.json(); 7 const user = await createUser(data); 8 return Response.json(user, { status: 201 }); 9 } catch (error) { 10 if (error instanceof ErrorResponse) { 11 throw error; // Re-throw ErrorResponse to preserve status code 12 } 13 // Handle other errors 14 throw new ErrorResponse(500, "Internal server error"); 15 } 16 }); ``` ### Using `except` for Error Handling [Section titled “Using except for Error Handling”](#using-except-for-error-handling) The `except` function is the recommended way to handle errors from Server Components, middleware, and RSC actions. It provides a declarative way to define error handlers that integrate with your routing structure: ```tsx 1 import { except, route } from "rwsdk/router"; 2 import { defineApp } from "rwsdk/worker"; 3 4 export default defineApp([ 5 except((error) => { 6 // Log error for monitoring 7 console.error("Route error:", error); 8 9 // Return a user-friendly error page 10 return ; 11 }), 12 13 route("/", () => ), 14 route("/api/users", async () => { 15 const users = await fetchUsers(); 16 if (!users) { 17 throw new Error("Failed to fetch users"); 18 } 19 return Response.json(users); 20 }), 21 ]); ``` See the [`except` documentation](#except) above for more details on nesting, bubbling, and advanced usage patterns. ### Server-Side Rendering Errors [Section titled “Server-Side Rendering Errors”](#server-side-rendering-errors) Errors that occur during React Server Component rendering are automatically caught and handled by `except` handlers if defined. If no `except` handler is found, the error is logged and the request is rejected, which will be caught by the outer error handler in `defineApp`. ### Global Error Handling [Section titled “Global Error Handling”](#global-error-handling) You can wrap the `fetch` method exposed by `defineApp` to handle all errors globally: src/worker.tsx ```ts 1 import { defineApp, ErrorResponse } from "rwsdk/worker"; 2 import { route } from "rwsdk/router"; 3 4 const app = defineApp([ 5 route("/", () => ), 6 route("/api/users", async () => { 7 // This might throw an error 8 const users = await fetchUsers(); 9 return Response.json(users); 10 }), 11 ]); 12 13 export default { 14 fetch: async (request: Request, env: Env, ctx: ExecutionContext) => { 15 try { 16 return await app.fetch(request, env, ctx); 17 } catch (error) { 18 // Handle all unhandled errors globally 19 if (error instanceof ErrorResponse) { 20 return new Response(error.message, { status: error.code }); 21 } 22 23 if (error instanceof Response) { 24 return error; 25 } 26 27 // Log error to monitoring service 28 console.error("Unhandled error:", error); 29 30 // Send to monitoring service asynchronously 31 // Use waitUntil to prevent the worker from being killed 32 // before the async operation completes 33 ctx.waitUntil( 34 sendToMonitoring(error).catch((monitoringError) => { 35 console.error("Failed to send error to monitoring:", monitoringError); 36 }), 37 ); 38 39 // Return a generic error response 40 return new Response("Internal Server Error", { status: 500 }); 41 } 42 }, 43 }; ``` **Important**: When sending errors to monitoring services (Sentry, DataDog, etc.), these calls are often async. Use `ctx.waitUntil()` from Cloudflare’s `ExecutionContext` to ensure the worker doesn’t terminate before the async operation completes. Without `waitUntil`, the worker may be killed before the monitoring service receives the error. This pattern allows you to: * Catch all errors that escape route handlers and middleware * Send errors to monitoring services (Sentry, DataDog, etc.) without blocking the response * Return consistent error responses * Prevent unhandled exceptions from reaching Cloudflare Workers ### Unhandled Errors [Section titled “Unhandled Errors”](#unhandled-errors) If an error is thrown that is not an `ErrorResponse` or `Response` instance, and you haven’t wrapped the `fetch` method, RedwoodSDK will: 1. Log the error to the console 2. Re-throw the error (which will surface as an unhandled exception in Cloudflare Workers) To prevent unhandled exceptions, you can either: * Wrap the `fetch` method from `defineApp` (recommended for global error handling) * Wrap potentially failing code in try-catch blocks within route handlers and either: * Return an `ErrorResponse` for structured errors * Return a `Response` for custom error responses * Handle the error gracefully within your route handler # sdk/worker > The RedwoodSDK worker The `rwsdk/worker` module exports the `defineApp` function, which is the entry point for your Cloudflare Worker. This is the shape of a Cloudflare Worker: ```tsx 1 export default { 2 fetch: (request: Request) => { 3 return new Response("Hello, World!"); 4 }, 5 }; ``` This is the shape of a RedwoodSDK Worker: ```ts 1 import { defineApp } from "rwsdk/worker"; 2 3 const app = defineApp([/* routes */]); 4 export default { 5 fetch: app.fetch, 6 }; ``` You can also wrap the `fetch` method to add global error handling: ```ts 1 import { defineApp, ErrorResponse } from "rwsdk/worker"; 2 3 const app = defineApp([/* routes */]); 4 5 export default { 6 fetch: async (request: Request, env: Env, ctx: ExecutionContext) => { 7 try { 8 return await app.fetch(request, env, ctx); 9 } catch (error) { 10 // Handle all unhandled errors globally 11 if (error instanceof ErrorResponse) { 12 return new Response(error.message, { status: error.code }); 13 } 14 15 // Send to monitoring service asynchronously 16 // Use waitUntil to prevent the worker from being killed 17 // before the async operation completes 18 ctx.waitUntil( 19 sendToMonitoring(error).catch((monitoringError) => { 20 console.error("Failed to send error to monitoring:", monitoringError); 21 }), 22 ); 23 24 // Log and return generic error response 25 console.error("Unhandled error:", error); 26 return new Response("Internal Server Error", { status: 500 }); 27 } 28 }, 29 }; ``` **Note**: When sending errors to monitoring services, use `ctx.waitUntil()` to ensure the worker doesn’t terminate before async operations complete. For more details on error handling, see the [router error handling documentation](/reference/sdk-router/#error-handling). ## `defineApp` [Section titled “defineApp”](#defineapp) The `defineApp` function is used to manage how Cloudflare Workers should process requests and subsequently return a response. ````ts 1 import { defineApp } from 'rwsdk/worker' 2 import { route } from 'rwsdk/router' 3 4 defineApp([ 5 // Middleware 6 function middleware1({ request, ctx }) { 7 ctx.var1 = 'we break' 8 }, 9 function middleware1({ request, ctx }) { 10 ctx.var1 = ctx.var1 + ' abstractions' 11 }, 12 // Route handlers 13 route('/', ({ ctx }) => new Response(ctx.var1)), // we break abstractions 14 route('/ping', () => new Response('pong!')), 15 ]); 16 17 --- 18 In this example above a request would be processed by the middleware, then the correct route would match and execute the handler. 19 --- 20 21 ## `ErrorResponse` 22 23 The `ErrorResponse` class is used to return an errors that includes a status code, a message, and a stack trace. You'll be able to extract this information in try-catch blocks, handle it, or return a proper request response. 24 25 ```ts 26 import { ErrorResponse } from "rwsdk/worker"; 27 28 export default defineApp([ 29 async ({ ctx, request, response }) => { 30 try { 31 ctx.session = await sessions.load(request); 32 } catch (error) { 33 if (error instanceof ErrorResponse && error.code === 401) { 34 await sessions.remove(request, response.headers); 35 response.headers.set("Location", "/user/login"); 36 37 return new Response(null, { 38 status: 302, 39 headers: response.headers, 40 }); 41 } 42 43 throw error; 44 } 45 }, 46 route("/", () => new ErrorResponse(404, "Not Found")), 47 ]); ```` ## `requestInfo: RequestInfo` [Section titled “requestInfo: RequestInfo”](#requestinfo-requestinfo) The `requestInfo` object is used to get information about the current request. It’s a singleton that’s populated for each request, and contains the following information. * `request`: The incoming HTTP [Request](https://developer.mozilla.org/en-US/docs/Web/API/Request) object * `response`: A [ResponseInit](https://fetch.spec.whatwg.org/#responseinit) object used to configure the status and headers of the response * `ctx`: The app context (same as what’s passed to components) * `rw`: RedwoodSDK-specific context * `cf`: Cloudflare’s Execution Context API